
Customer Account Credit

The customer account credit tool allows you to add a positive credit balance to your customers’ accounts. This can be used to add credit to particular customers and can be used in place of gift cards and store credit.
Please Note:
Your POS will need to be online to use this feature.
When credit is added to an account a button will be enabled on the POS for the account to which credit has just been added to 'Refund Credit'. In the event that credit is added to the wrong account press this and the credit will be removed and can be then added to the correct account without affecting your record of takings.
Getting Started:
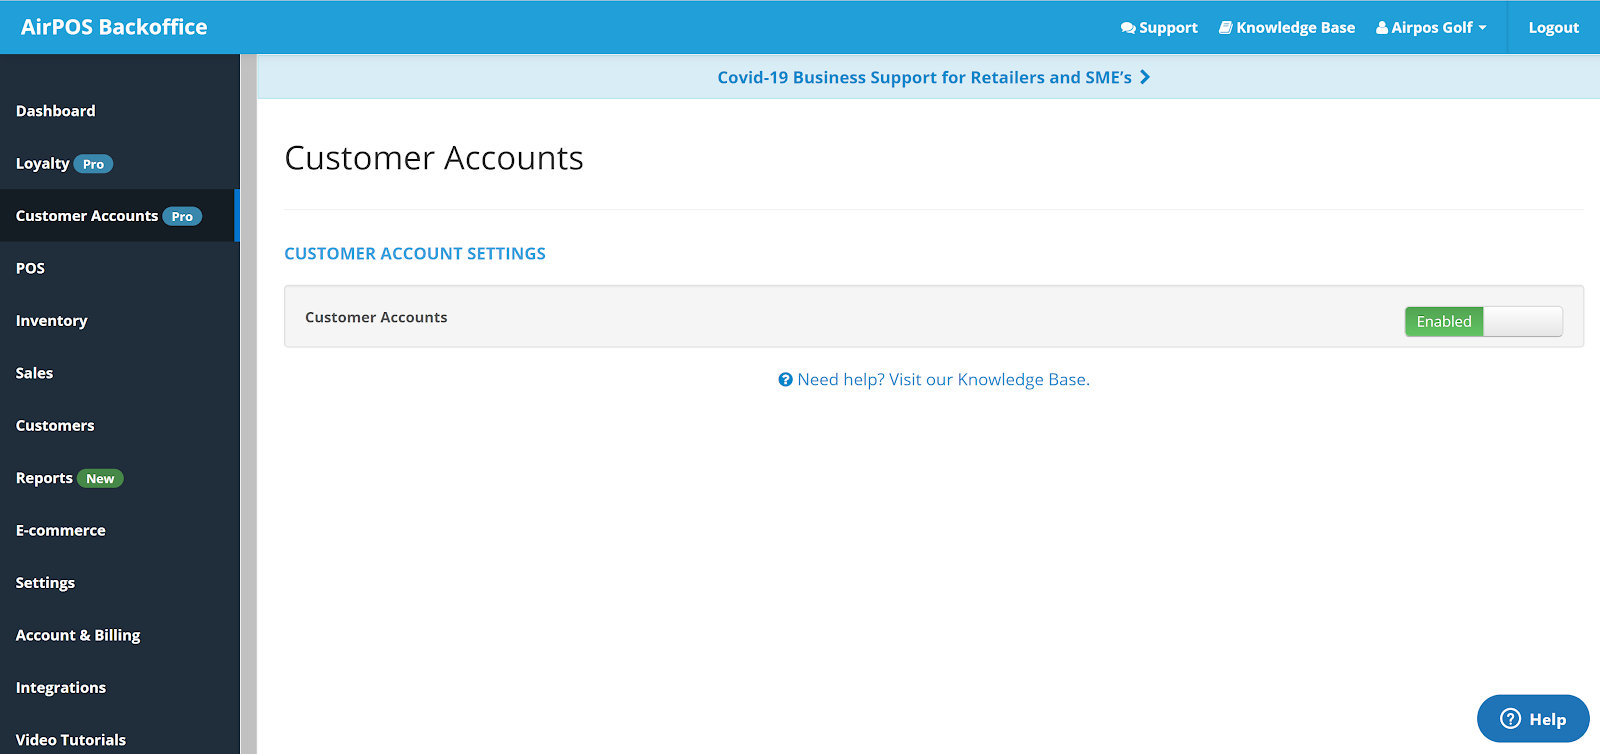
To get started you’ll need to switch the customer accounts feature on back office if you haven’t already done so. Log into your AirPOS account here and sign in.
Now you’re in the back office you’ll need to navigate to ‘Customer Accounts’ in the nav bar on the left and switch the Customer Accounts slider to on.
Now you’ve got the feature switched on we’ll next need to create customers in the back office who are eligible to avail of this feature (N.B. customer accounts can also be created in the POS but you’ll need to activate them for use with this feature through the back office).
To create a customer account click ‘Customers’ on the nav bar on the left and select the green ‘Create Customer’ button. Mark the slider beside ‘Do you want to enable this customer to pay on account’ to yes then add your customer details in the fields below - the ‘First Name’, ‘Last Name’ and ‘Email’ fields are mandatory and need to be completed to successfully save the customer account. When you’re ready and have added your customer details to the form select the green ‘Create Customer’ button.
N.B. Using this feature requires to enable the customer to pay on account, please be aware that doing so will allow the customer to pay on account, whether credit is assigned to the account or not.
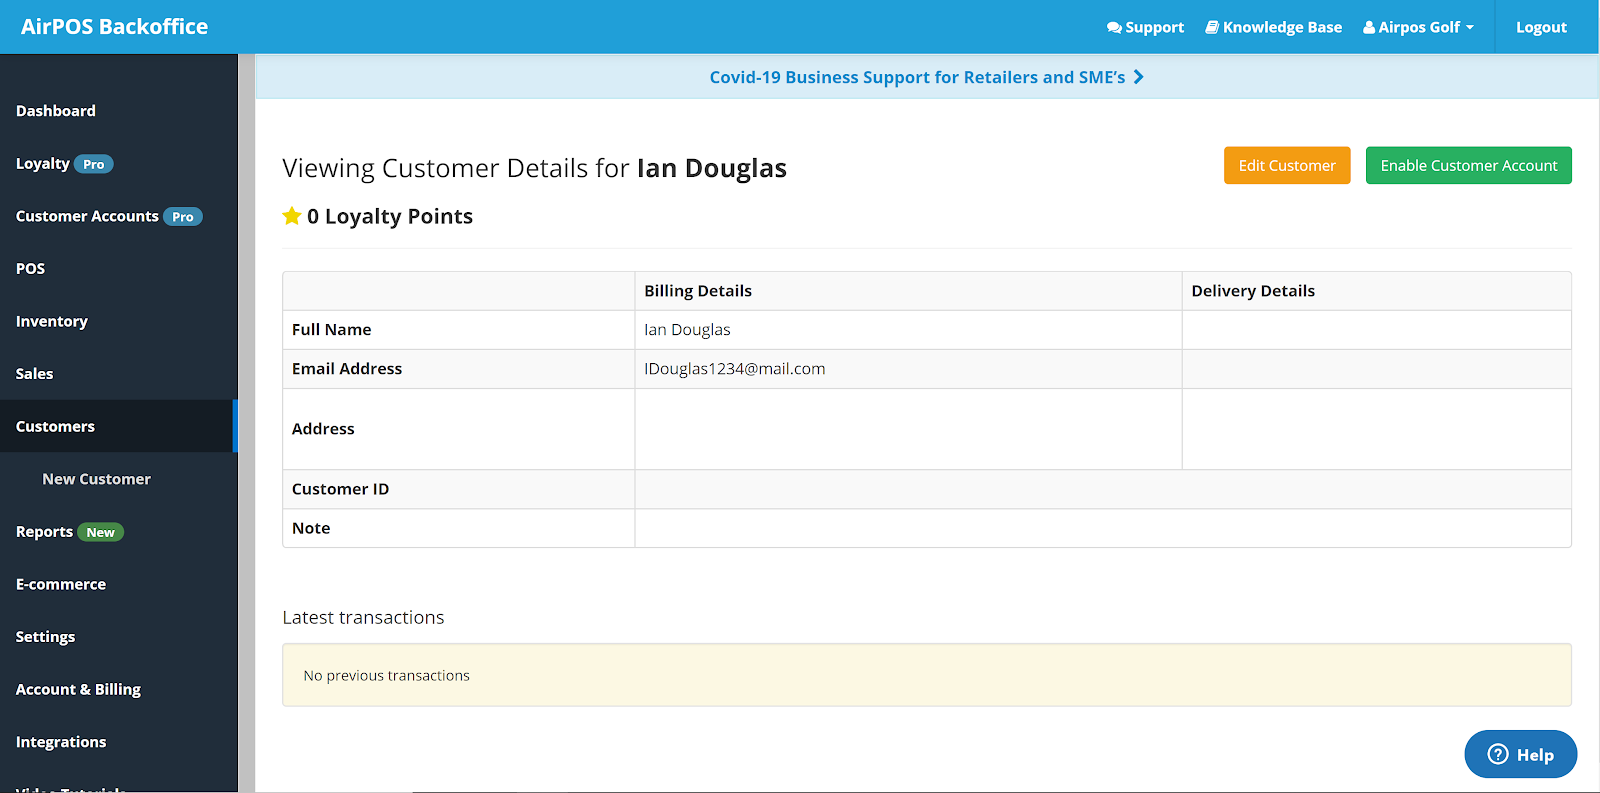
Alternatively, if you’ve already created customer accounts, you can turn the pay on account feature on by clicking into the customer and selecting the green ‘Enable Customer Account’ button.
Using Customer Accounts on POS
Now that we’ve set up customers to use the feature (customers can sometimes take around a minute to appear on your POS) we’ll now run through how to use the feature on your AirPOS app.
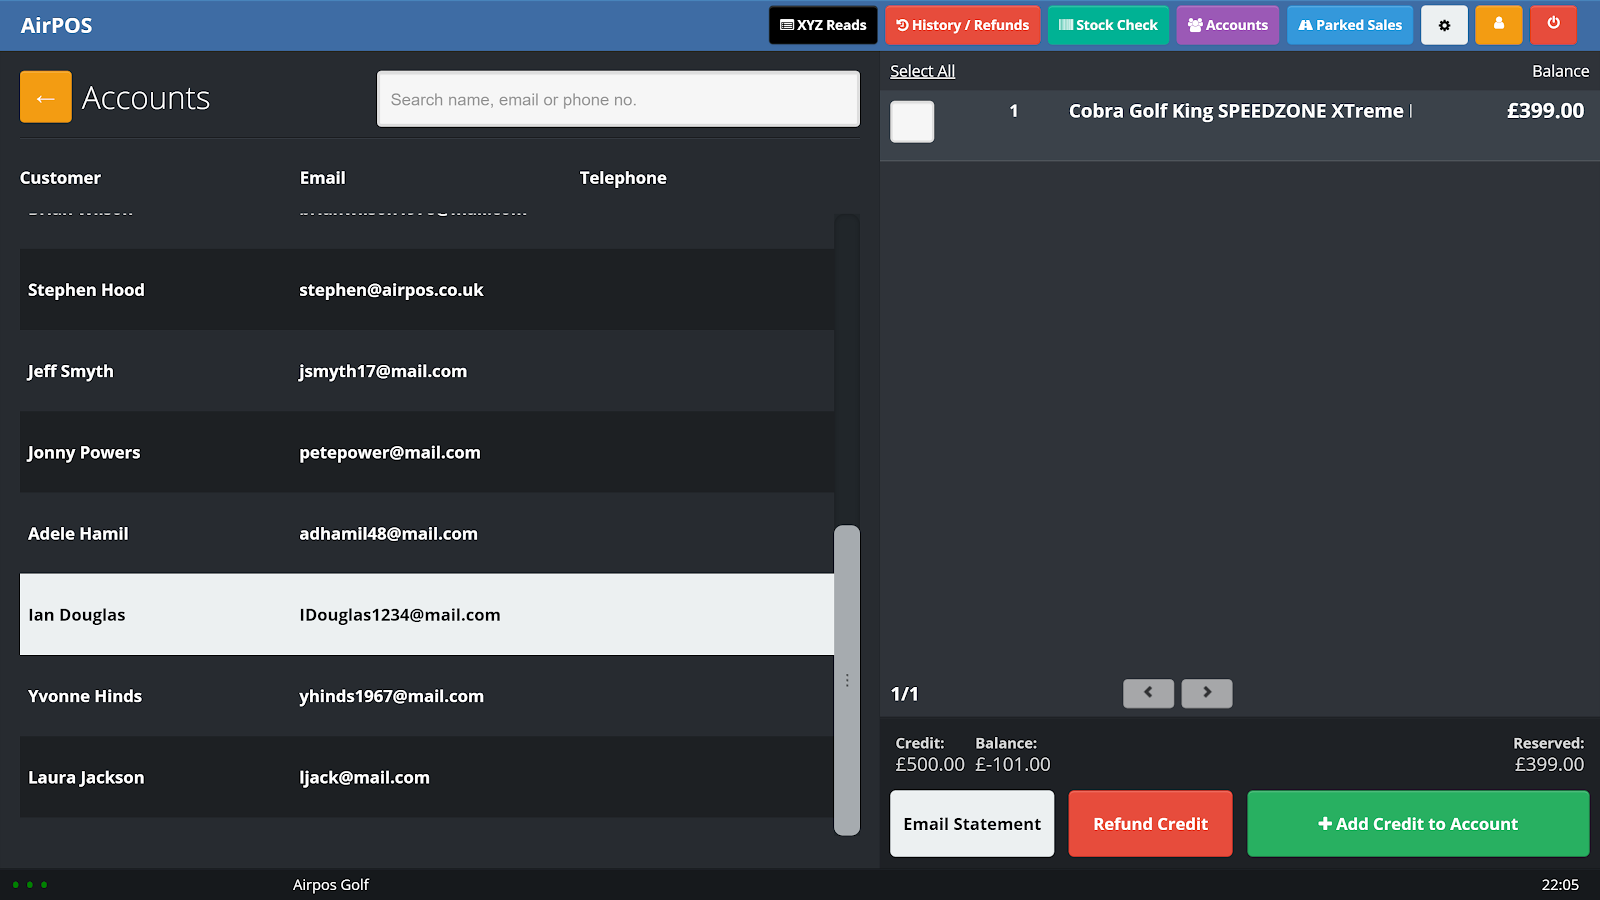
To add credit to a customer’s account click the purple ‘Accounts’ button in the top right corner of the AirPOS app. Here you’ll see a list of your customers who are able to pay to account. Selecting a customer on this list will show the credit/debit balance of the account as well as any outstanding purchases tendered to that account.
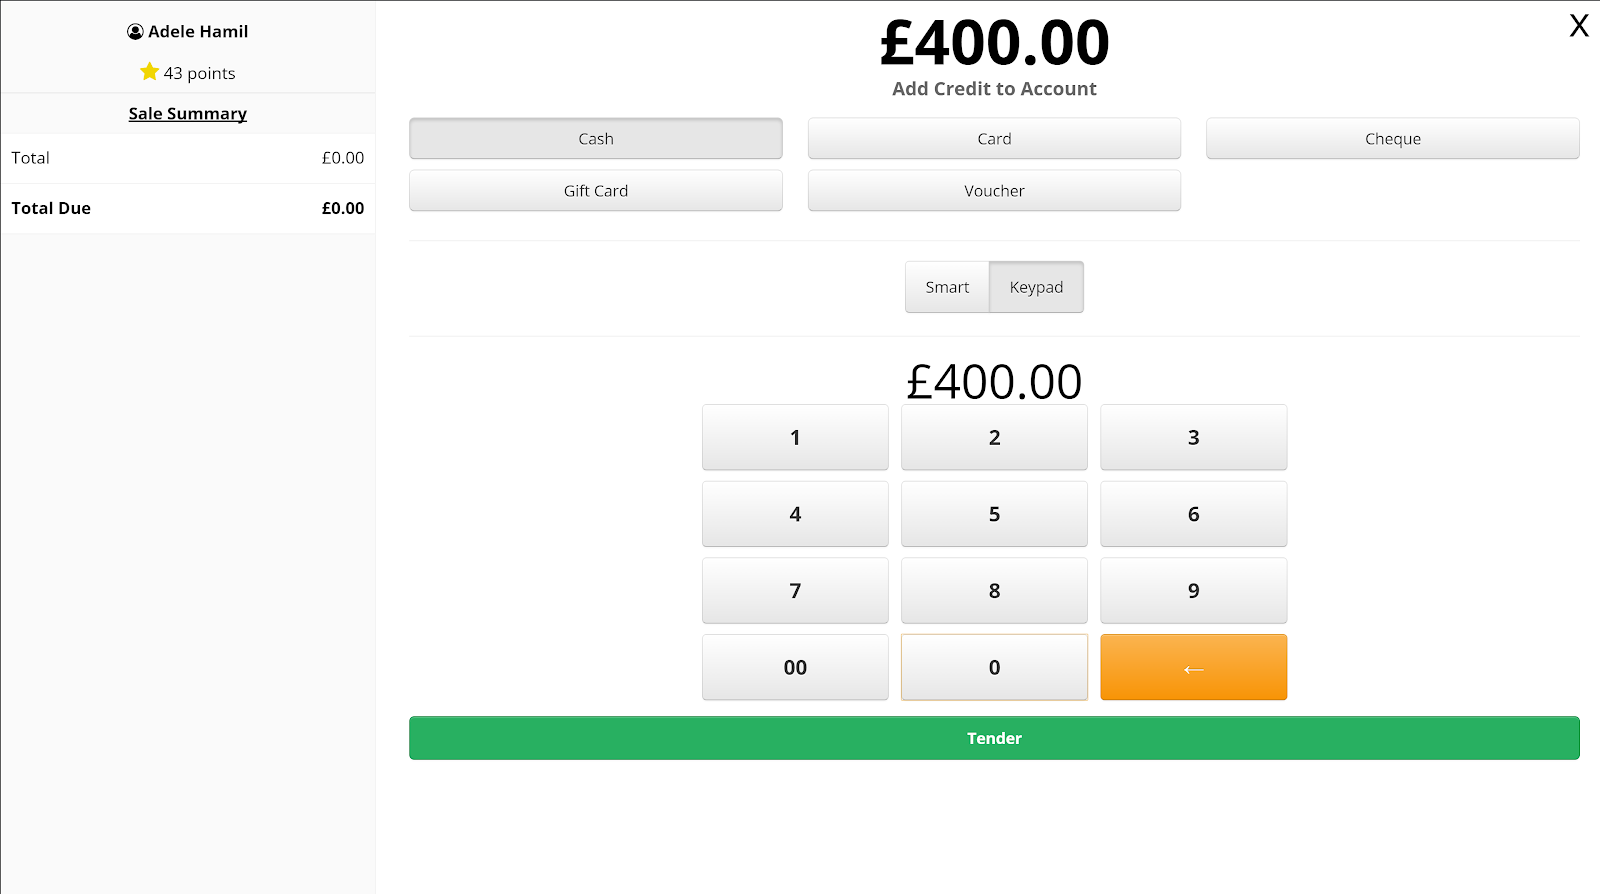
To assign credit to an account you’ll need to select it from the list and select the green ‘Add Credit to Account’ button. You’ll be greeted by the tender screen which will allow you to assign credit by taking payment via one of your available tender types.
After this you’ll see the account showing a credit, balance and reserved figure:
Credit - Displays the amount of credit currently on account
Reserved - This shows the amount outstanding from the items that haven’t been paid off on the account
Balance - This figure is Reserved minus Credit
Note: If credit is added to the wrong account a button will be enabled on the POS for the account to which credit has just been added to 'Refund Credit'. Simply press this and the credit will be removed and can be then added to the correct account.
To use credit against a purchase first ensure that your customer has credit on their account, then add products to the cart in the POS as normal.
When you’re ready to process customer account credit as payment for the purchase select the ‘Add Customer’ button above the cart and select the customer making the purchase.
Select the purple ‘Account’ button to add this purchase to the customer’s account, after clicking confirm on the pop up you should see the below screen confirming that the purchase has been added to your customer’s account.
To apply a customer’s credit to the purchase just tendered by account you’ll then need to select the purple ‘Go to Account button’ on the popup or select the purple ‘Accounts’ button front the home screen of the AirPOS app.
Select the customer from the list, this will allow you to see a list of their outstanding products that need to be paid for. You can use the ‘Select All’ button or choose products one by one using the tick boxes, when ready use the green ‘Take Payment’ button to bring up the payment screen.
If a customer has credit that can be used against the purchase you’ll see the screen below.
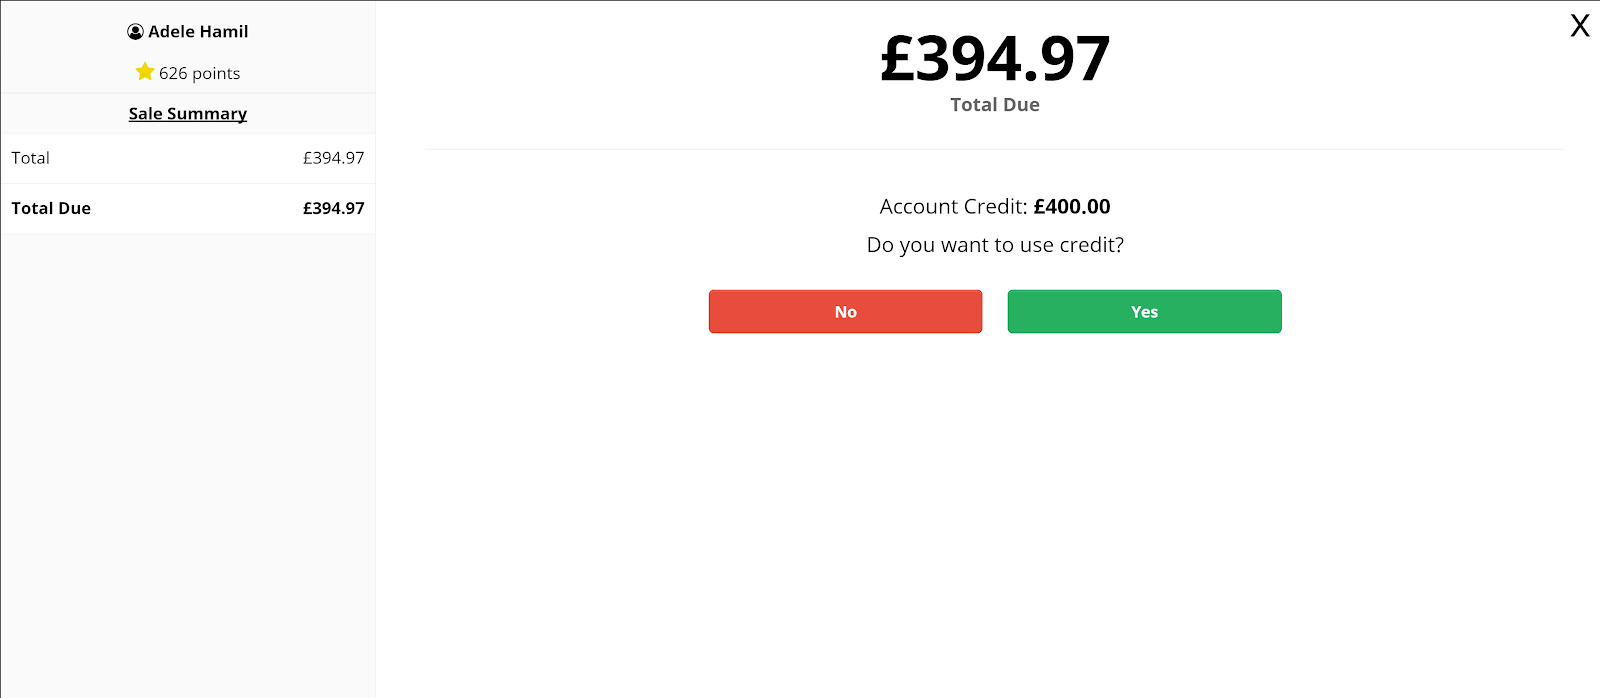
To use the credit on account select yes, if not you can choose no and tender the purchase as normal using your available tender types. If the customer opts not to use their credit and tenders using another payment method then the credit will remain on their account.
It is also possible to refund a customer’s credit, to do this navigate to the customer list in ‘Accounts’ on the AirPOS app. Select a customer and if they have remaining credit on their account select the red ‘Refund Credit’ button and select a method of tendering their refund. In the video below I show the paying off of a balance using credit and then refund the remaining balance as cash.