
Setting up MC-Print3 Printer for AirPOS on Windows


This package includes the Star mc-Print3 compact, versatile receipt printer and a Star CB-2002 cash drawer which easily connect together.
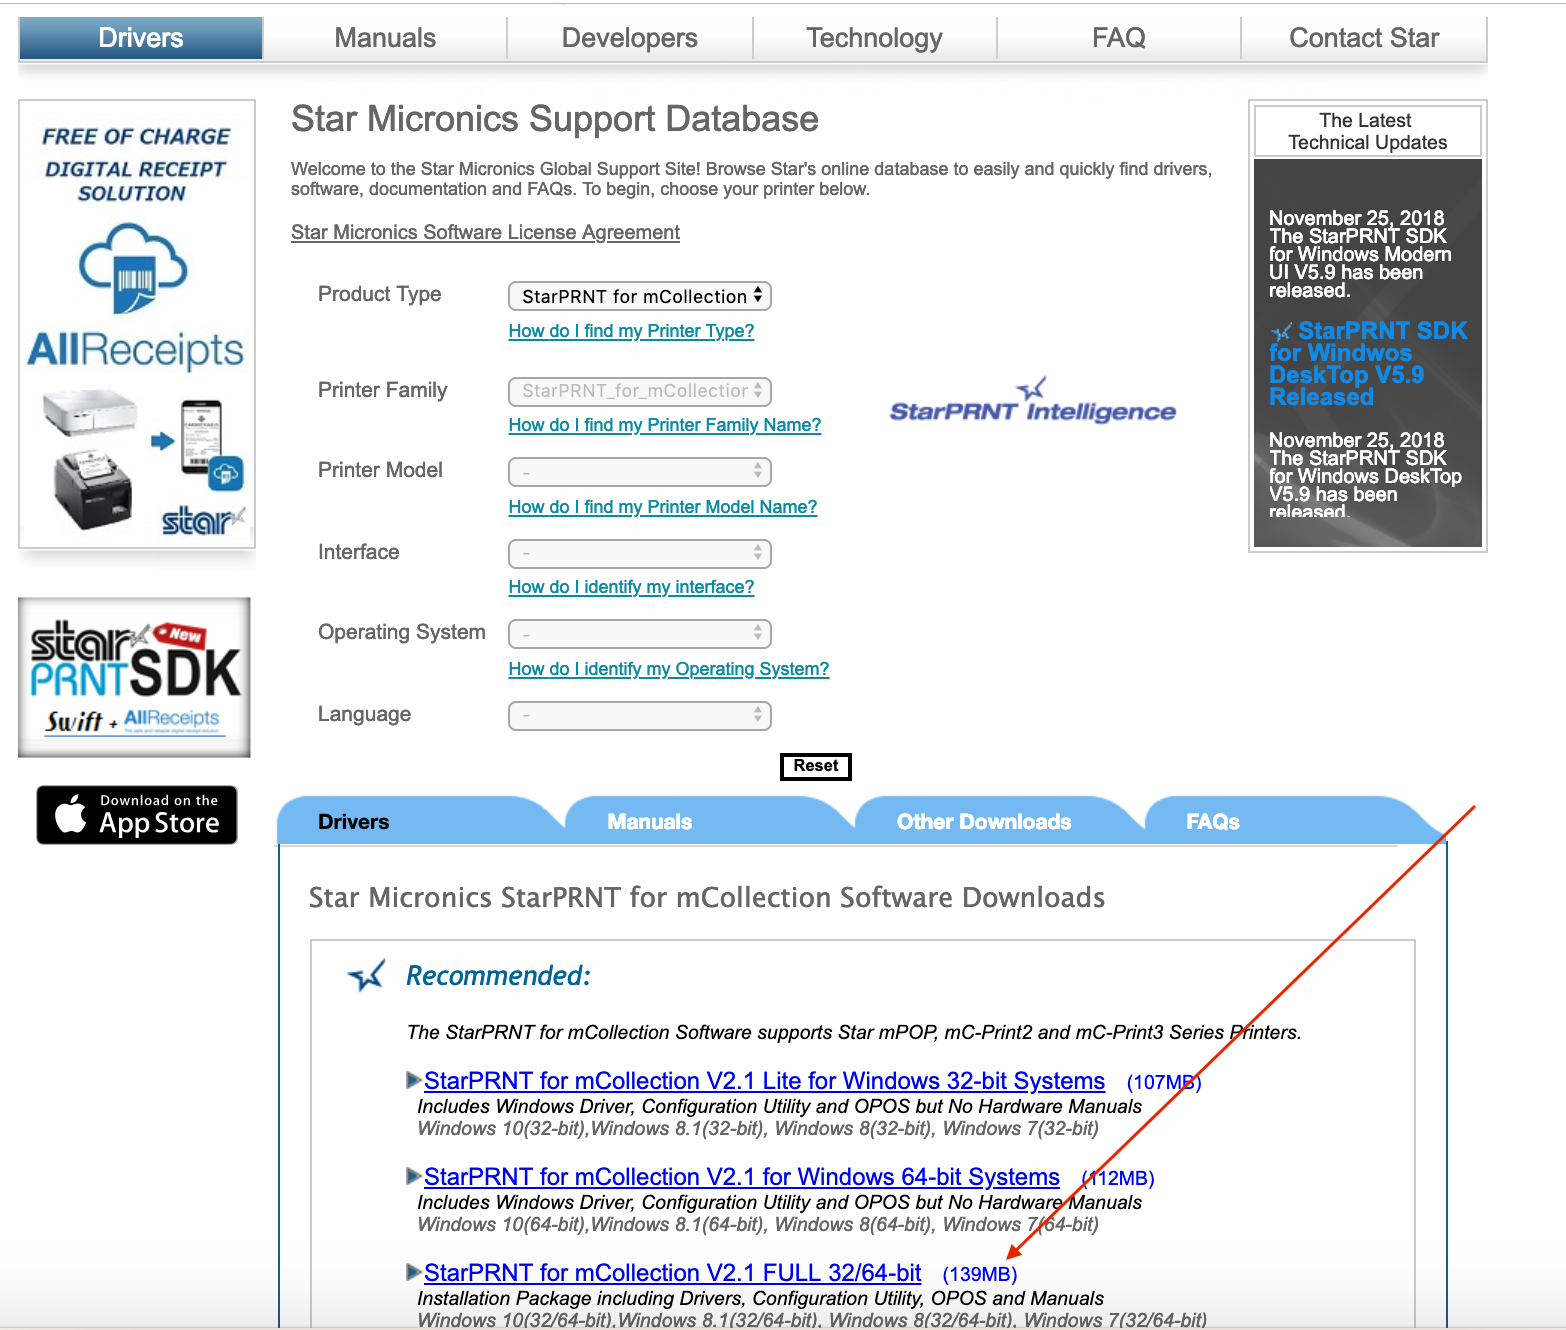
The first step is to download the driver for the Star mc-Print3 printer and install it on your Windows machine. The driver can be found at the link below.
http://www.starmicronics.com/support/default.aspx?printerCode=StarPRNT_for_mCollection
If you are unsure if your Windows machine is 32 bit or 64 bit then you should download and install the StarPRNT for mCollection V2.1 FULL 32/64-bit version as indicated in the image below.
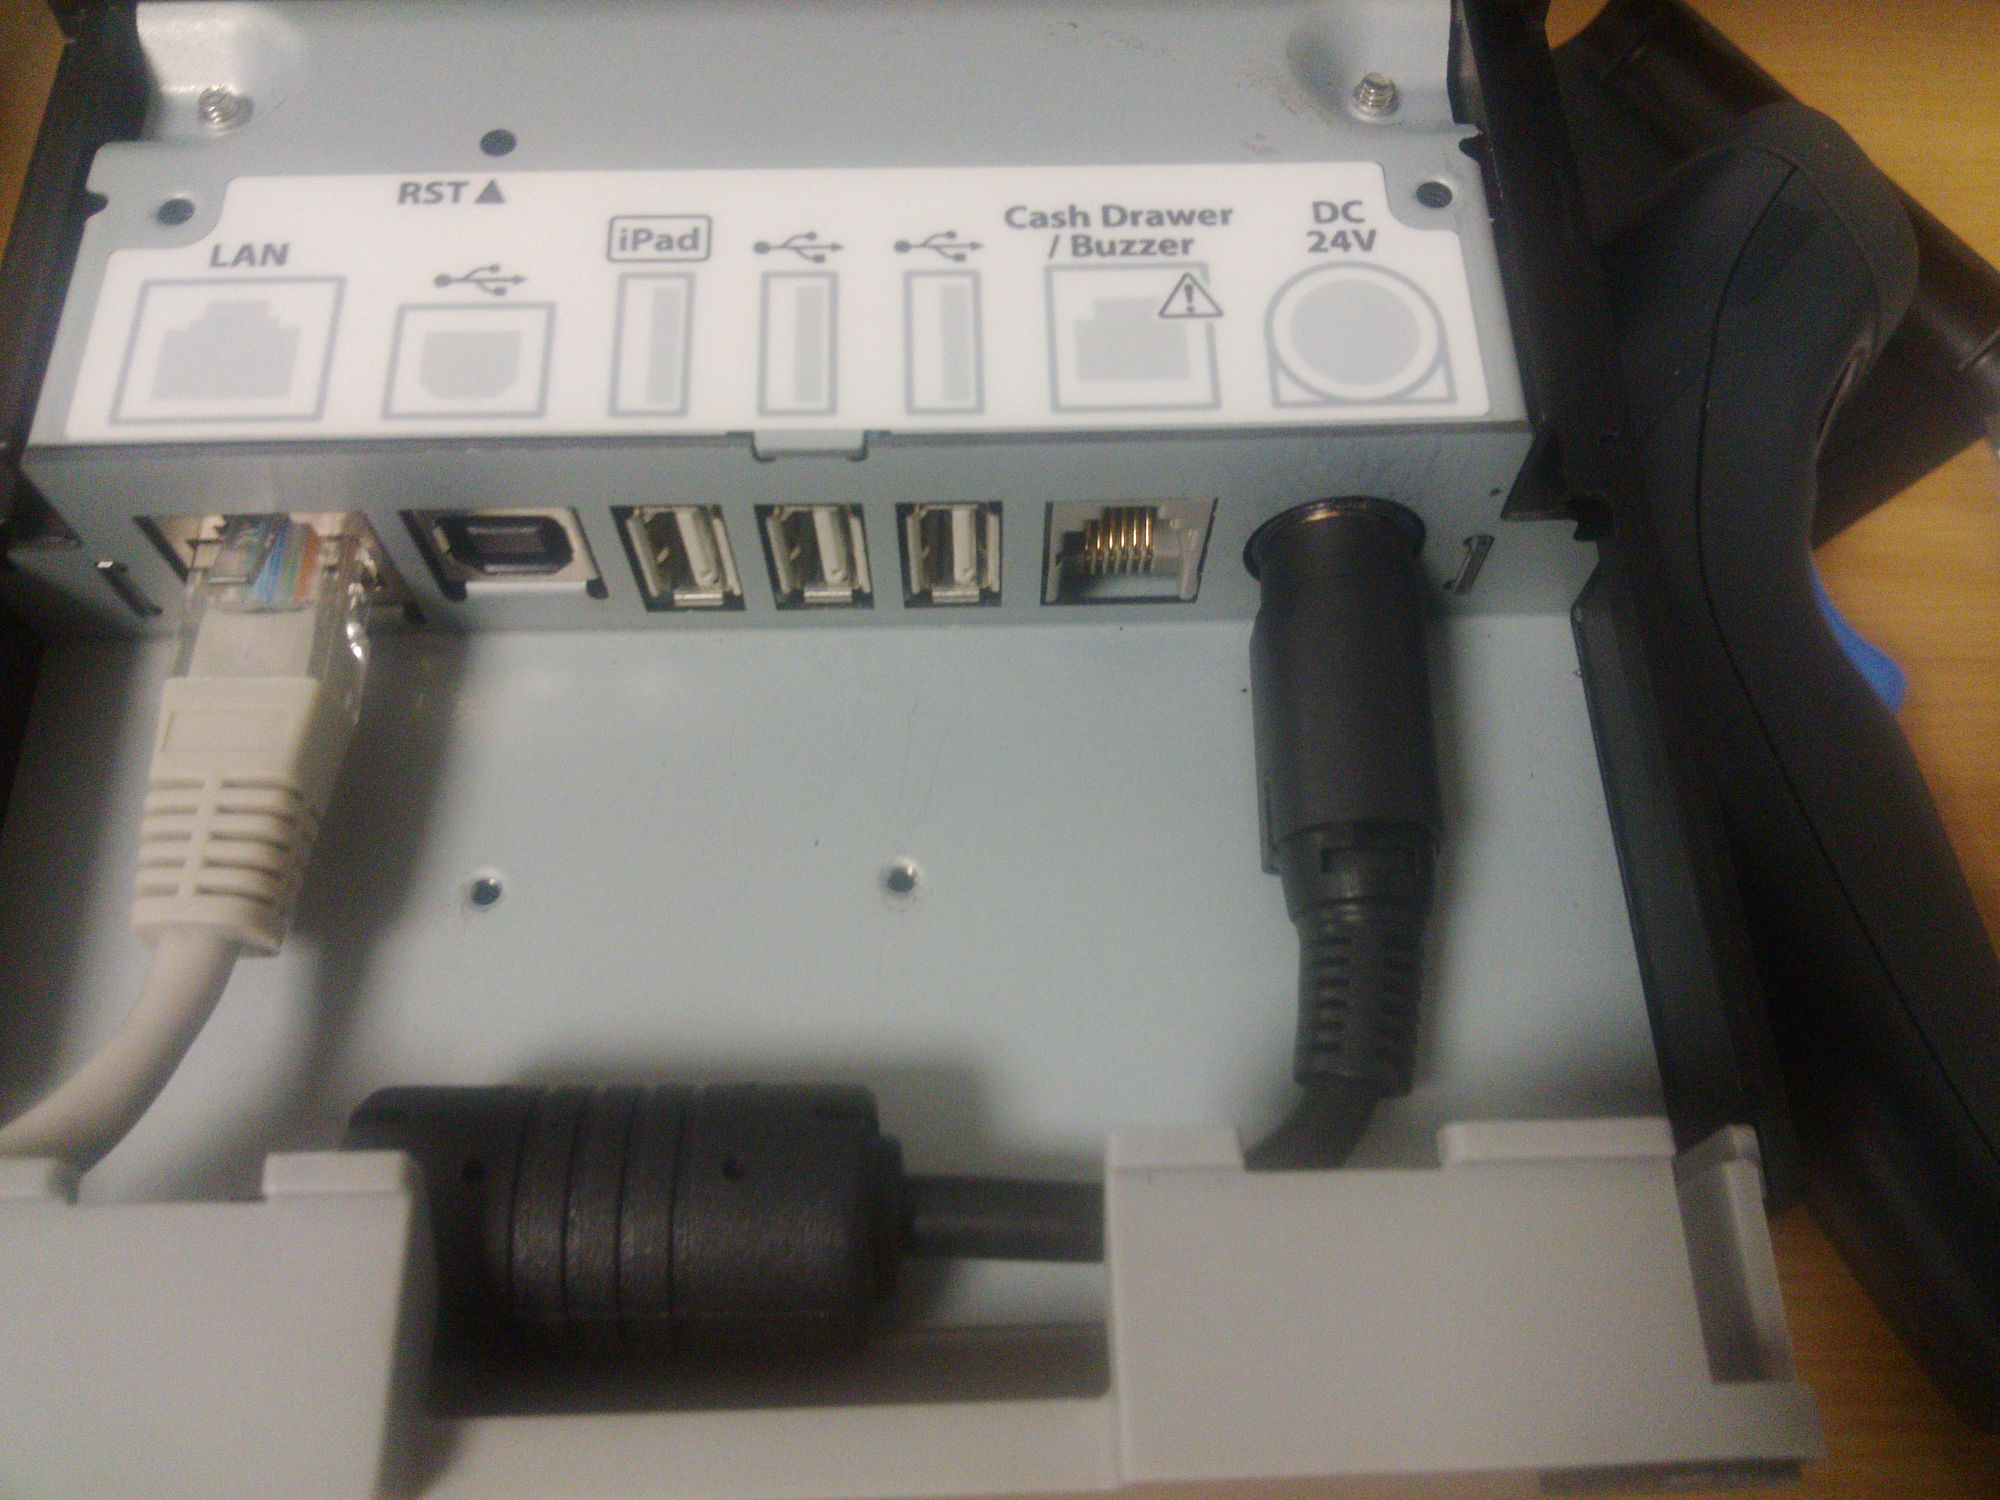
The next step is to connect your printer to your router with an Ethernet cable from the port at the back of the printer labelled 'LAN'.
If you then hold in the Feed button at the front of the printer and press the Power button once the printer will start to self print it's settings and you can release the Feed button. When the self print is complete at the bottom you'll see the IP Parameters with the IP Address.
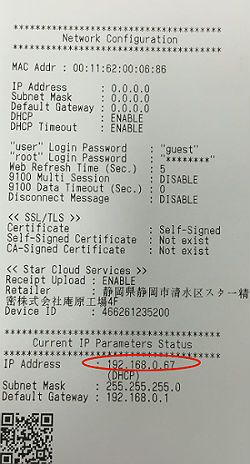
This confirms that the printer is connected to your network and you may need this to add the printer to your Windows machine.
On Windows 10 open the settings and select 'Devices'. In earlier versions of Windows open the Control Panel and select 'Devices & Printers'. Click on the 'Add Printer' button at the top of the screen as shown below.
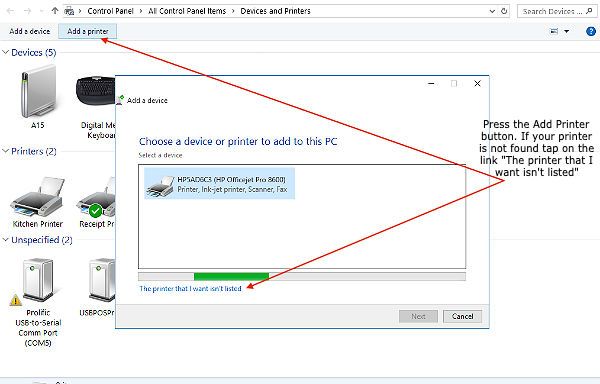
If the green bar stops moving across the screen becoming a solid line and your printer isn't shown in the list of devices click on the link, 'The printer that I want isn't listed'.
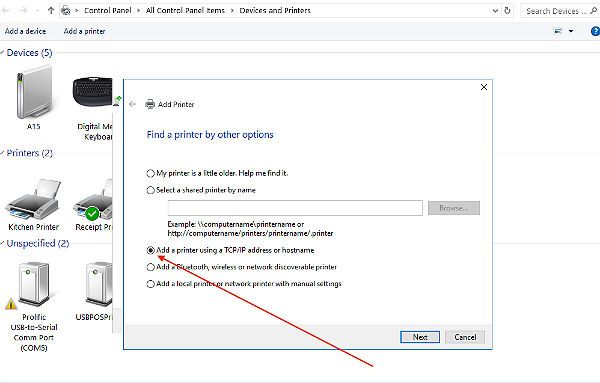
The screen will change to one similar to that below. Select the option to 'Add a printer using a TCP address or hostname' and press the 'Next' button.
In the new screen type the IP address you obtained from the self print into the box beside 'Hostname or IP address' and press 'Next'. After a few moments if your printer is not found you'll see a screen like that below. Select the 'Custom' option and press 'Next'.

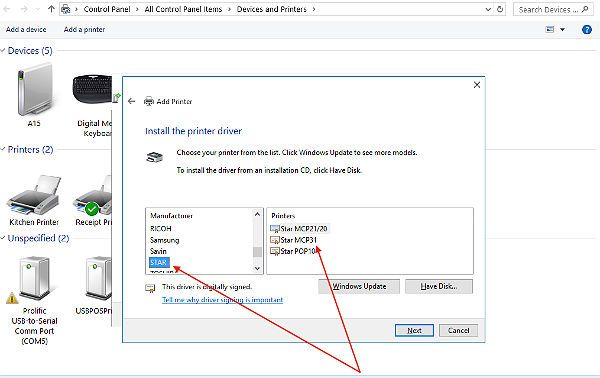
After a few moments a new popup will appear in which you can select the manufacturer and model of your printer. select 'Star' as the manufacturer and 'Star MCP31' as the model and press 'Next'.
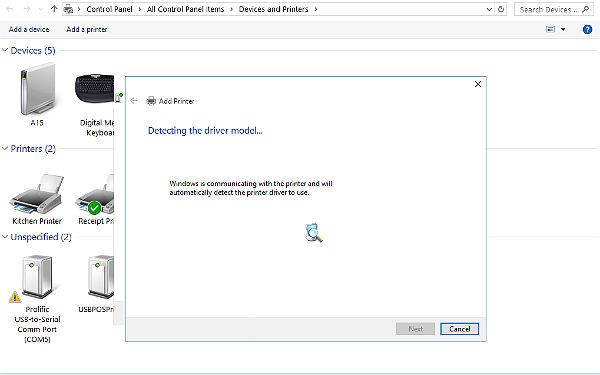
The screen will inform you that Windows is detecting the driver model.
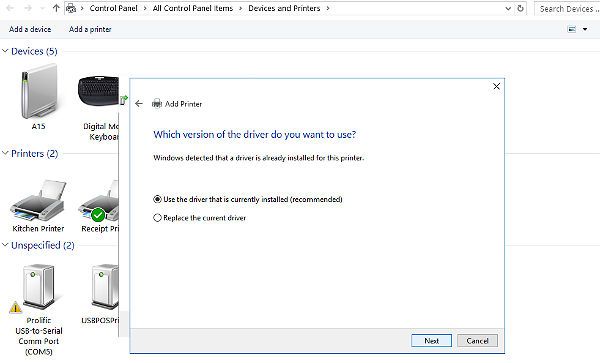
A popup will appear to say that a driver has been found. Select the option to 'Use the driver that is currently installed'. Press 'Next'.
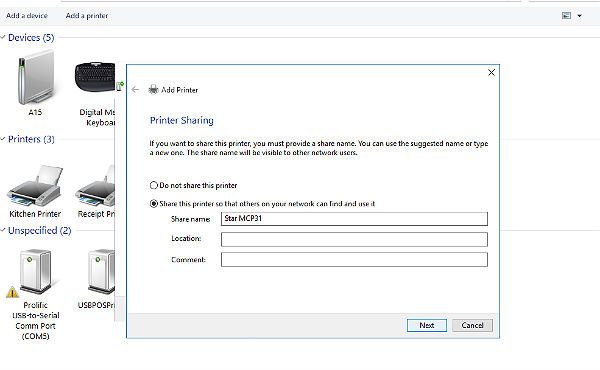
Next you'll see a popup appear for the printer name. By default the name will be 'Star MCP31' and you can change that or simply press 'Next'. A popup for printer sharing will next appear. Just press 'Next'.
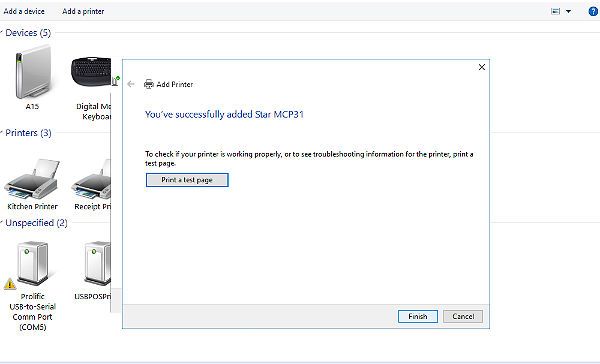
Finally a popup will show to tell you that you have successfully added the Star MCP31 with a 'Print Test Page' button.
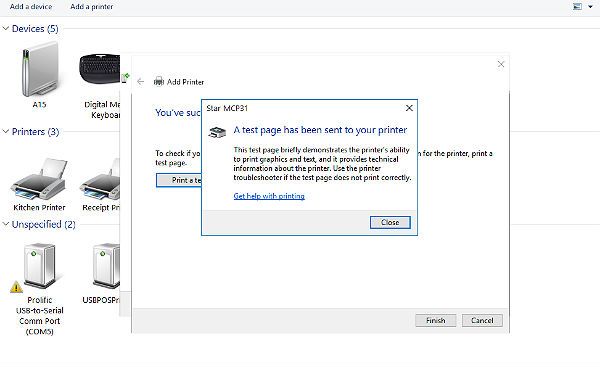
Tap on the print test page button to ensure that the printer is working and you'll see a message like that below and the printer should print a Windows test sheet.
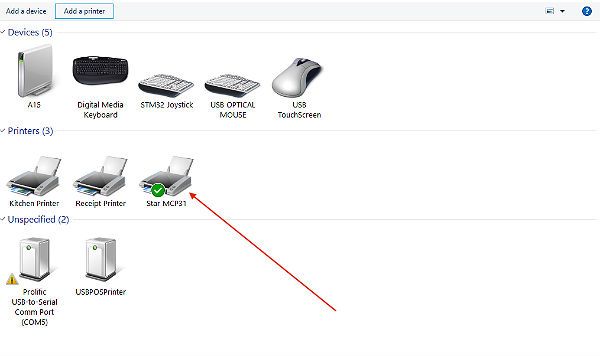
Press the finish button to complete the setup and you'll see that the MC-Print3 has ben added to your Windows machine.
Note: If you are connecting the printer with a USB cable, after you have downloaded and installed the driver Windows will automatically add the printer when it is plugged into the Windows machine.
Now that the printer is added to the Devices & Printers on your Windows machine it only remains to configure it in AirPOS.
Open the AirPOS application and tap on the settings cogwheel at the top of the screen. Select 'Peripheral' from the left margin and press the green 'Add Printer' button. All printers setup on your Windows machine will each be displayed in a blue box on the POS screen.
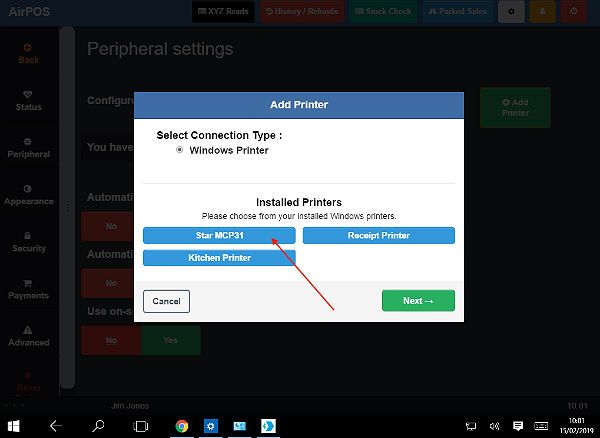
Tap on the 'Star MCP31' box and press 'Next. You'll see the printer type popup in which you select the type of printer.
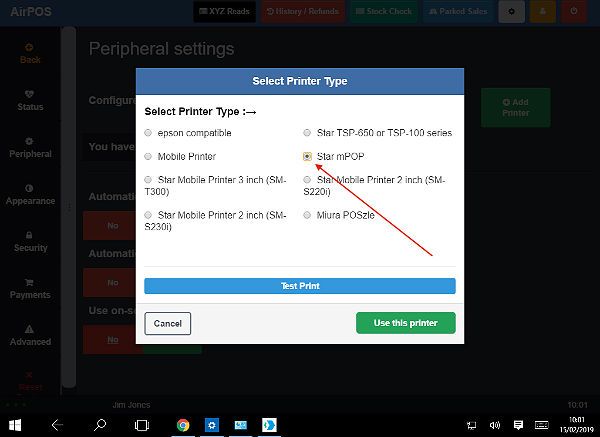
Select the 'Star mPOP' option. The Star mPOP and the Star MC-Print3 belong to the Star mCollection of printers. Press the test print button and if it prints correctly press the green 'Use this printer' button to save your selections and that's your printer configured to use with AirPOS.
Connecting Your Cash Drawer
Leading from the back of the cash drawer is a cable the end of which looks a bit like a telephone connection or small Ethernet connection. This is known as an RJ11 cable.

The Cash Drawer is kicked by an electrical impulse from the printer upon completion of a transaction so the cash drawer connects into the printer at the port labelled 'Cash Drawer / Buzzer' using this cable.
Your Windows Kit is now setup and you are ready to sell.