
Connecting the Star TSP143IIIU USB Receipt Printer on Windows

How to Connect the Star TSP143IIIU USB Receipt Printer on Windows with AirPOS.
The driver and configuration utility for this printer can be downloaded from the following link.
http://www.starmicronics.com/support/default.aspx?printerCode=futurePRNT

Once you have downloaded the file, click to open it.
If you cannot find this file after you downloaded it you will be able to quickly find it again in your 'Downloads' tab, usually located by searching 'File explorer' in your start tab and clicking the 'downloads' section on the right side.
When this file is open, navigate down to the file named set up.
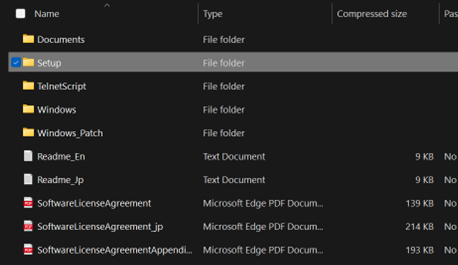
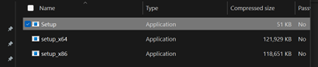
Once this file is open there will be another file inside it named 'setup' also, clicking this will finally begin the set up.
Near the end of the set up process, a screen will appear looking similar to the image below.
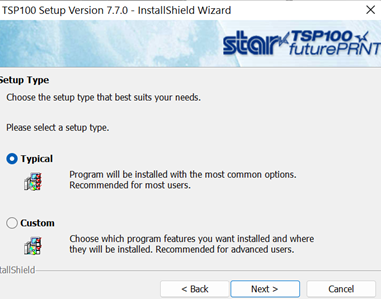
Select the 'Typical" option and then click 'Next'. Once you have done this the driver will continue to download and will eventually finish, ending on a screen similar to the image below.
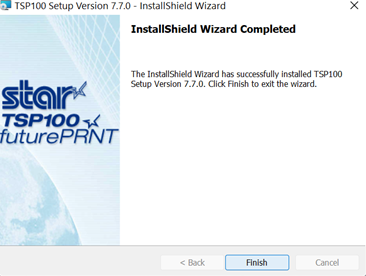
Click 'Finish'
After downloading and installing futurePRNT, plug the square end of the USB cable into the middle port at the back of the printer and the other end into the Windows machine.
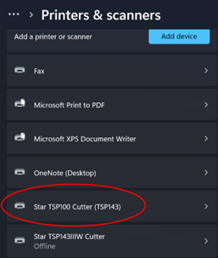
The printer should now appear among the 'Devices & printers' in the Control Panel of the Windows machine as shown below.
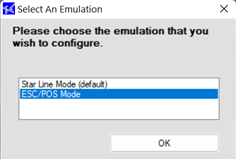
The default mode for these printers is ‘Star Line Mode’. You need to change that to ‘ESC/POS Emulation’. It is necessary to enable this setting to ensure printouts are parsed accurately, the barcode prints and the cutter works.
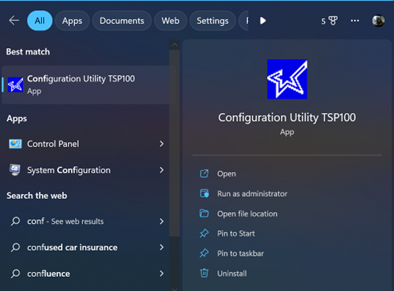
From the Start menu in Windows click in ‘All Programs’ > Star Micronics > TSP100 > Configuration Utility TSP100 as shown here.
When you double click on the utility a small modal window appears. Highlight ESC/POS Mode and click OK.
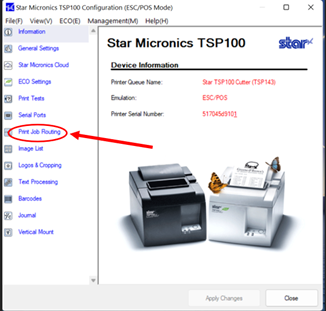
After a moment the configuration utility will open. In the left hand navigation panel click on ‘Print Job Routing’.
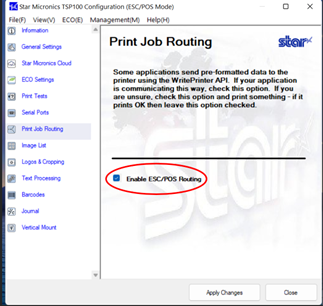
A new screen will appear. Ensure that the box at Enable ESC/POS Routing is ticked as seen here. If the box is left unchecked, some applications may use ‘Star Line Mode parsing’, resulting in corrupted printing.
Adding a Logo to your Receipts.
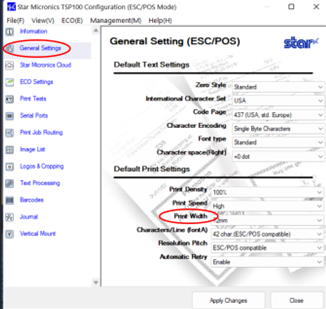
While in the Configuration Utility Click on General Settings near the top left of the screen. When the general settings screen opens click in the drop down box beside Print Width and ensure 72mm is selected.
Press the apply changes button and close.
Your printer is now setup on your Windows machine and all that remains is to configure it on AirPOS.
Open the AirPOS application and click or tap on the settings cogwheel at the top of the screen. From the left margin select 'Peripherals'. When you press the green 'Add Printer' button a popup will appear showing all printers setup on your Windows machine. Click on the printer you wish to add and press the 'Next' button as seen below.
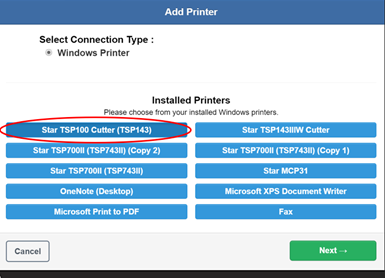
A new popup in which you select the printer type will appear. Select the "Star TSP650 or TSP - 100 series" option and then press the 'Use this printer' button to save your settings.
Finally close and start selling!