
How to Setup your Bluetooth CT-10 Barcode Scanner on Android

CT-10 Bluetooth Barcode Scanners and Onscreen Keyboards for Android

Enter the Setting Mode
For the scanner to enter the setting mode you must have it read the 'Enter Setup' barcode below. The CT10 Barcode Scanner will respond with three beeps descending in tone. Next scan the barcode 'Restore Factory'.
(NB: You will need to print off the following barcodes using an A4 office printer as the scanner won't scan off the screen).


Setting Up the CT-10 Barcode Scanner to Work with Android
Next scan these three barcodes one after the other to make a one-click Android connection.

Restart the scanner.
Pairing the CT-10 Barcode Scanner with your Android Tablet
Turn the scanner on by holding the trigger down. The scanner will beep once when it powers up and twice when powering off. Scan the 'Enter Setup' barcode above. The indicator light at the top of the scanner will turn purple. Scan the 'Restore Factory' barcode above. The light will turn red after a few moments. The scanner is now ready to pair with your tablet.
Turn on Bluetooth on your Android device and click on the CT10 when it appears in ‘Available devices’ in order to pair it.
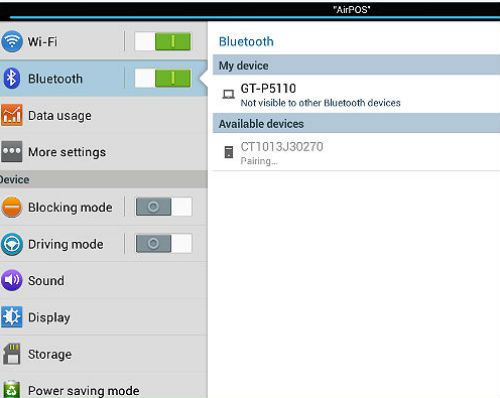
Your Android device will show a pop-up request to ‘Pair’ with the scanner and a prompt for a PIN. Enter '10010' to pair.
NB: There are known Bluetooth connectivity issues when running the Spotify App with AirPOS. Attached Bluetooth peripherals (Card Readers, Printers, Barcode Scanners, etc) may regularly drop connection resulting in receipts not printing, drawers not kicking and aborted card transactions.
The CT-10 Scanner and your On Screen Android Keyboard
The newer versions of Android will not display the system keyboard because the scanner behaves as an external keyboard and the device thinks that is what it is. In order to get around this the next thing to do, therefore is to go into the settings on your tablet and turn Bluetooth off so that we can use the onscreen keyboard.
- Go to the Play Store and search for an App called ‘Hackers Keyboard’ (ignore the unfortunate name). It will have ‘Esc’ in black on what looks like a grey keyboard key.

- Download and install the application.
- Accept permissions (none are needed)
- When the app has downloaded press the ‘OPEN’ button.
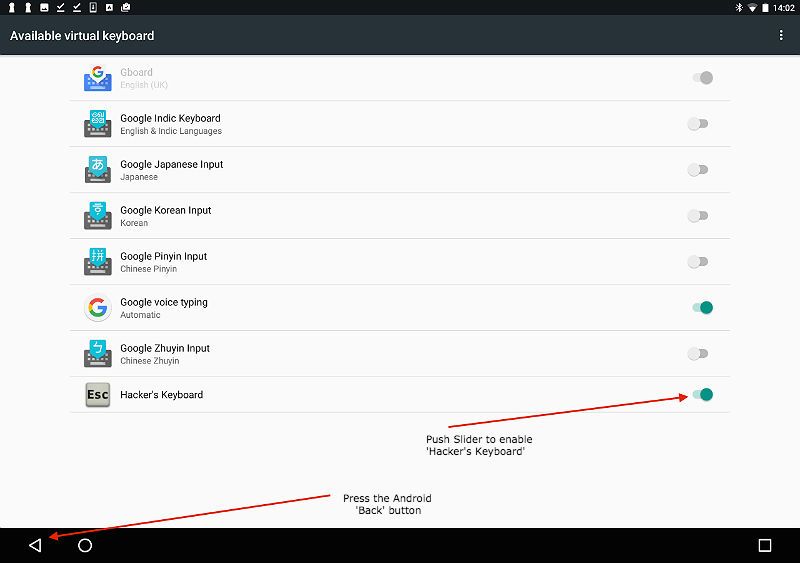
- At the top left of the screen tap ‘Enable keyboard’.

- Next select ‘Hacker’s Keyboard’ and press the Android back button as shown below.
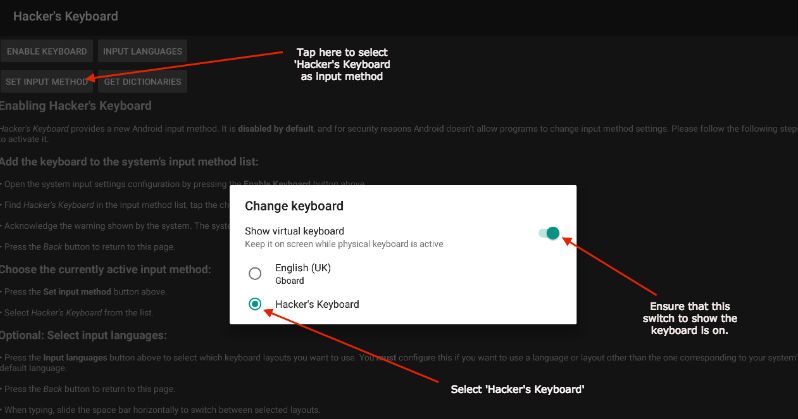
- At the top left tap on 'Set Input Method'. A small popup like that below will appear. Make sure the switch to 'Show Virtual Keyboard' is toggled on and select 'Hacker's Keyboard'.
Turn Bluetooth back on and tap on the name of the scanner to ensure it’s connected.
The Hacker’s keyboard will appear where appropriate in the POS for keying in transaction IDs or for adding a customer.