How to Setup The Star TSP650 USB Printer on Windows
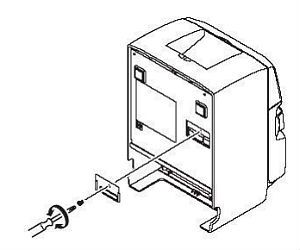
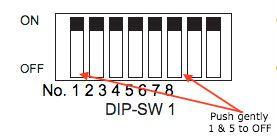
The first step is to set the printers dip switches. For this you'll need a small Phillips screwdriver. Switch the printer off. Underneath the printer is a small base plate fastened with a small Phillips screw as shown below. When you remove this plate you'll see two sets of dip switches, a set of 4 and a set of 8. In the set of 8 gently push number 1 and number 5 towards the numerals printed below, into the off position.
This puts the printer in 'Vendor Class' mode as opposed to 'Printer Class' mode so when you connect the printer and switch it on Windows will not recognise it as a printer and we'll have to add it to the list of devices as a printer. This dip switch step will create a virtual serial port such as 'COM8'.
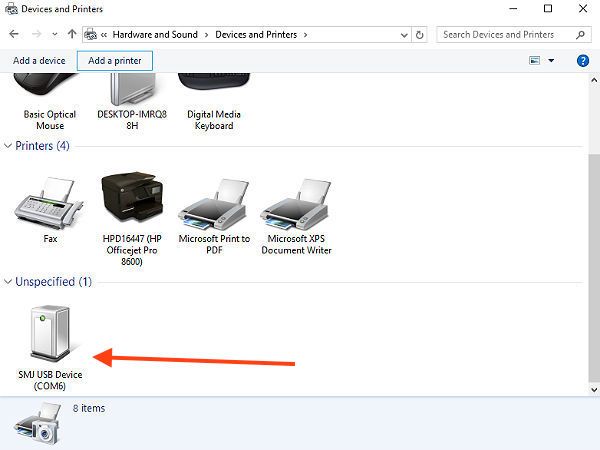
Go to your Windows Control Panel and open Devices and Printers. When you plug the printer in and switch it on the device will be reported as unspecified and will report the COM port number as shown below.
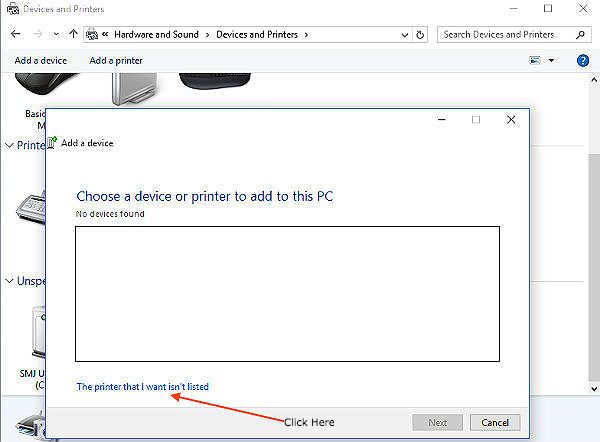
Press the 'Add a printer' button at the top of the above window and Windows will start searching for printers. It may show other printers such as your office printer but may find none. When it has finished searching click on the link "The printer I want isn't listed" and press the next button as seen below.
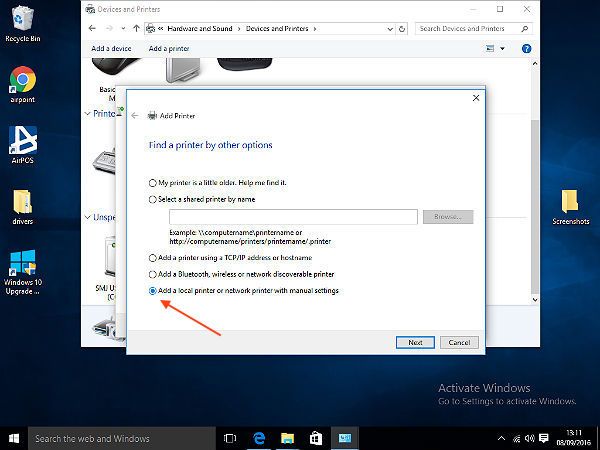
A new popup will appear to 'Find a printer by other options'. In that window select the option to "add a local printer or network printer with manual settings" and press the next button as seen here.
A new window will open to "Choose a printer port". Click on the option to "Create a new port" and press the next button as seen below.

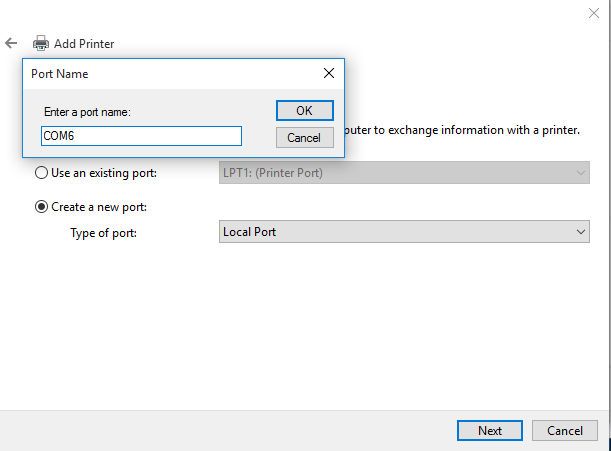
A new window will open in which you name the port. Name it COMx where 'x' is the number of the port reported for the unspecified device you saw appear when you connected the printer and turned it on (in this case COM6). Press the next button. See below.
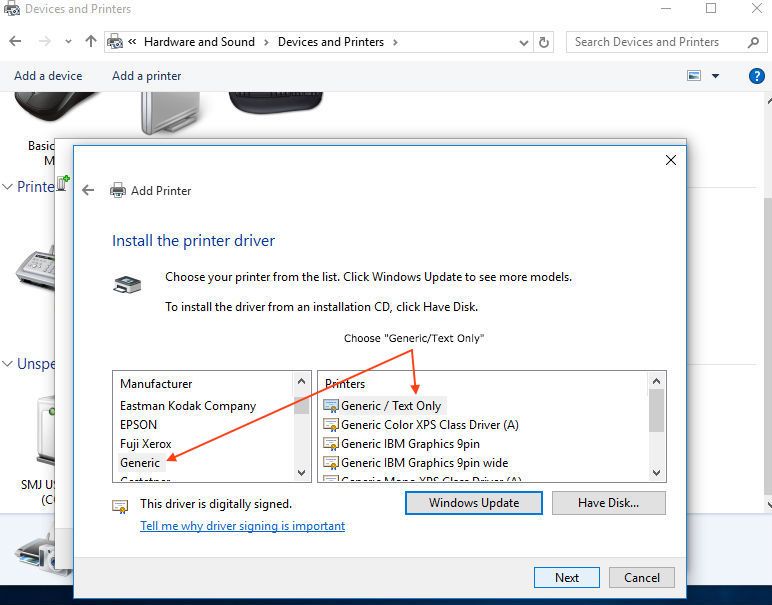
A new window will open where you can search for printers by manufacturer and model. Select "Generic" under manufacturer and "Generic/Text Only" under printers and press the next button as shown here. You can also select 'Star' as the manufacturer and search for the 'Star TSP650II Cutter' under printer.
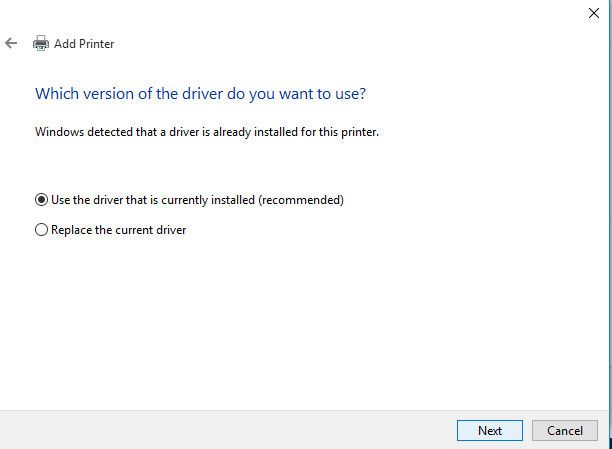
A progress bar will appear as Windows installs the printer and a driver window will open. Press next.
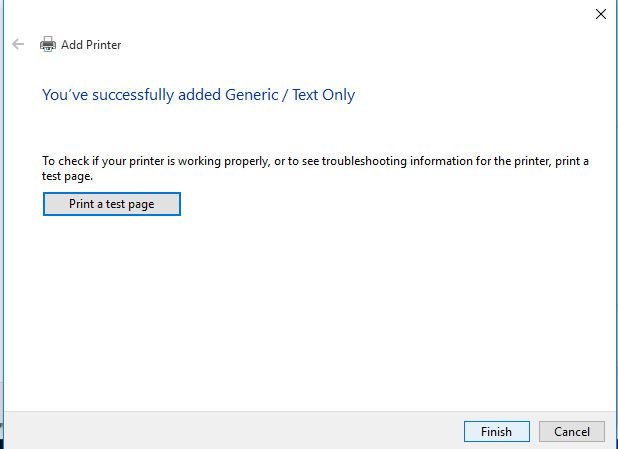
The new window will prompt you for a printer name. If you're happy with 'Generic/Text Only' press the finish button.
The next step is to configure the printer on AIrPOS. Open the AirPOS peripheral settings by clicking on the settings cogwheel icon at the top tight of the POS screen and selecting 'Peripherals' from the menu in the left panel. Press the green 'Add Printer' button and a window like that below will appear in which all printers connected to your Windows machine will be shown.
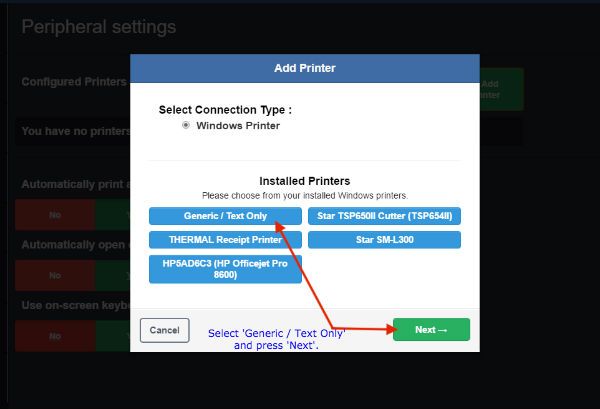
Select the 'Generic/Text Only' option and press the 'Next' button.
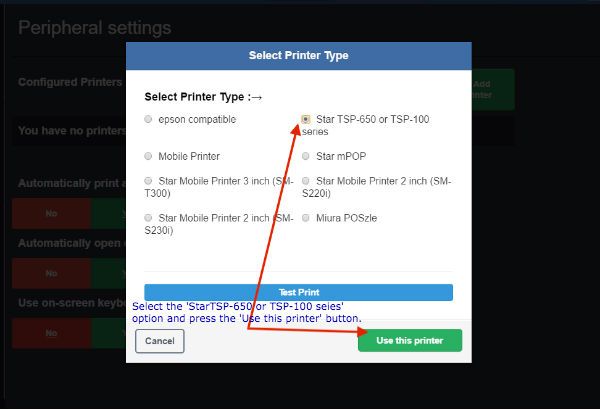
The printer type popup will appear in which you'll select the printer type. The printer type is 'Star TSP-650 or TSP - 100 series'. Select this option then press the green 'Use this printer' button to save your selections.