How to Setup the Star TSP100IIIW Wi-Fi Printer for AirPOS on Windows
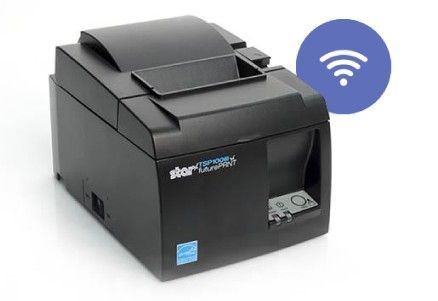
Star TSP100 IIIW WiFi Printer Configuration.
Straight out of the box this printer when powered up exists on it's own network and is not connected to the internet. The first task is to get the printer configured on to your own Local Area Network (LAN).
Connecting with WPS
WPS (Wi-Fi Protected Setup) is a standard for making easy connections between wireless networking devices. Depending on the manufacturer, buttons that have been displayed as "AOSS", "Easy wireless start","Rakuraku wireless start", "JumpStart" etc. may also be handled equivalently to WPS.
If your router supports WPS, connecting with WPS is quick and convenient.
If WPS cannot be used you can connect your Windows device to your printer using 'AP Mode' (Access Point Mode also called Ad-Hoc mode). In AP mode, the printer becomes a simple network access point and devices such as wireless LAN tablets can connect directly to the printer. If WPS cannot be used, first connect in AP mode to configure wireless LAN settings for the printer in order to allow the printer to connect to your wireless LAN network.
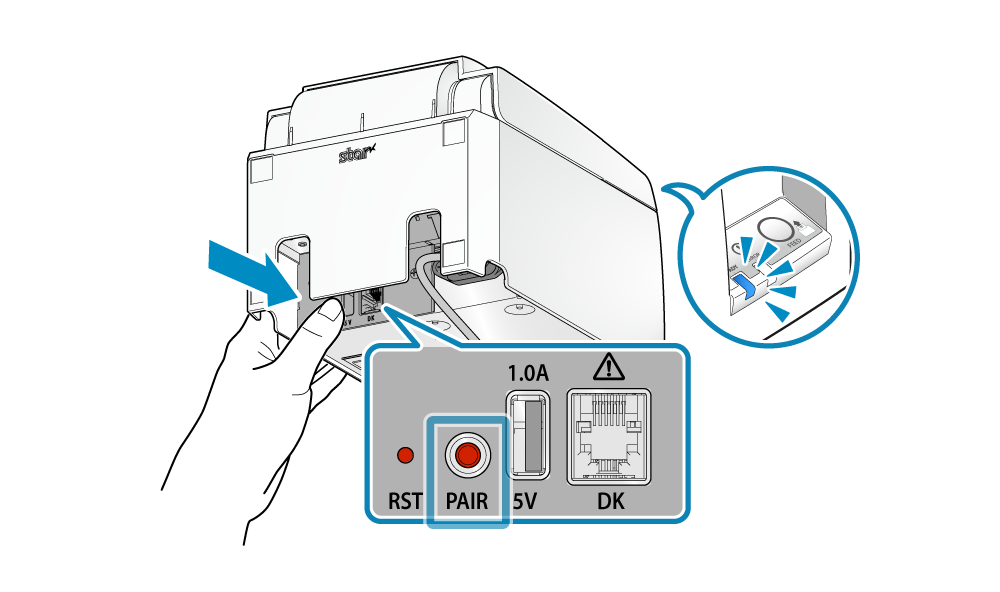
Connecting your printer with WPS
- Press and hold the PAIR button until the LED (blue) button of the printer blinks (see diagram below).
Press the WPS button of the access point or router.
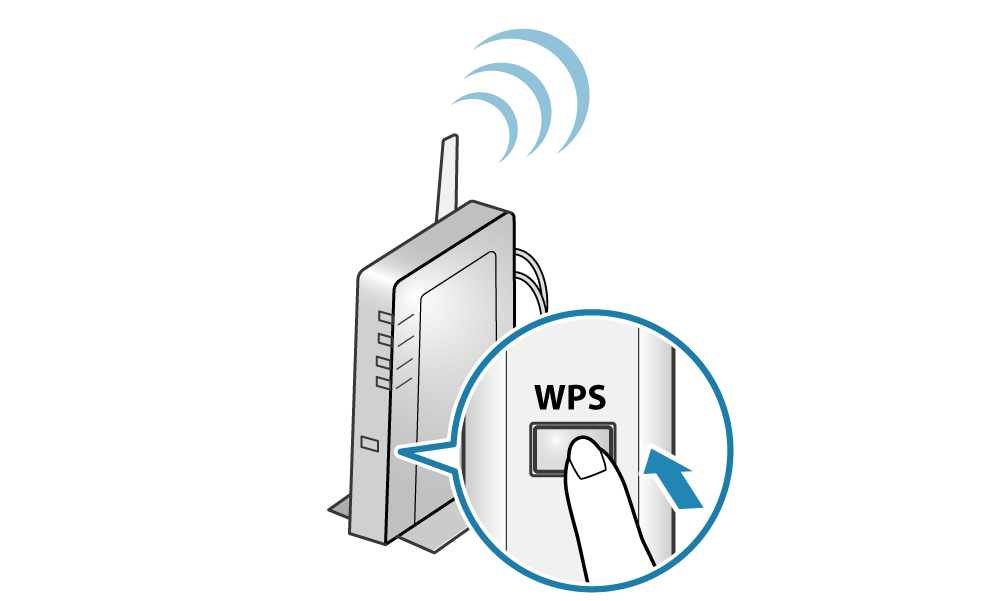
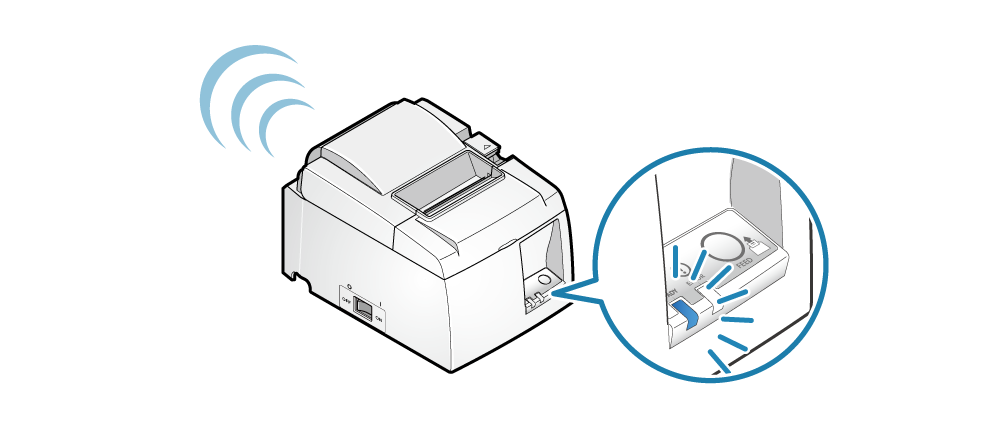
When a network connection is established the LED of the printer will stop blinking and stay lit. You can print out the connection details by turning the printer off and then while holding down the feed button switch it on again. The printer will perform a self print with it's IP Address (see below).
There is a dedicated Application, TSP100III Utility (futurePRNT), which is very useful for setting up this printer. You can download this App from the following link by clicking on it or copying and pasting it into a browser on your iPad.
http://www.starmicronics.com/support/default.aspx?printerCode=futurePRNT
You can use this app to search for the network printer and connect to it, provided the printer is connected on your network. It can also be used to change the network settings of the connected printer to give it a static IP Address. Once a static IP address is assigned, IP address changes through the DHCP server will not occur. This means that once setup you will be able to continuously use the same IP Address for your printer.
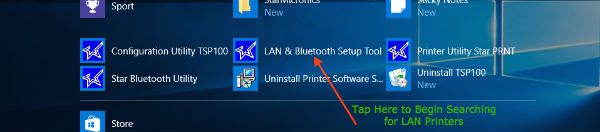
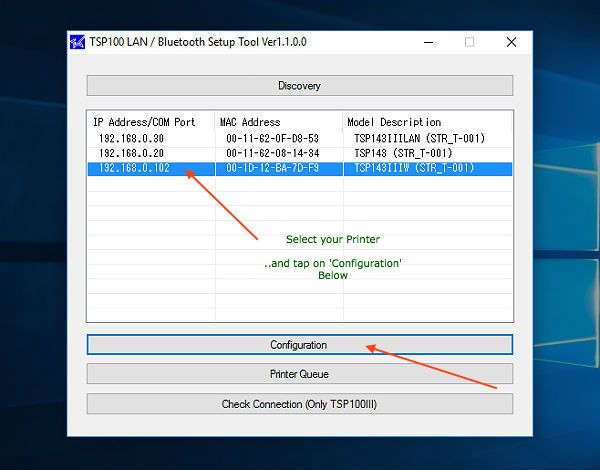
Having downloaded the TSP100 III Utility go to your Windows Start menu and expand the Application 'Configuration Utility TSP100'. Use "LAN & Bluetooth Settings Tool" to connect the printer and the PC/tablet. It is installed at the same time as the Windows printer driver (futurePRNT) is installed.
When you click on 'Star Micronics' the expanded view will show the "LAN & Bluetooth Settings Tool".
When your printer is found by the Utility it will appear in your list of attached Star printers. Select the device to be connected and then click on the Configuration button. This connects your Windows machine to the selected printer and opens the Web Configuration Utility.
At this point your Windows machine is connected to your printer and can now be configured on AirPOS.
Connecting with AP Mode
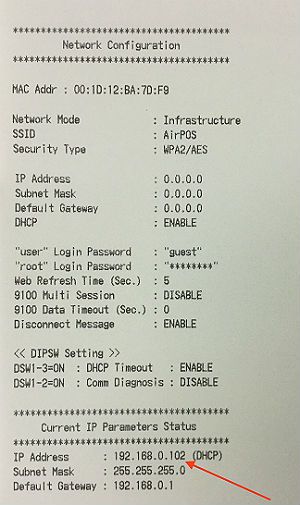
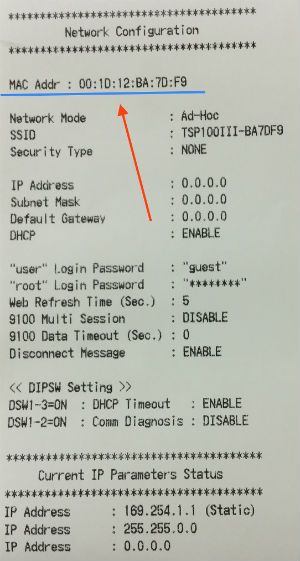
You'll need to obtain the Mac address of the printer. This is printed at the top of a selfprint from the printer which you can get by switching the printer off and waiting for all the lights to go off. Next, while holding down the feed button turn the printer on again. It will selfprint with the Mac Address and IP Address as seen below.
Click on the Wi-Fi symbol at the bottom tight of your Windows machine.
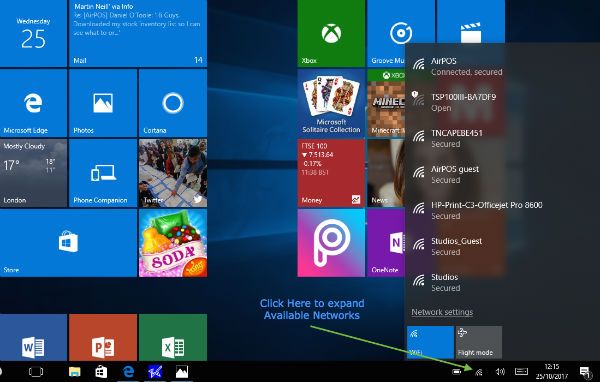
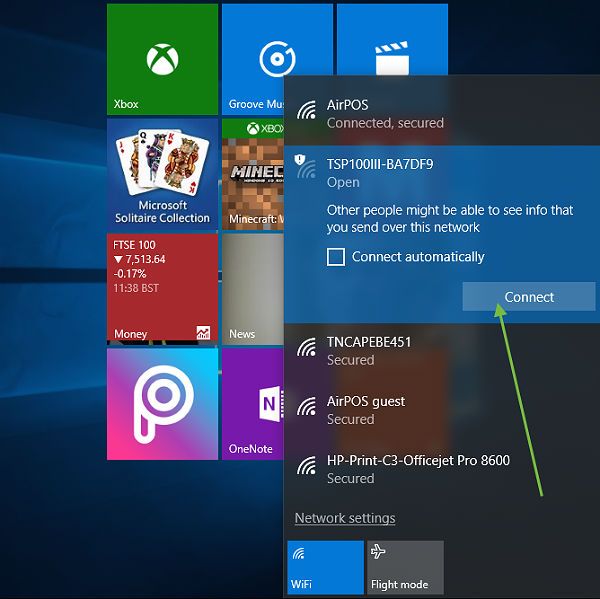
From the list that appears when you click the network icon in the taskbar (Windows 10), refer to the last 6 digits of the MAC address confirmed above and select the printer's network to connect, and click "Connect". You are now connected in AP mode to the printer and no internet access is available during this time.
Open a browser and type in the address entry field 169.254.1.1 (This is the factory default IP Address of the printer and the address after a factory reset)

This will open the 'TSP100III Network Utility'. You should see a screen like that below.
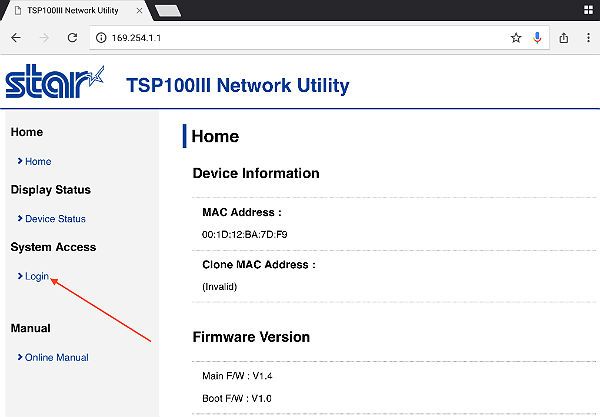
From the menu on the left side of the screen tap on 'login'.
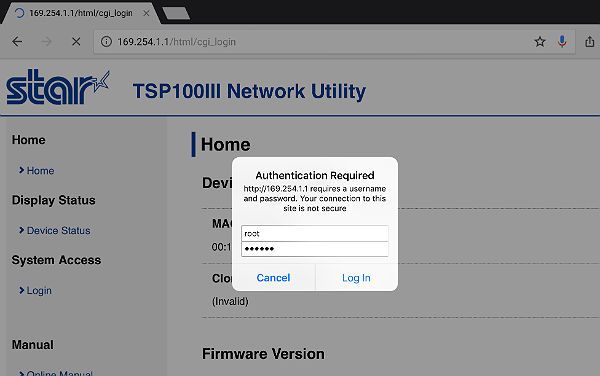
Login with the default username 'root' and the password 'public'. A popup may appear to prompt you to change the password. Tap OK to change it or Cancel to leave it as it is. Now click on 'WLAN Settings' from the menu in the left panel of the screen.

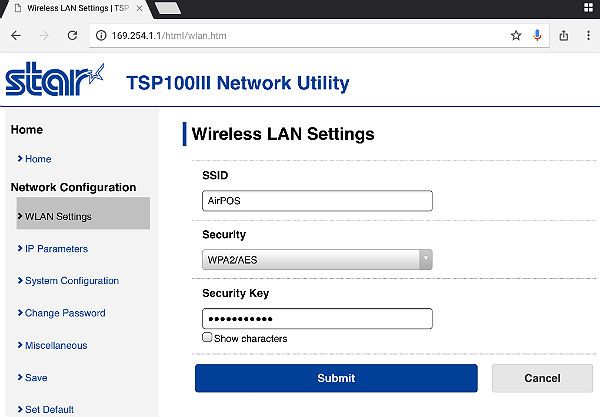
Enter the name of your LAN network (SSID) and the security key (Password) as shown here and then tap on the 'Submit' button.
The 'Save' button in the left margin will flash red.
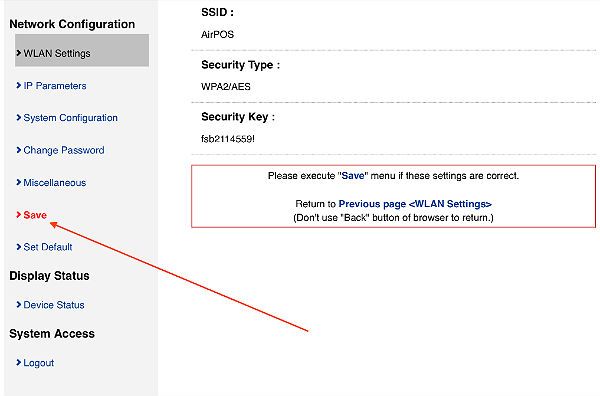
Now tap the flashing red 'Save' button on the left side.
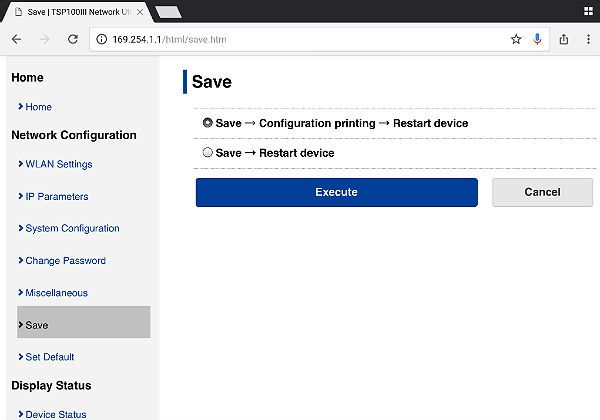
Now tap the 'Execute' button as shown above to reboot your printer.
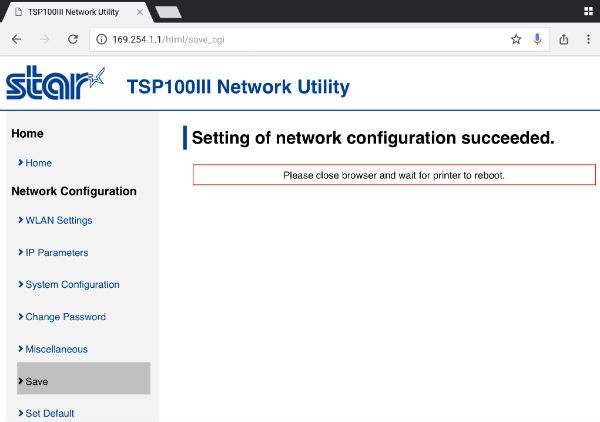
The printer will restart and self print it's settings with a new IP Address at the bottom of the self print.

Your printer is now connected to your network and it now remains for you to reconnect your Windows machine to your network. Click on the Wi-Fi symbol again at the bottom right of the screen and Click on the name of your network and then on 'Connect.
Configuring the Printer for AirPOS
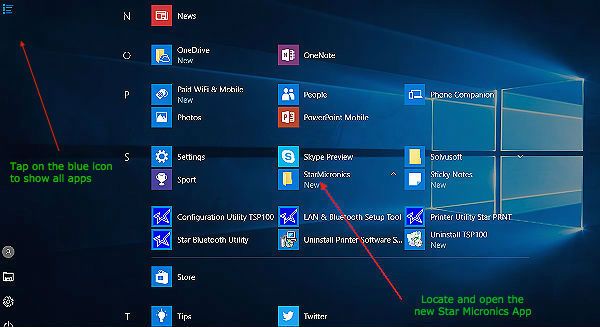
One task remains but it is an important one. In order to properly parse and format your receipts the printer needs to be put into what's know as 'ESC/POS' mode so that it can properly respond to commands from your POS. To do this you'll need to open the 'Configuration Utility TSP100' from your list of Windows programs which will have been downloaded with the printer driver. On earlier versions of Windows click on the 'Start' button and then on 'All Programs'. Scroll down until you see 'Star Micronics' and click on it to expand it.

On Windows 10 tap on the icon to show All apps and locate 'Star Micronics' as shown above and select 'Configuration Utility TSP100'. After a few moments a popup like the one shown below will appear.
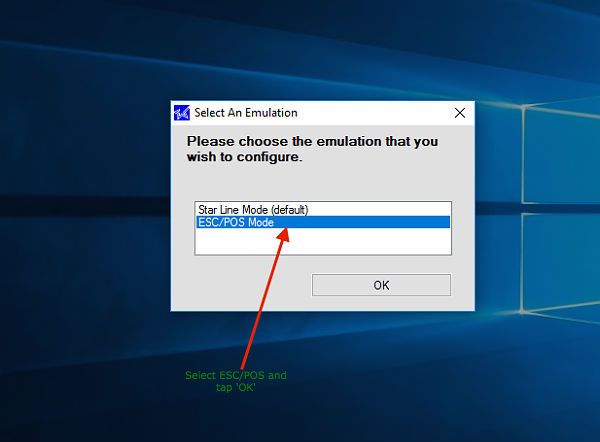
Click or tap on 'ESC/POS Mode' and press OK. It may appear not to be doing anything but after a few moments the screen will change to one like that below.
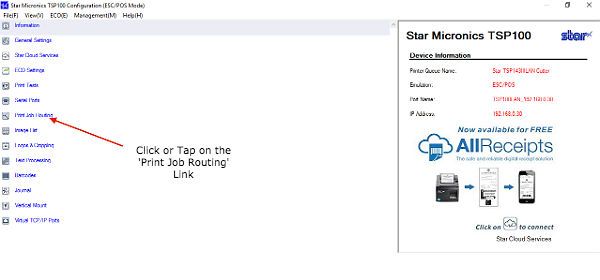
From the left navigation panel click on 'Print Job Routing' and the screen will change again.
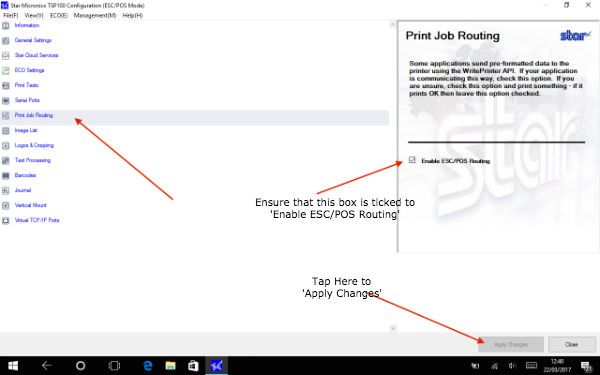
Click in the box beside 'Enable ESC/POS Routing' and press the 'Apply Changes' button. Your printer is now setup on your Windows machine and it remains only to configure it on AirPOS.
When I click 'Configuration Utility' the 'Select an emulation' window doesn't appear!
f the window to switch to ESC/POS doesn't appear when you open the configuration utility app, as shown in the example above. Simply follow these steps:
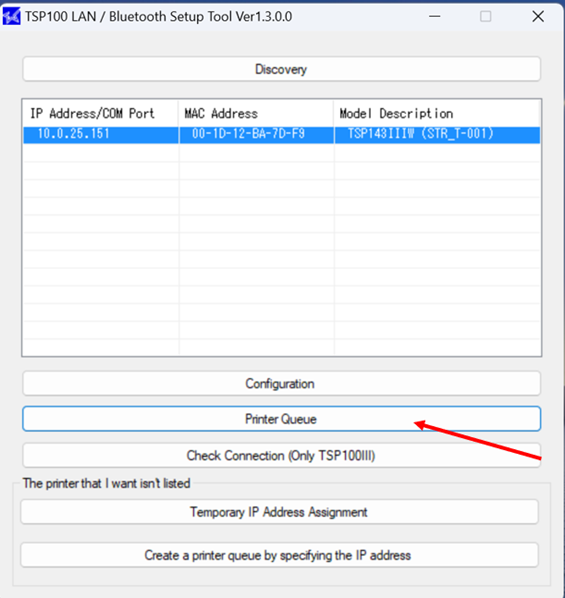
Select the printer that you have successfully connected to your network again.
Click on 'Printer Queue' to open it
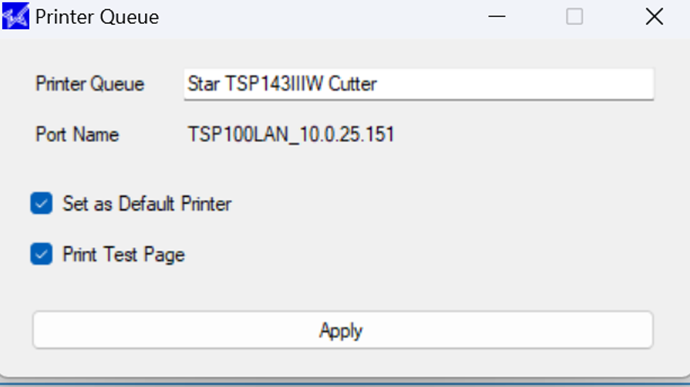
Make sure to check the box labeled 'Set as default printer'. This ensures that the printer is selected for the configuration process. You can also check the box for 'Print test page'. This will confirm that the printer has been successfully connected. If a test page doesn't print, please check for any errors like a paper jam or no paper.
Once both boxes are ticked, click 'Apply'
You should then see a window like the image below.
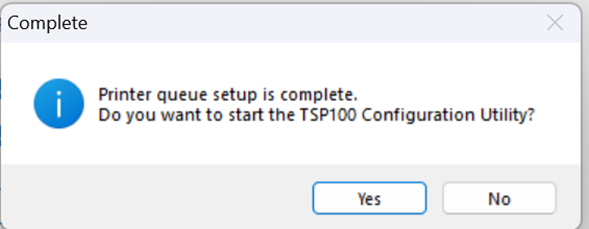
Click on 'Yes', and it will take you to the 'Select an emulation' window. From there, you can refer back to the previous part of this article to connect your printer successfully!
Connect your printer to AirPOS
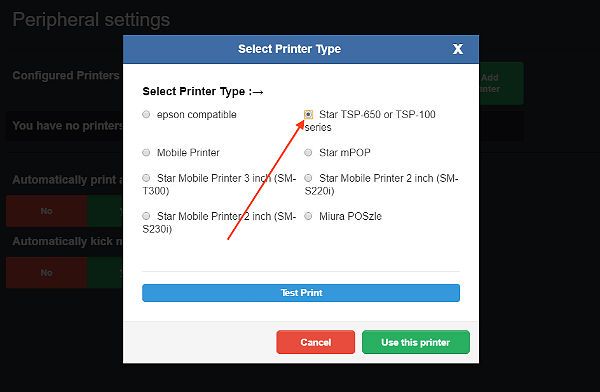
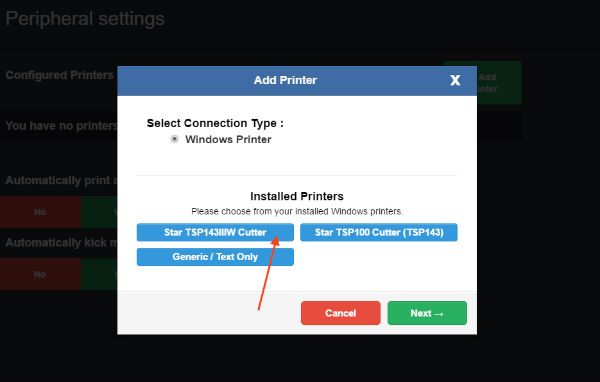
Open the AirPOS application and click or tap on the settings cogwheel at the top of the screen. From the left margin select 'Peripherals'. When you press the green 'Add printer' button a popup will appear like that below showing all printers connected to your Windows machine. Select your printer and click on the 'Next' button
A new popup in which you select the printer type will appear. Select the 'Star TSP-650 or TSP-100 series' option and click on the 'Use this printer' button to save your selections and that's your printer setup.