
Adding ePOS Now USB Printers to AirPOS on Windows
To download AirPOS for Windows open a browser such as Chrome, go to airpointofsale.com and sign in to your backoffice. Click on 'POS' from the left margin and then on 'Download AirPOS App'. Select the option for Windows and download the application.
You can also download the application for Windows by clicking on the link below.
https://releases.airpointofsale.com/windows/AirPOS+POS+Setup+1.9.1.exe
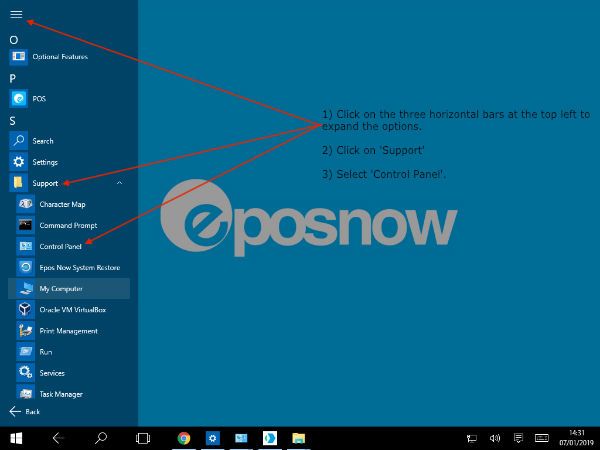
On the Windows machine you'll need to access 'Devices and Printers' in the 'Control Panel'. To do this on Windows 10 click or tap on the three blue horizontal bars at the top left of the screen to expand the options then click on 'Support'. Below that you'll see listed 'Control Panel'. Click on that as shown below.
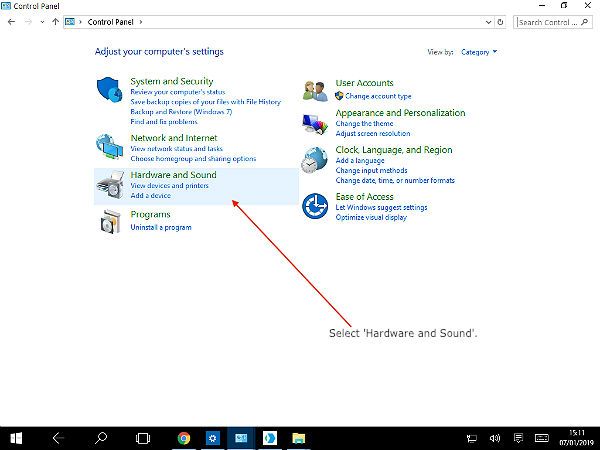
When the control panel opens select the 'Hardware and Sound' option as shown in the image below.
This will show all devices and printers connected to the Windows machine. In the image below we can see that there are printers called 'Kitchen Printer' and 'Receipt Printer'. The Receipt Printer has a green tick signifying that it's been set as the default printer as seen in the image below.
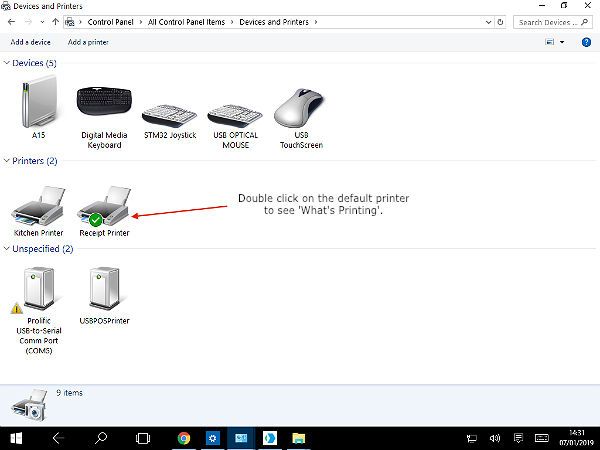
Double click on this device to see the list of current printing jobs. Ideally there should be none.
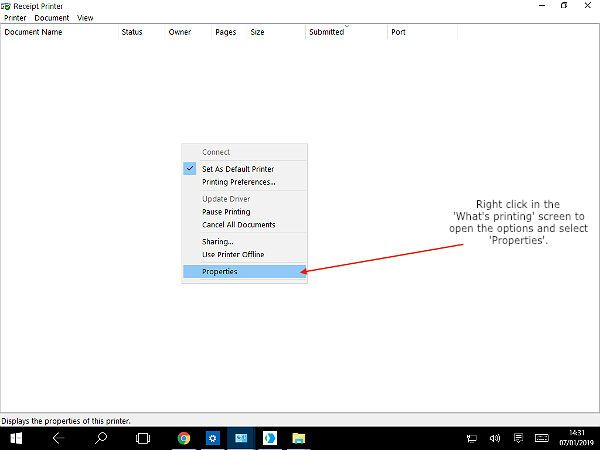
In that window right click and select 'Properties' from the menu that appears.
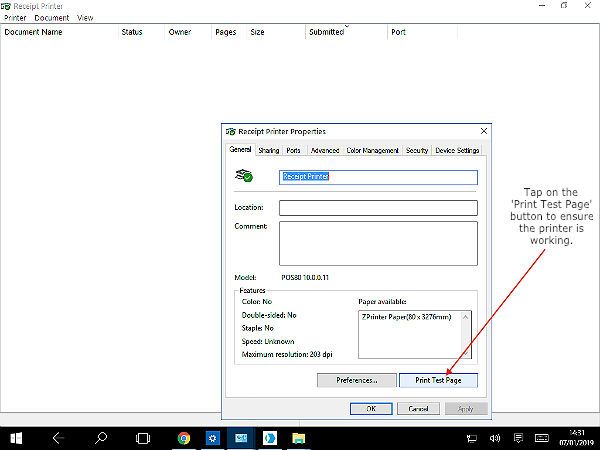
At the bottom right of the resulting popup you'll see a button to 'Print Test Page'. Press that button to ensure that the printer is working and that the driver is installed and configured.
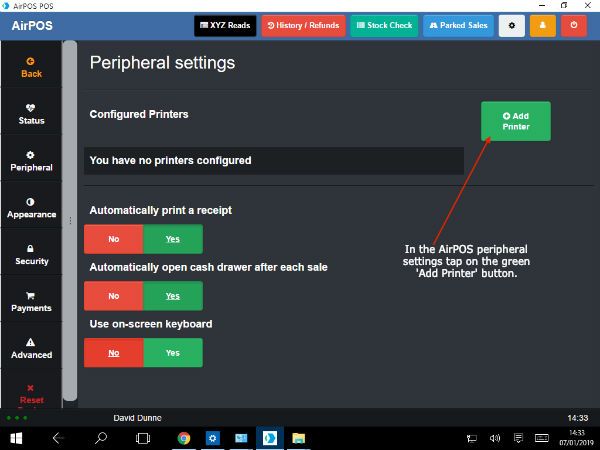
Now that we know that the printer has been added to Windows and is printing we can configure it in AirPOS. We know from the label on the base of the printer that it's connected by USB and is operating in what's known as 'ESC/POS' mode for Epson Compatible printers.
Open the AirPOS application that you downloaded earlier and tap on the settings cogwheel at the top of the screen and select 'Peripheral' from the left margin. In the configured printers screen tap on the green 'Add Printer' button as seen in the following image.
Any printers setup on this Windows machine will appear in a blue box as shown next.
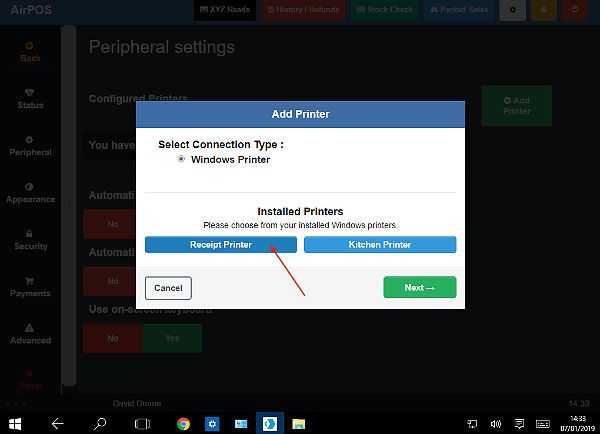
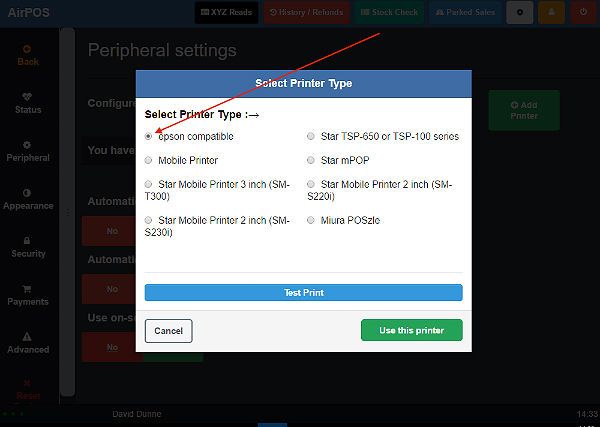
We know from the 'Print Test Page' that the printer that's connected is the one called 'Receipt Printer'. Tap on it to select it and press the 'Next' button. In the printer type popup we'll select the 'epson compatible' option as we know that this printer is operating in 'ESC/POS' mode and is not a Star printer.
Finally tap on the 'Use this printer' button at the bottom of the popup in the image above to save your selections and that's the ePOS Now printer configured to work with AirPOS on this machine.