
AirPOS Pay - Setting Up The BBPOS WisePOS E Card Reader
If you have just received your new 'BBPOS WisePOS E' it will require to be set up properly before it can be used. This article will explain how to set up your new reader while also explaining some of the important settings that can be adjusted to best suit you.
First time setup
https://www.airpointofsale.com/register
When you first receive your reader you will need to;
- Insert the battery by lifting the back cover and sliding it in the slot with the gold connectors on top.
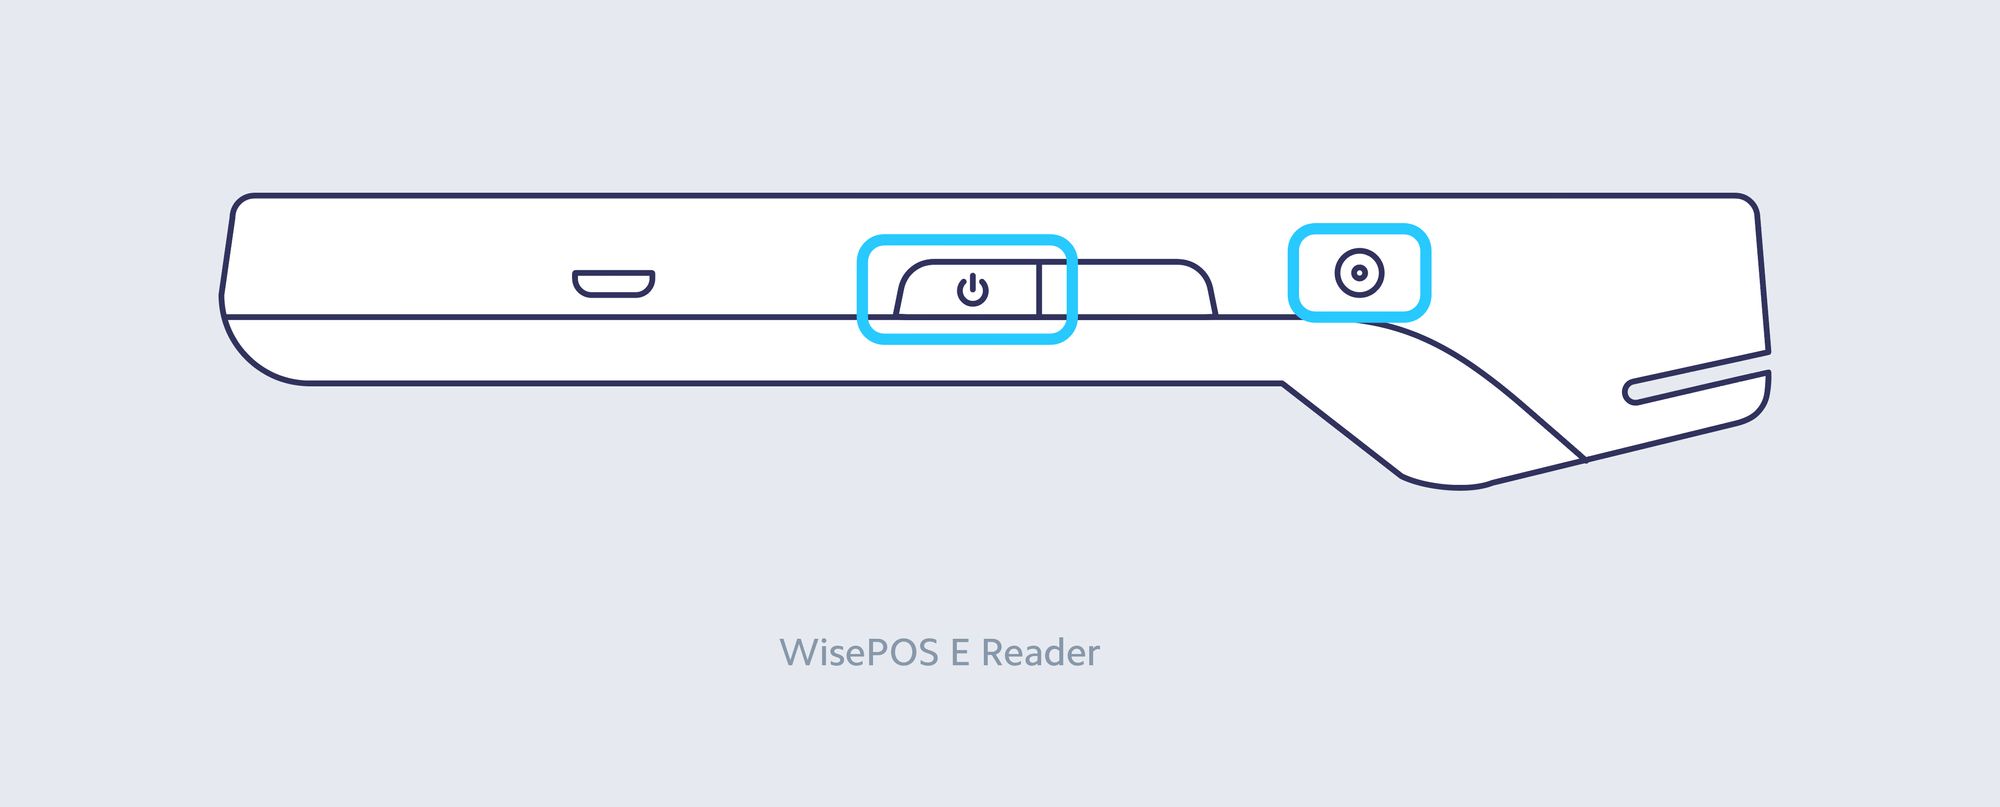
- Charge the reader by plugging the provided cable into the port with the lightning bolt symbol.
- Hold down the power button on the right-hand side to turn it on, and press the button to put it to sleep or wake it up.
- To turn it off, hold down the power button until the option is shown on the screen, then select it.
After your reader is fully charged, you can turn it on by holding down the power button on the right-hand side until the screen turns on. If you want to put the device to sleep or wake it up, simply press the power button. And if you need to power it off completely, hold down the power button until the 'power off' option appears on the screen, and then select it.
If you're using the device on a countertop, it's normal to leave it on for long periods of time. With a full charge, the battery should last for about eight hours.
Once the device has a suffecient amount of charge please continue with the setup process such as selecting your WIFI network.
Please note that your WisePOS E reader and the device you use for your POS MUST BE ON THE SAME NETWORK otherwise they will be unable to connect.
You can message the support team by clicking on the small blue chat box on the bottom right of this page or email us at: Support@airpos.co.uk
Accessing settings
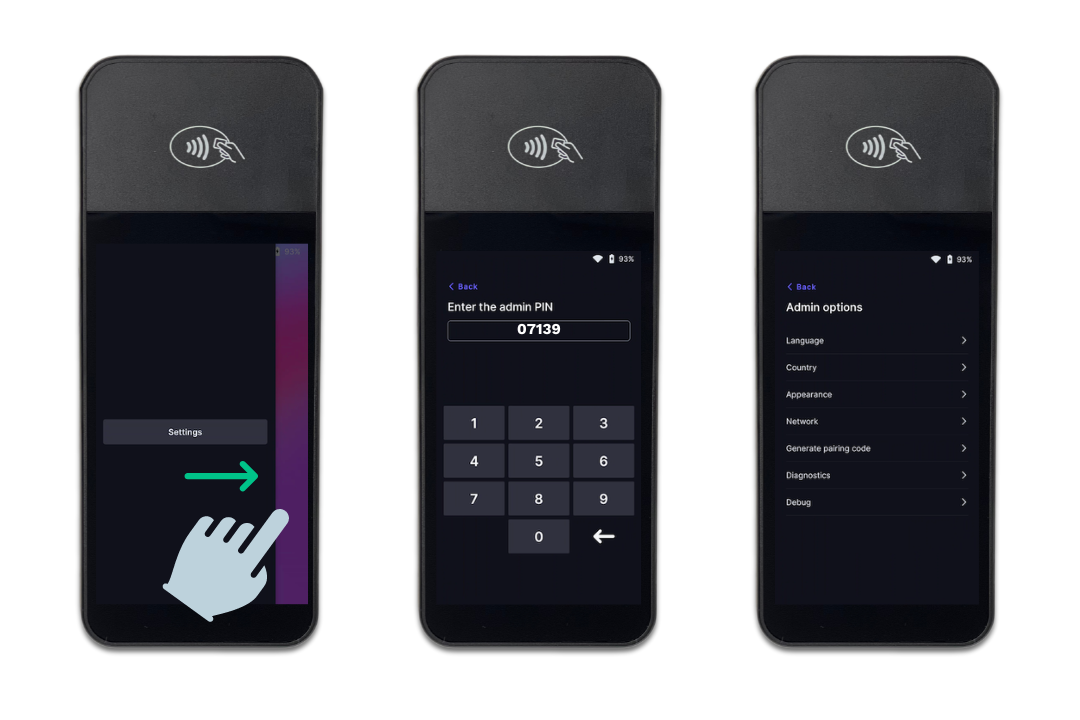
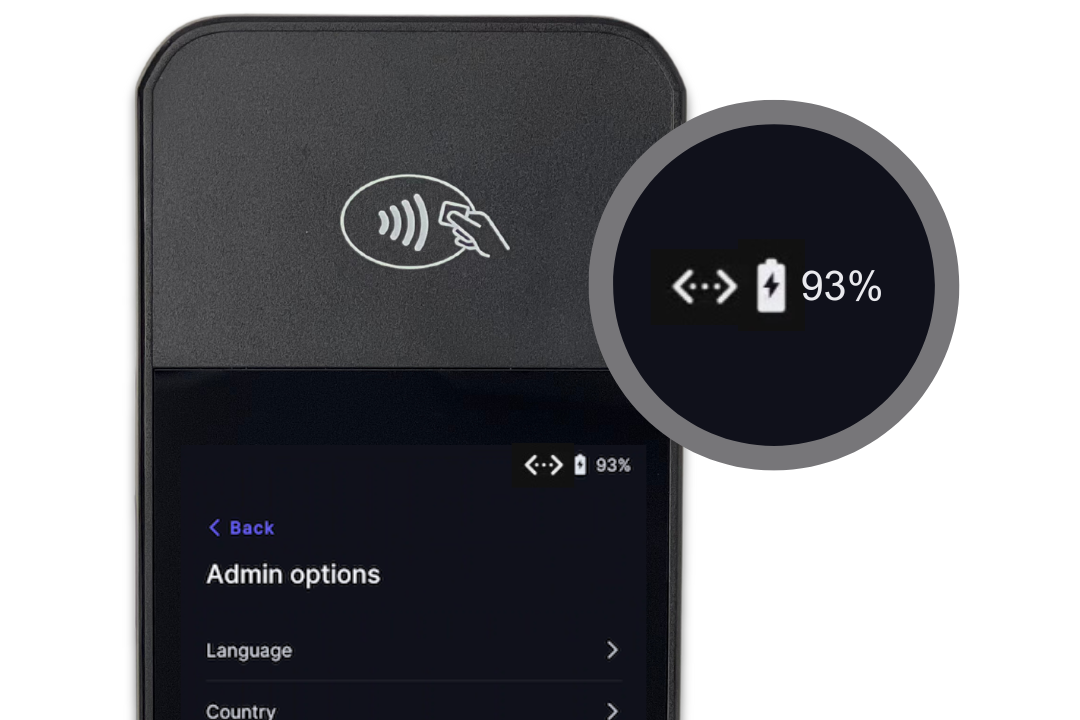
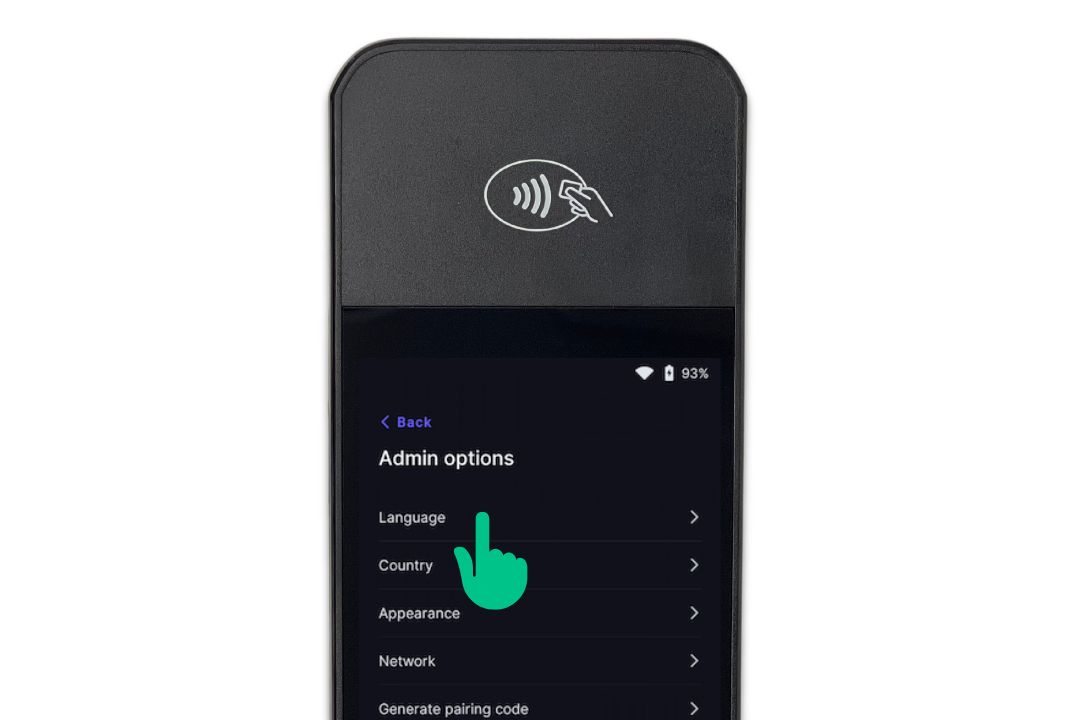
To access the settings on your device, swipe right from the left edge of the screen until you see a button labelled 'Settings' Tap on it and enter the admin PIN 07139. This will take you to a menu where you can update your WiFi settings or generate a pairing code for device registration. You can check the battery status on this screen as well, which is displayed at the top right corner. To exit the settings menu, simply click the back arrow located in the top left corner.
Screen timeout
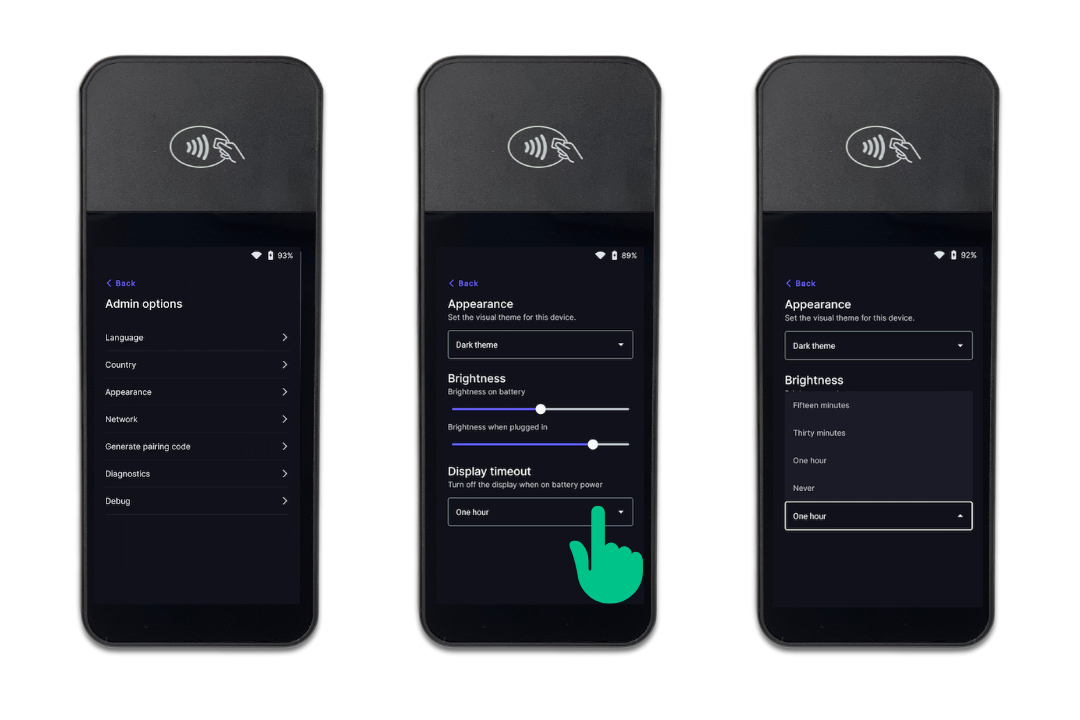
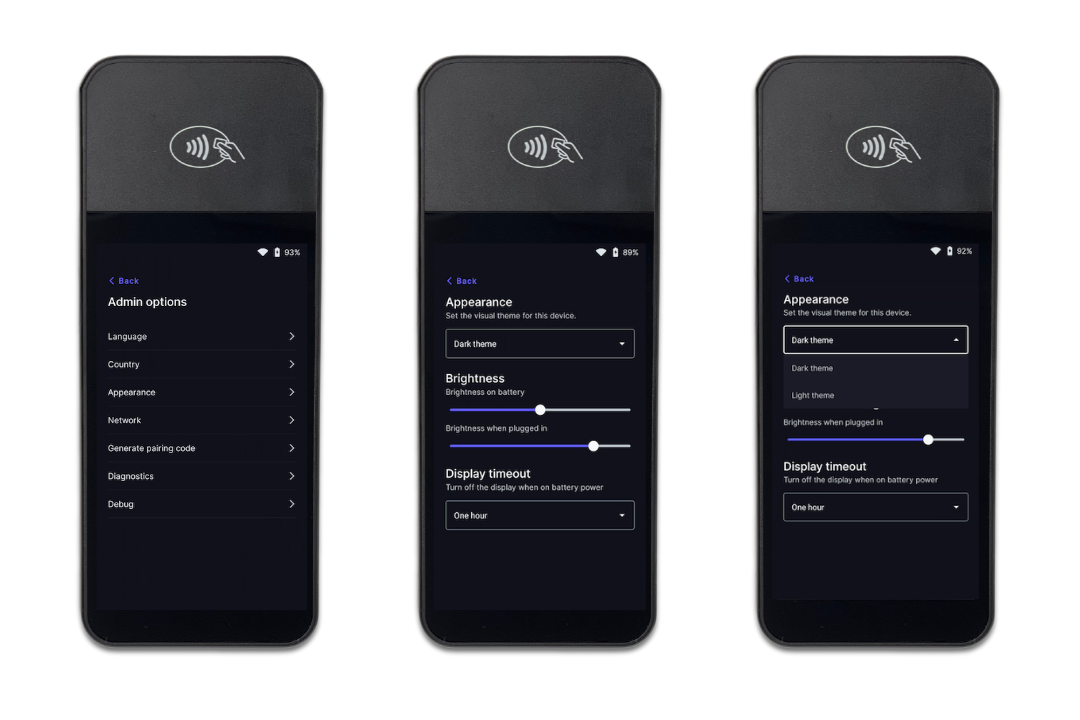
When the reader isn't plugged in, the screen will go black after one hour to save battery life. If you want to change this setting, go to the settings menu and select 'Appearance' You can then choose a different length of time before the screen goes black.
The screen will automatically turn back on when you interact with the device, like touching the screen or making a payment.
Connecting the reader to the internet
The BBPOS WisePOS E is a smart reader that communicates directly with Stripe through a LAN connection. To connect the reader to your local network, it must be on the same network as your point of sale application.
Wi-Fi
To connect your device to a Wi-Fi network, go to the settings and choose the Wi-Fi option. But keep in mind that the device only supports Wi-Fi networks that have a password and are protected by either WPA-Personal or WPA2-Personal encryption.
Ethernet
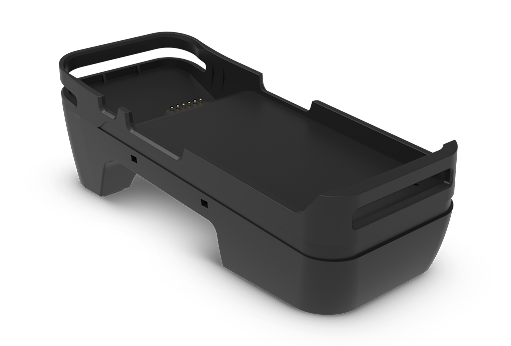
If you want to use Ethernet instead of Wi-Fi to connect your card reader to the internet, you'll need to buy a special dock separately from the AirPOS Pay hardware store. To set it up, you need to connect the dock to your router with an Ethernet cable, and plug the dock into a power source using the cable that comes with it. Then, put the reader into the dock to make sure it's in place. The reader will automatically connect to the internet and try to talk to Stripe as soon as you plug it into the dock.
To set up the dock:
- Connect the Ethernet cable from your dock to your router.
- Connect the dock to power. It has a minimum power requirement of 5V-2A (10W) and includes a charging cable, which you can plug into any USB-A power adapter (not included).
- When both cables are connected, insert the reader into the dock.
Network priority
The BBPOS WisePOS E is designed to prioritize Ethernet connection when available. If the reader is connected to the dock with an Ethernet cable plugged in, it will automatically switch to Ethernet even if it was previously configured for Wi-Fi. When the reader is removed from the dock, it will switch back to the Wi-Fi connection.
Upon reboot, the reader resets its priority to Ethernet. So, if an Ethernet cable is plugged in during start-up, the reader will switch to Ethernet even if it was previously configured for Wi-Fi.
If the reader is docked but there is no Ethernet cable plugged in, it will use Wi-Fi. However, you can still manage Wi-Fi networks on the device regardless of its connectivity while docked.
Changing the UI appearance
The BBPOS WisePOS E reader has a dark theme as its default interface. If you prefer a light theme, you can easily change it in the settings menu. Just go to settings, select 'Appearance', and choose a new theme from the list.
Change the default reader language
To change the language of your BBPOS WisePOS E reader, simply swipe right across the screen to access the settings menu. From there, select your preferred language option to update the reader's language settings.
Connecting the reader to AirPOS
Once you have successfully set up your reader you will now need to connect it to your POS device.
To begin this process please open your POS device and login to an employee account that has the "manager" permissions in order to access the settings
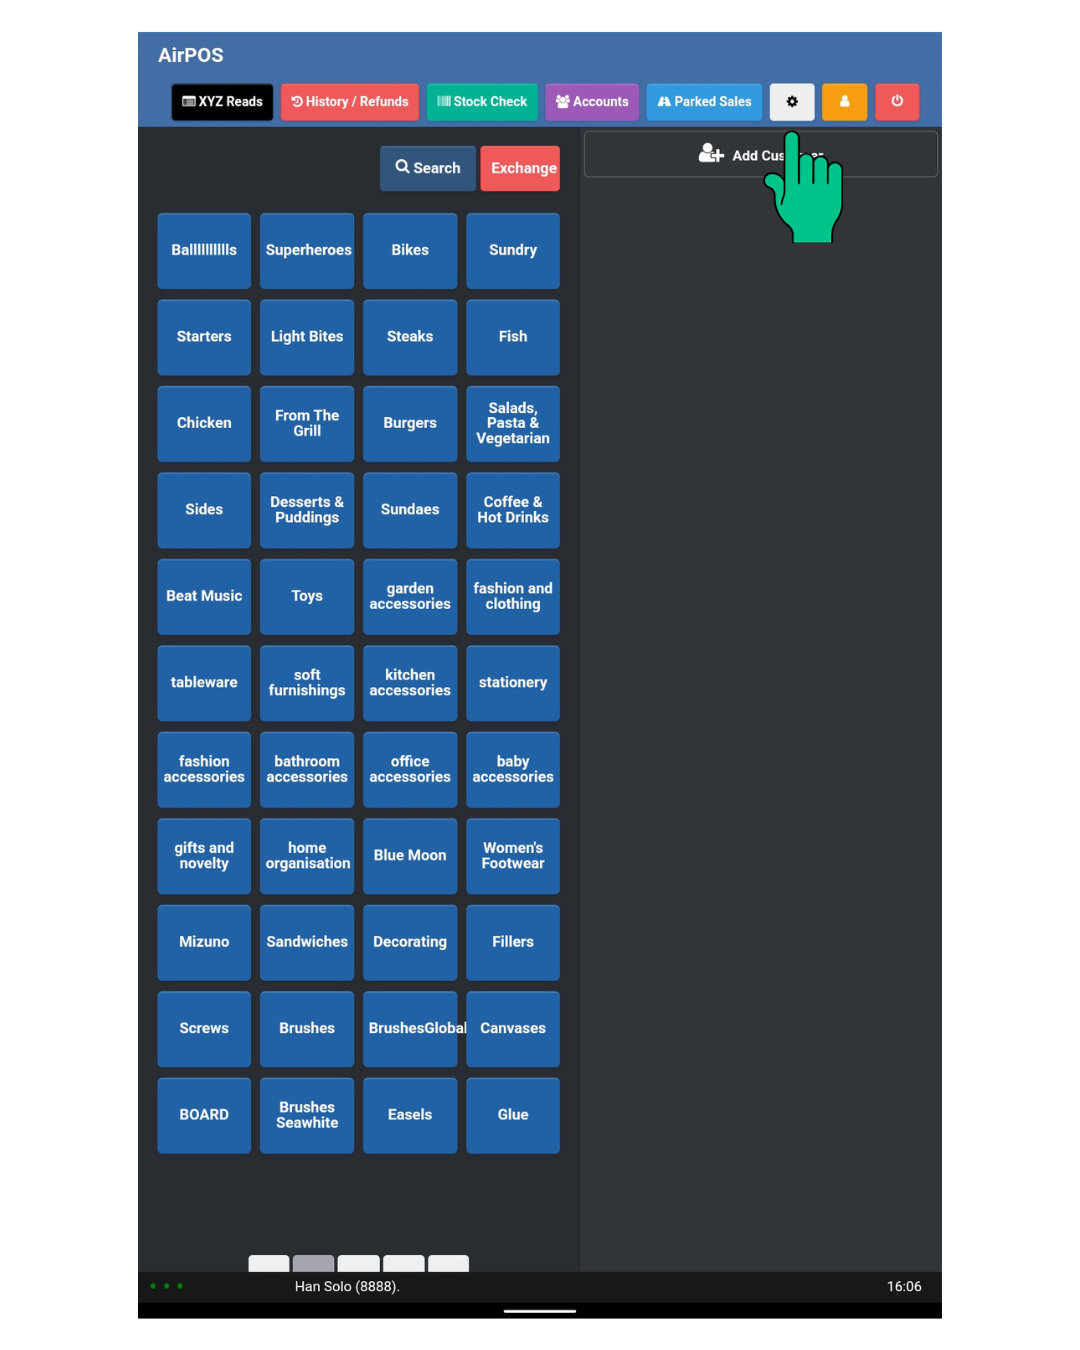
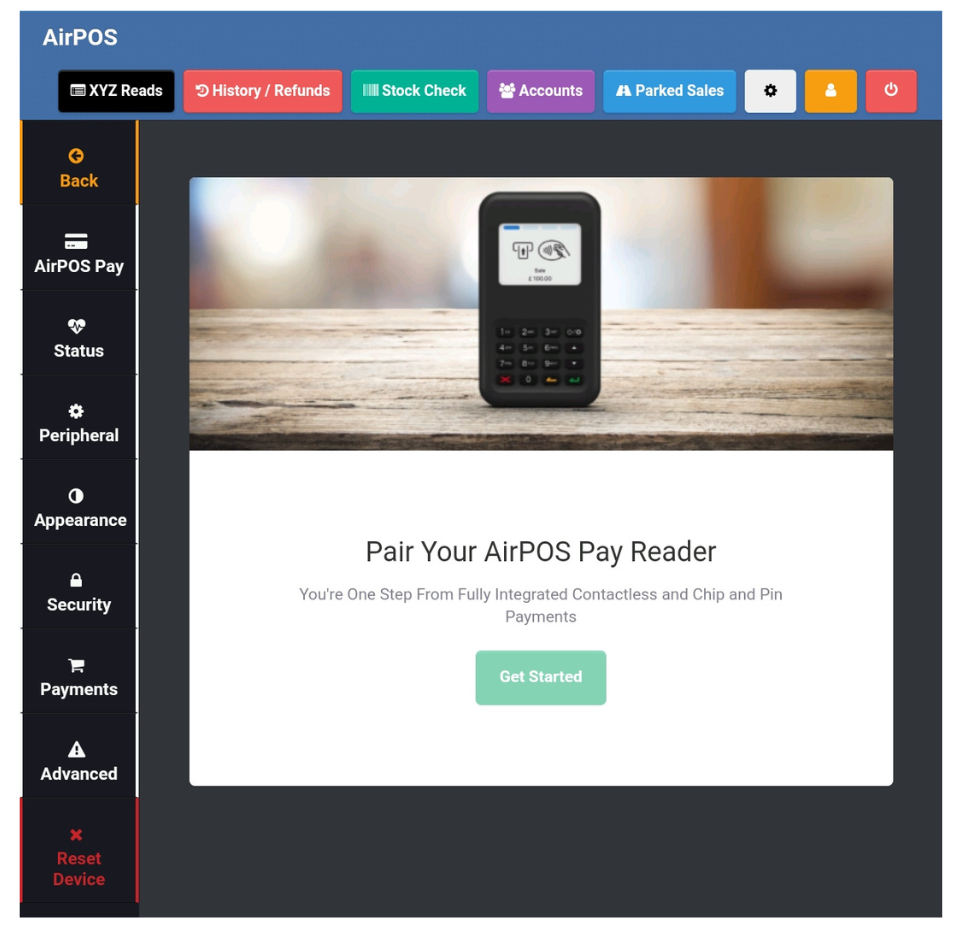
With the settings opened, please tap on "AirPOS Pay" button on the left hand side of the screen and then tap "Get Started" to begin the pairing process.
If you are connected to the internet you should then see you WisePOS-e device appear in the list of available devices. Please select the reader you would like to connect to and wait for it to successfully pair.
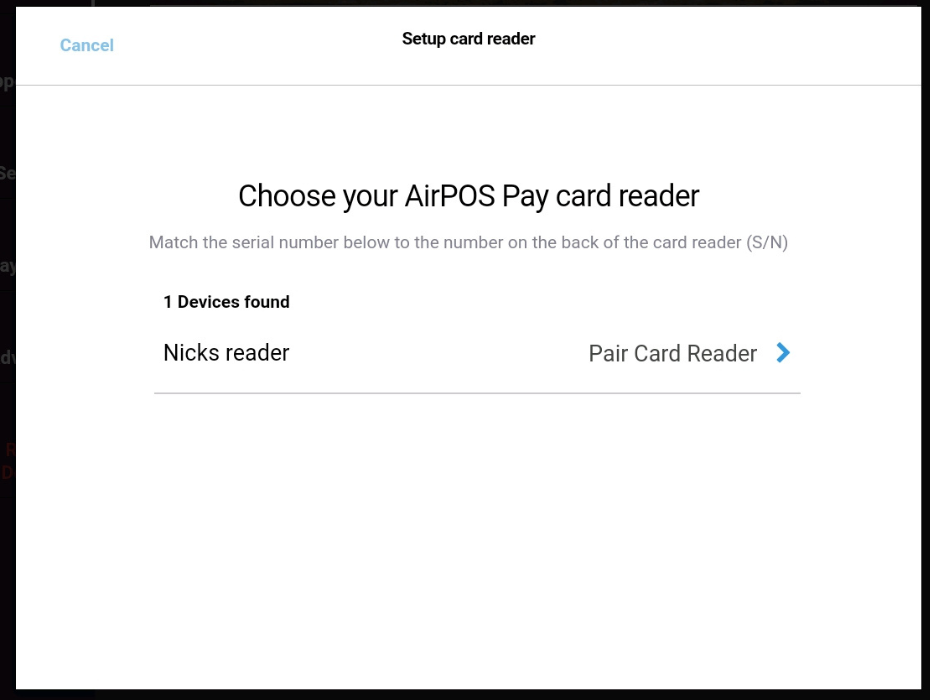
Congratulations! Your WisePOS e reader should now be connected to your POS device and ready to make payments. Simply start a transaction and make sure to choose AirPOS Pay as the tender type to preform a sale using the reader.
Troubleshooting
If you are encountering problems while using your WISEPOS E reader then please follow these troubleshooting steps.
- Check the power source: Make sure the reader is properly charged or connected to a power source. If it's not turning on or seems to be losing power quickly, try charging it for at least an hour or connecting it to a different power source.
- Check the network connection: If the reader is having trouble connecting to the internet or to your point of sale system, check your network connection. Make sure the reader is connected to the same local network as your point of sale application, or try connecting to a different network. If you're using WiFi, make sure your network uses WPA-Personal or WPA2-Personal encryption and is password-protected.
- Restart the reader: Sometimes simply restarting the reader can resolve issues. Hold down the power button until the screen turns off, then turn it back on.
- Update the reader software: Make sure the reader software is up to date. Check for updates in the settings menu and install any available updates.
- Check the cables: If you're using the Ethernet dock, make sure the Ethernet cable is properly connected to both the dock and your router. If the reader is not charging while docked, check the charging cable and power source.
- Reset the reader: If none of the above steps work, try resetting the reader to its factory settings. Note that this will erase all data on the device, so make sure you have backed up any important information before resetting. To reset, go to settings, select Reset, and confirm the action
If none of these steps have resolved your issue please follow this link to access stripes own troubleshooting guide for the WISEPOS E card reader!
https://stripe.com/docs/terminal/readers/bbpos-wisepos-e#troubleshooting
If you still require help please get in contact with AirPOS support by clicking on the small blue box in the bottom right corner of your screen or by emailing support@airpos.co.uk.