
AirPOS Pay - Adjusting your DNS settings for the WisePOS E reader
At times, when setting up your WisePOS e-card reader for the first time, you might face difficulties connecting it to your POS device. This problem could be related to the DNS (Domain Name System) settings on your device causing connection issues. This guide will walk you through changing DNS settings on Windows, iOS, and Android devices to help ensure a successful connection for your WisePOS e-reader.
Windows:
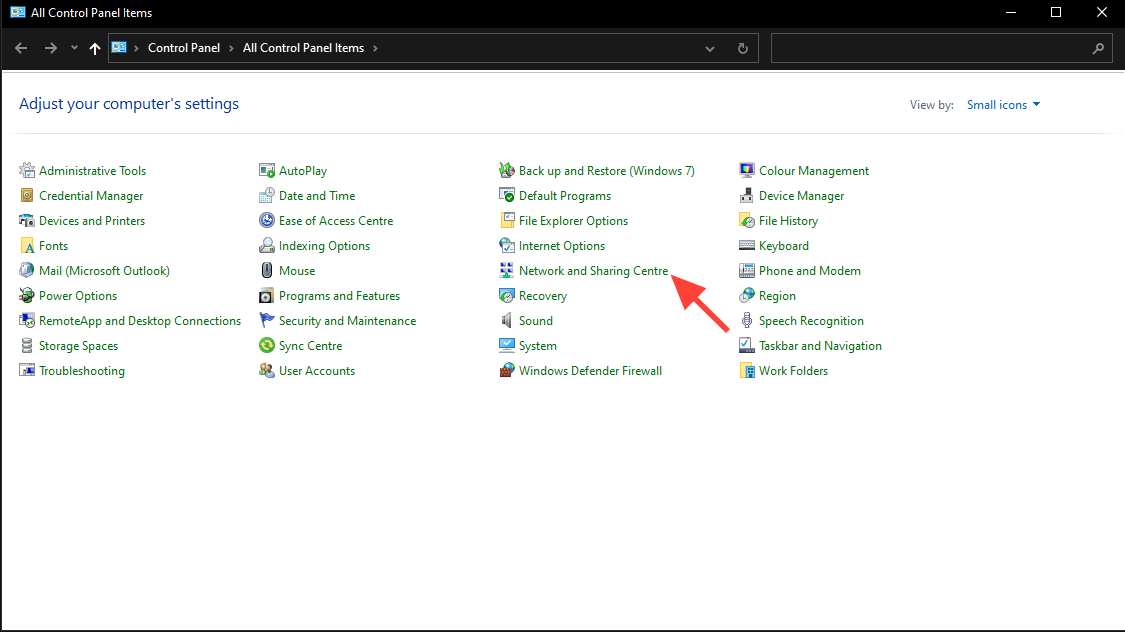
Access Network Settings
- To find your network settings please open the Control Panel by searching for it in the Windows search bar.
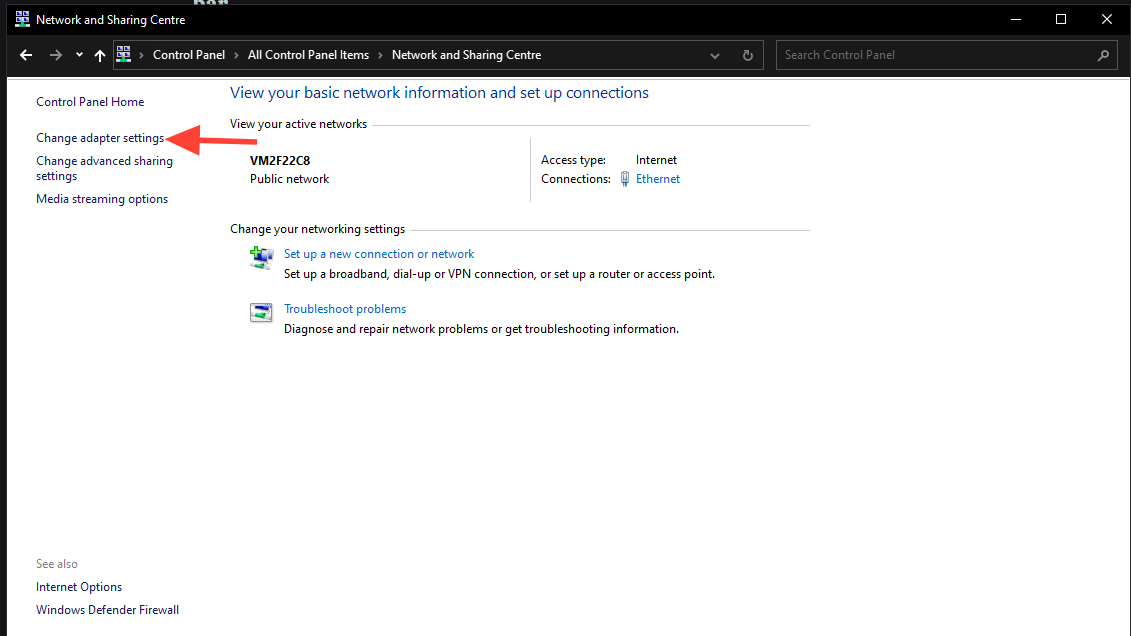
- Click on "Network and Internet" > "Network and Sharing Centre" > "Change adapter settings."
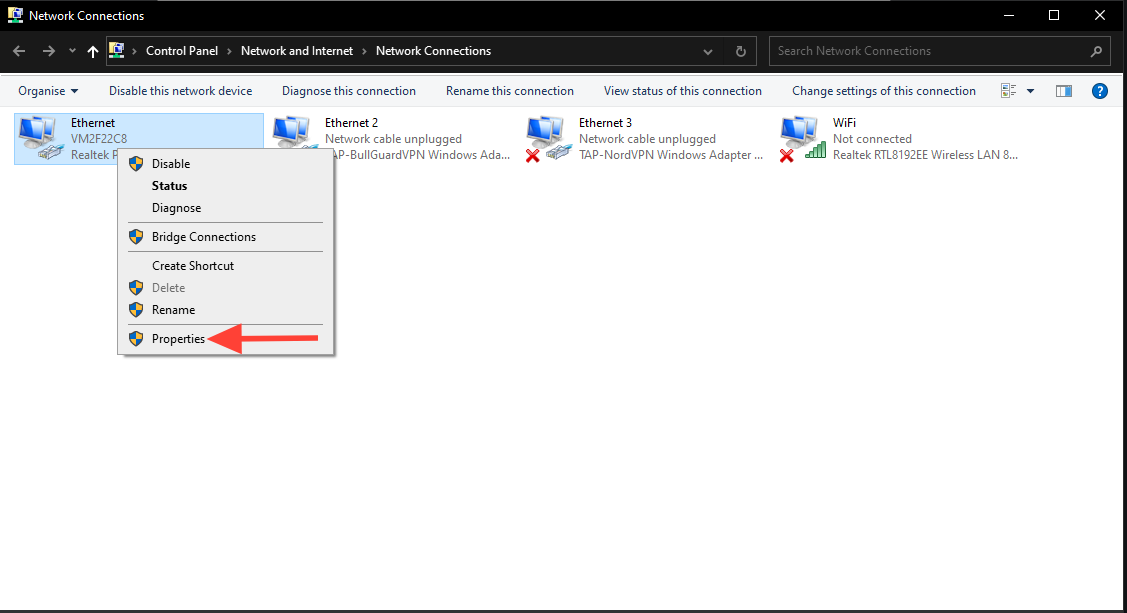
Select Network Connection
- Right-click on the specific connection (Ethernet or Wi-Fi) and choose "Properties."
Navigate to DNS Settings
- In the properties window, find and select "Internet Protocol Version 4 (TCP/IPv4)" or "Internet Protocol Version 6 (TCP/IPv6)."
- Click on "Properties."

Configure DNS:
- In the next window, select "Advanced" and then go to the "DNS" tab.
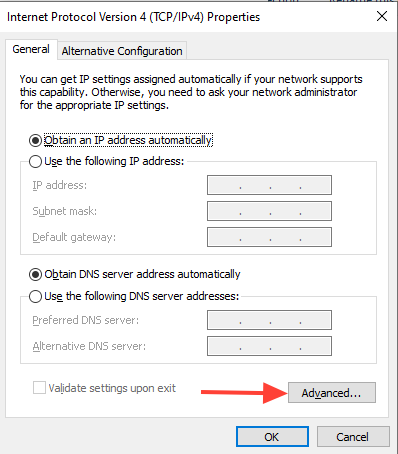
- If there are any listed DNS server IP addresses, note them down for future reference and remove them from this window. Click
- Select "Use the following DNS server addresses" and enter the Google DNS server addresses:
- For IPv4: Preferred DNS server - 8.8.8.8, Alternate DNS server - 8.8.4.4
- For IPv6: Preferred DNS server - 2001:4860:4860::8888, Alternate DNS server - 2001:4860:4860::8844
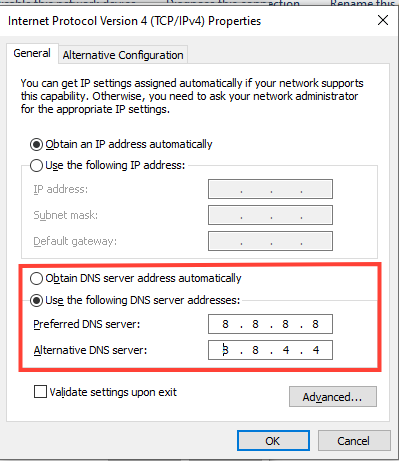
- Click "OK" to save the changes.
iOS
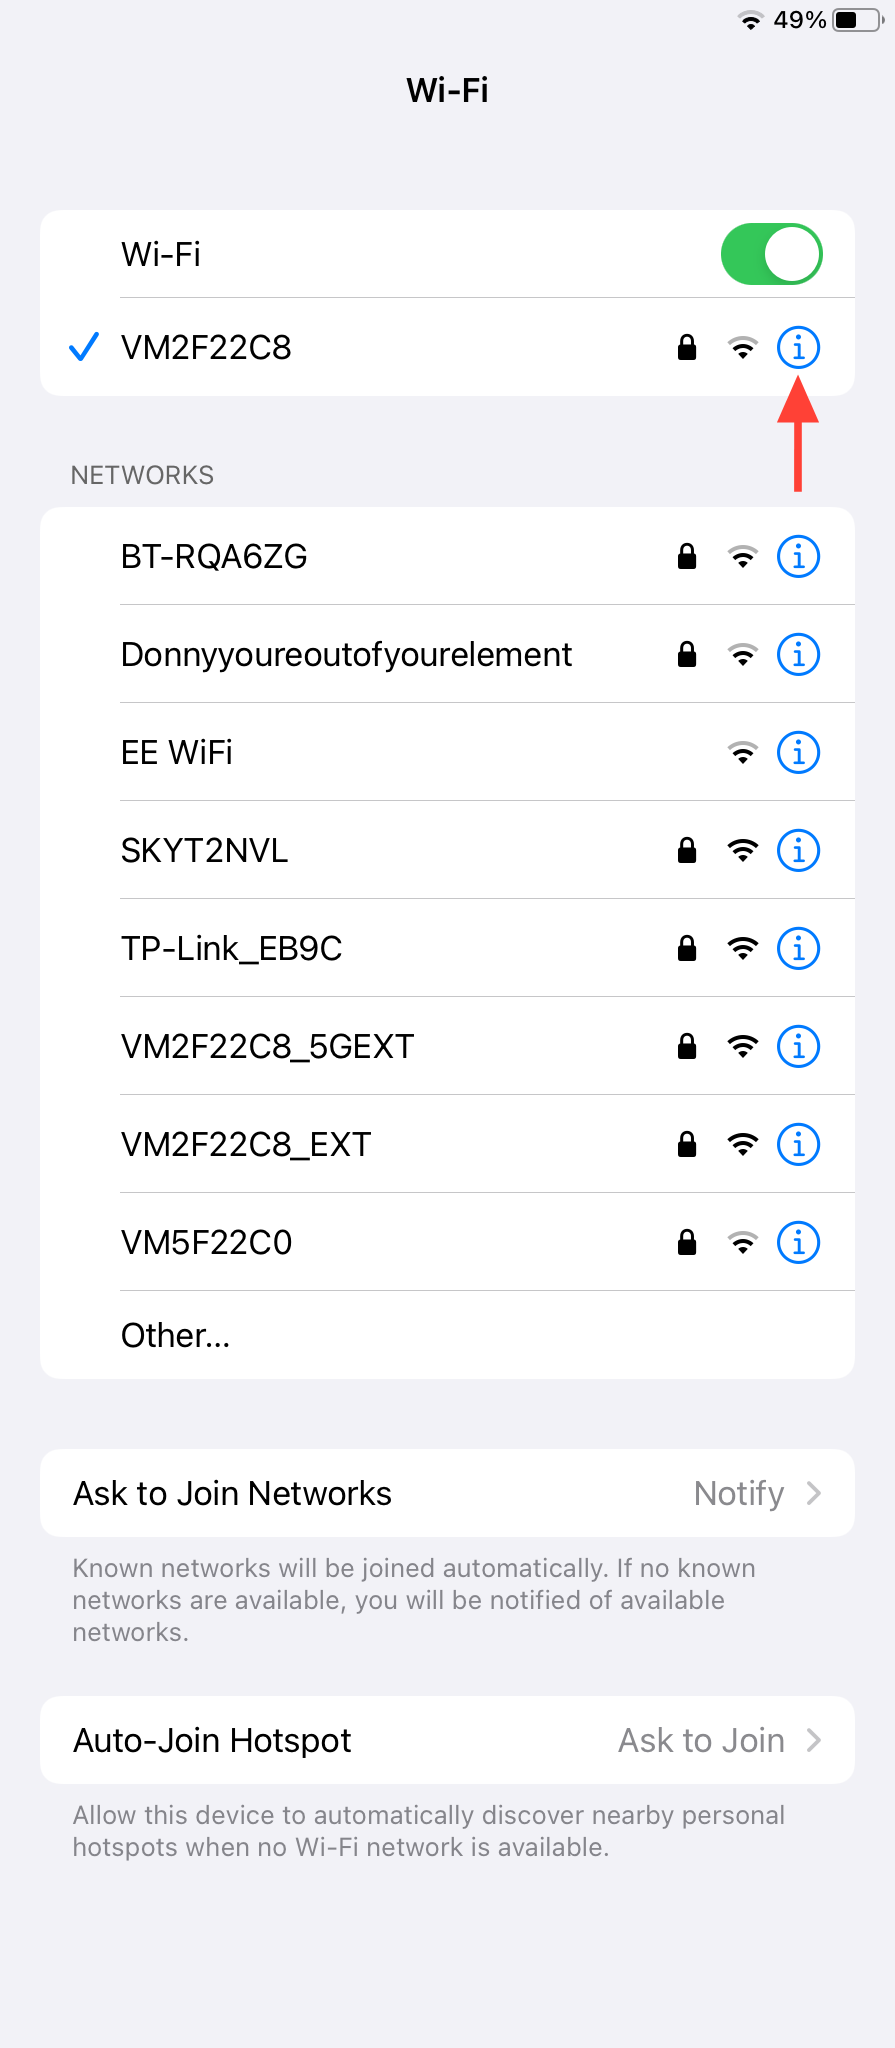
Access Wi-Fi Settings
- Open the "Settings" app and tap on "Wi-Fi."
Select Network
- Find and tap the ⓘ icon next to the Wi-Fi network you want to configure.
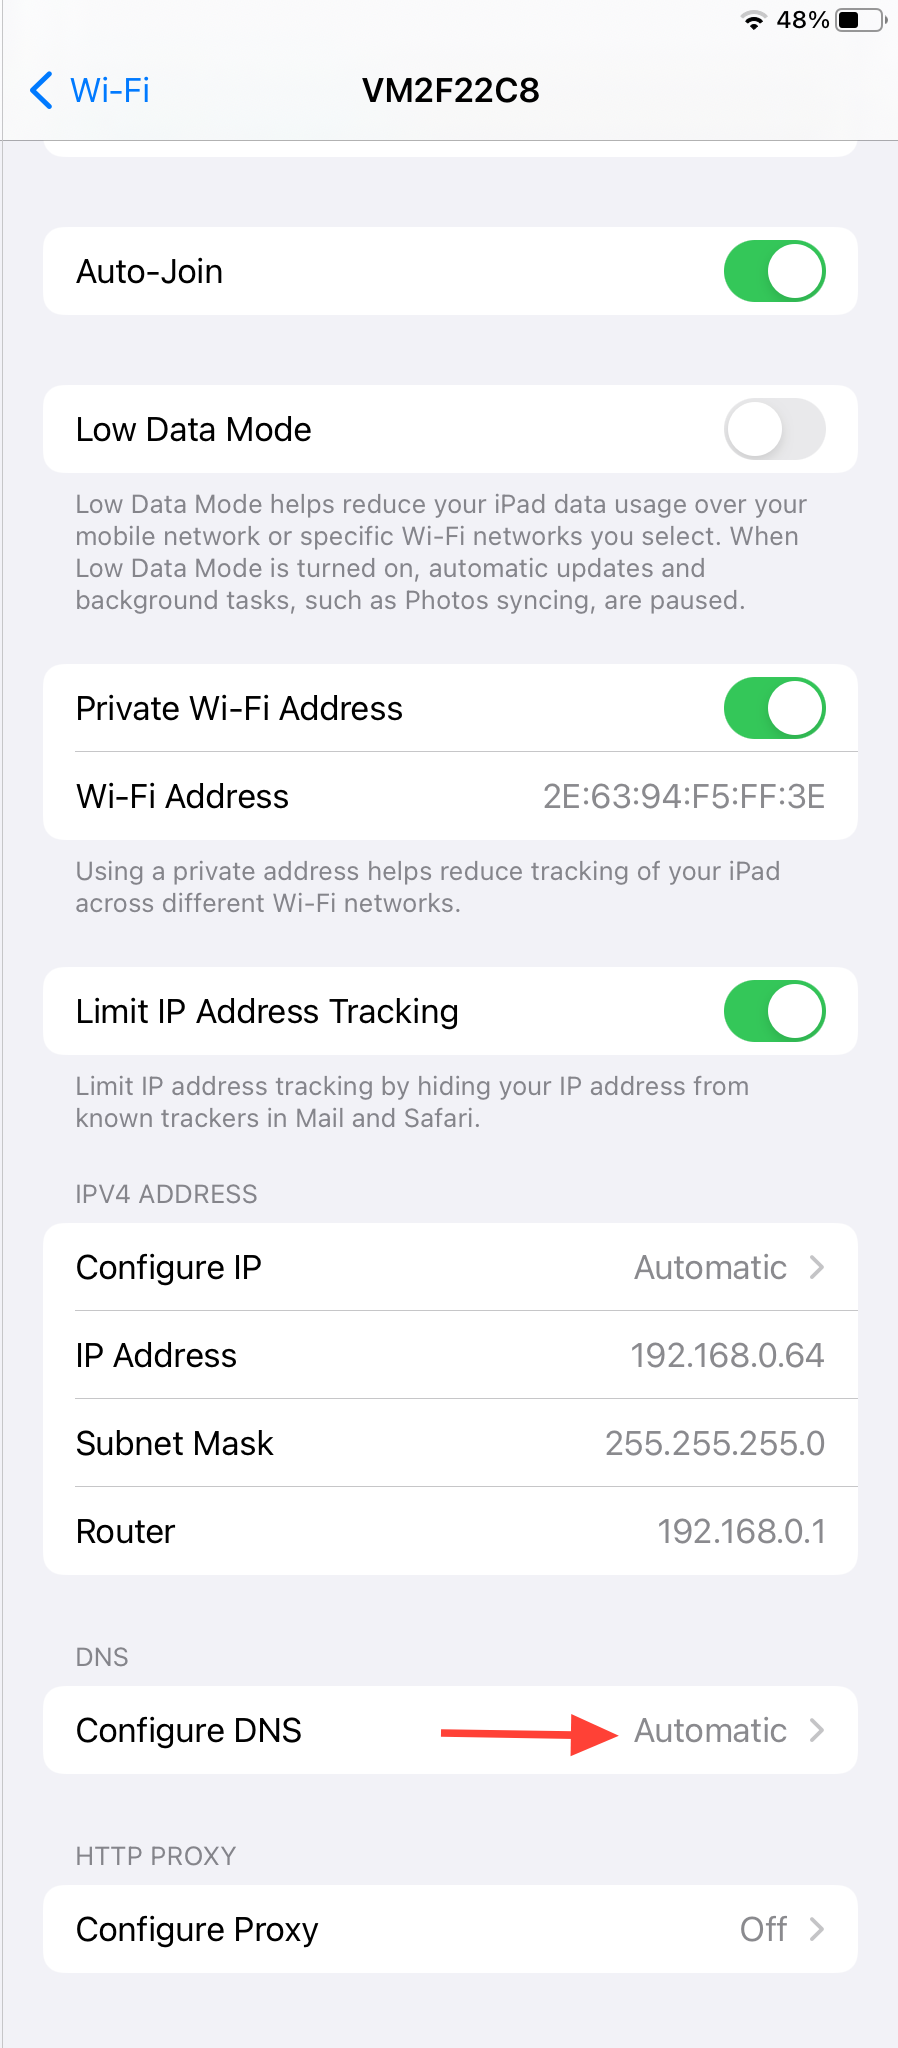
Configure DNS
- Scroll down and tap on "Configure DNS."
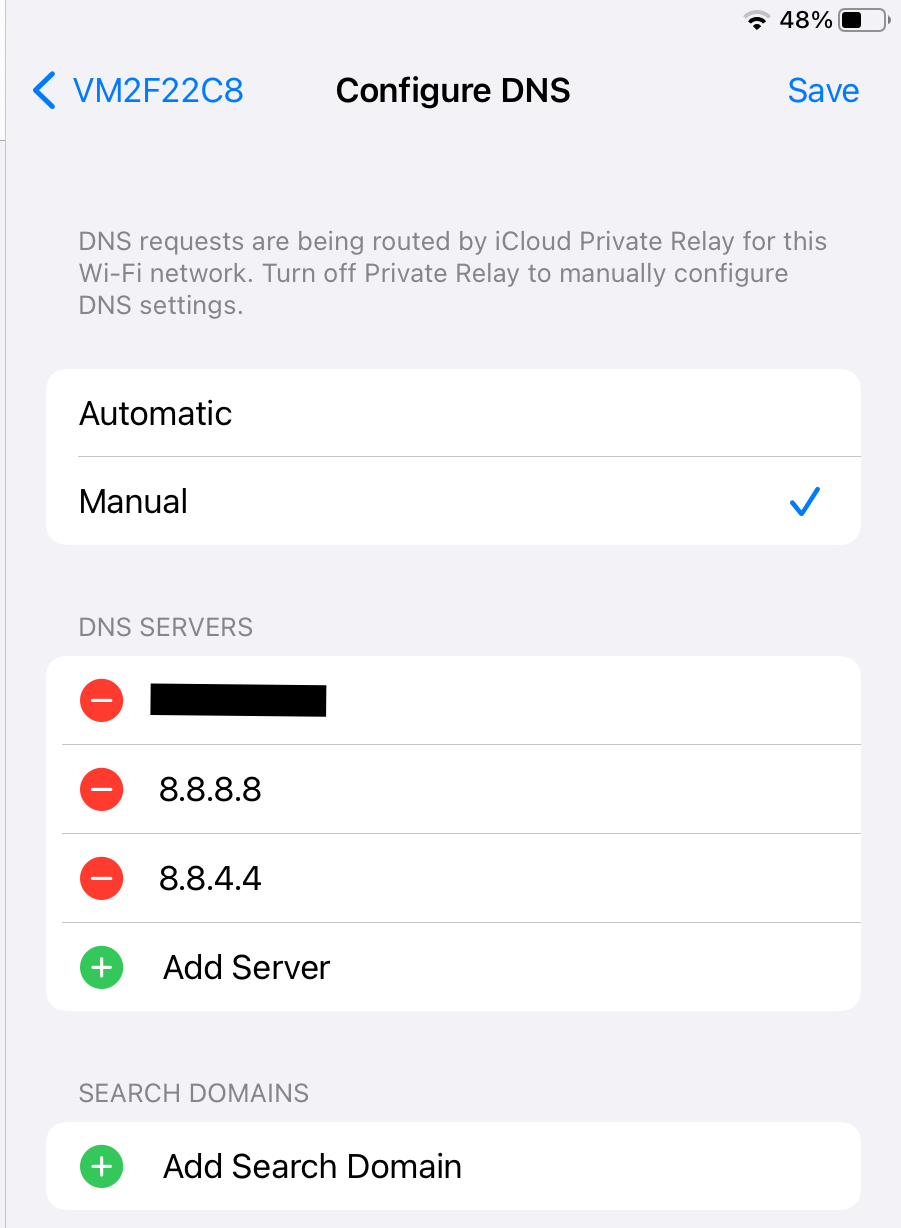
- Choose "Manual."
- Tap on "Add Server" and enter the Google DNS addresses:
- For IPv4: 8.8.8.8 and/or 8.8.4.4
- For IPv6: 2001:4860:4860::8888 and/or 2001:4860:4860::8844
- Tap "Save" to apply the changes
Android
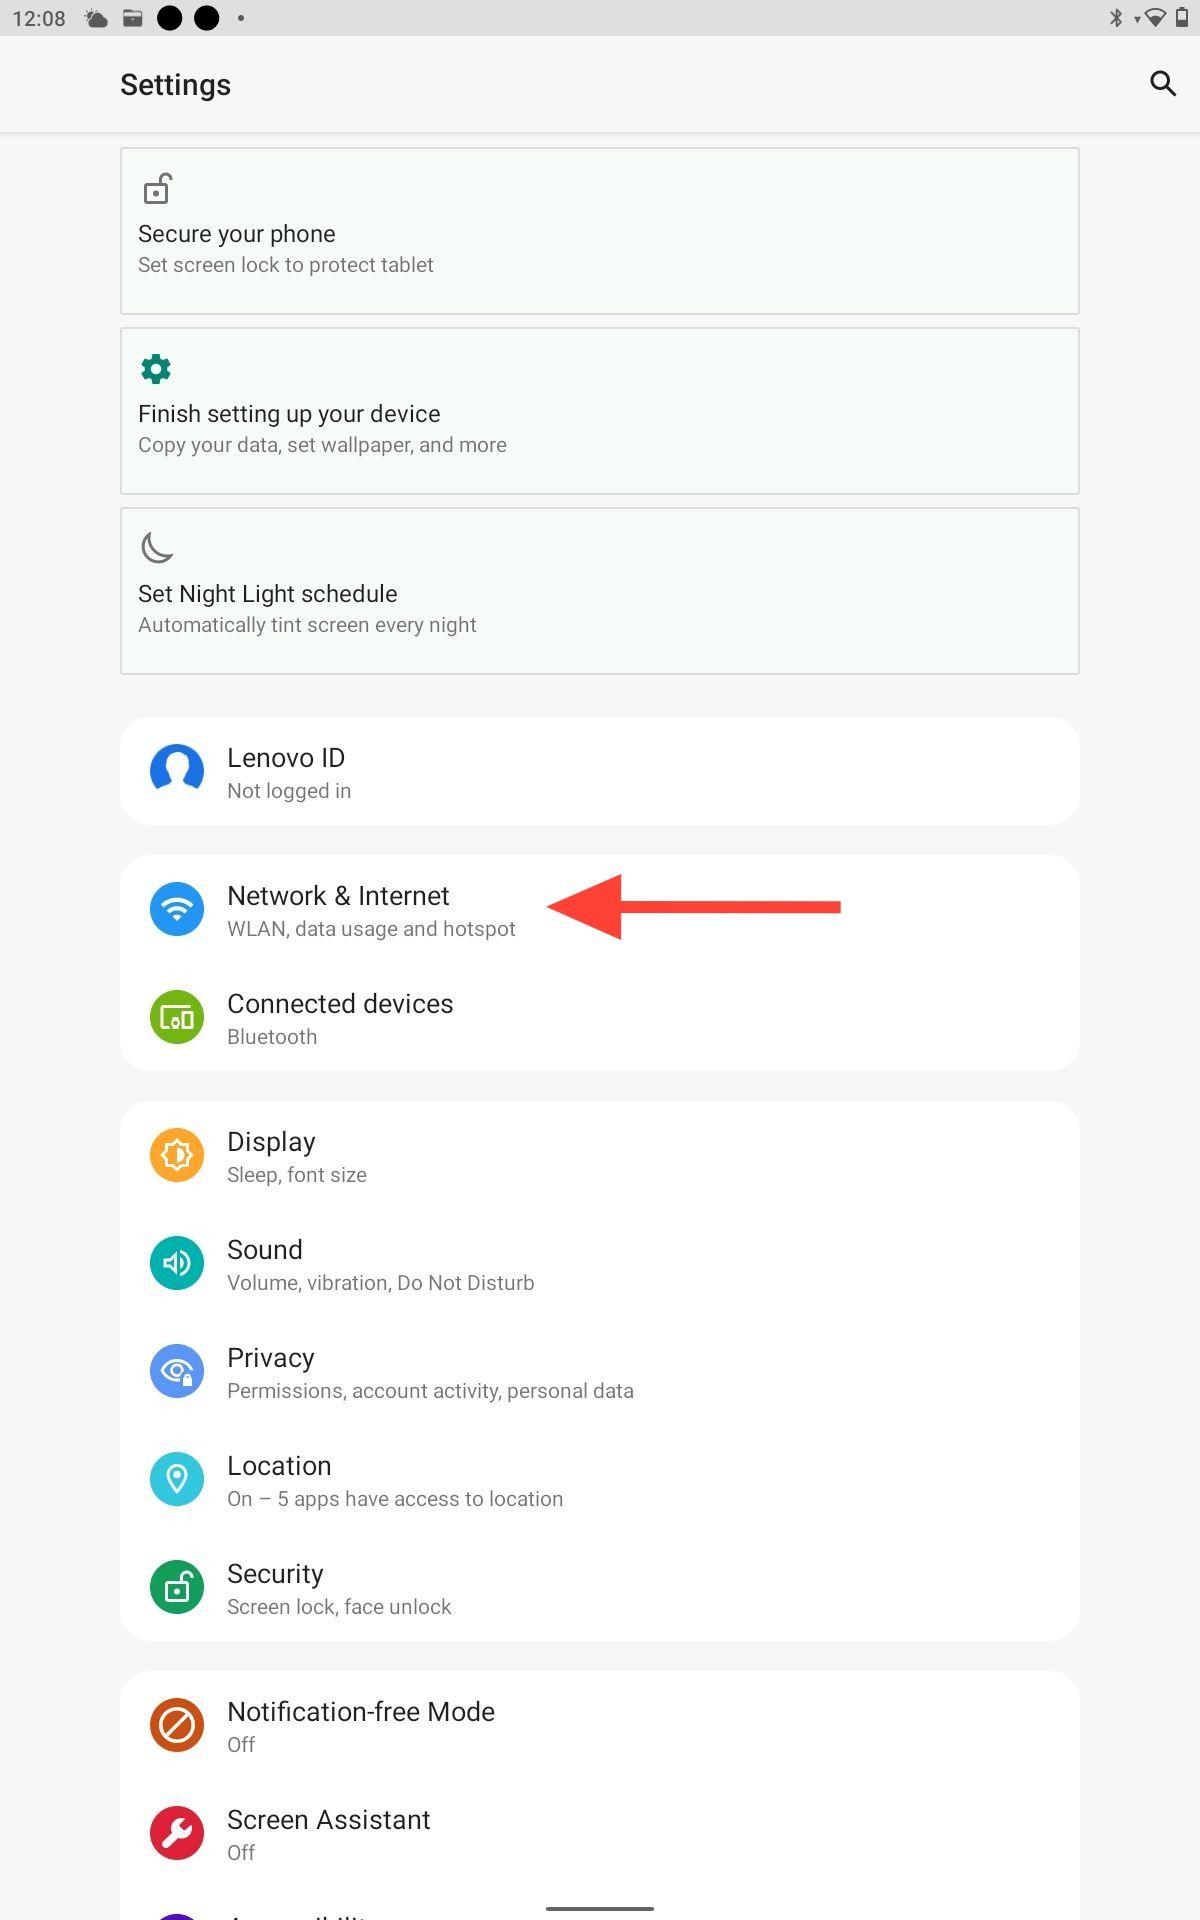
Access Network Settings
- Open the "Settings" app and tap on "Network & Internet."
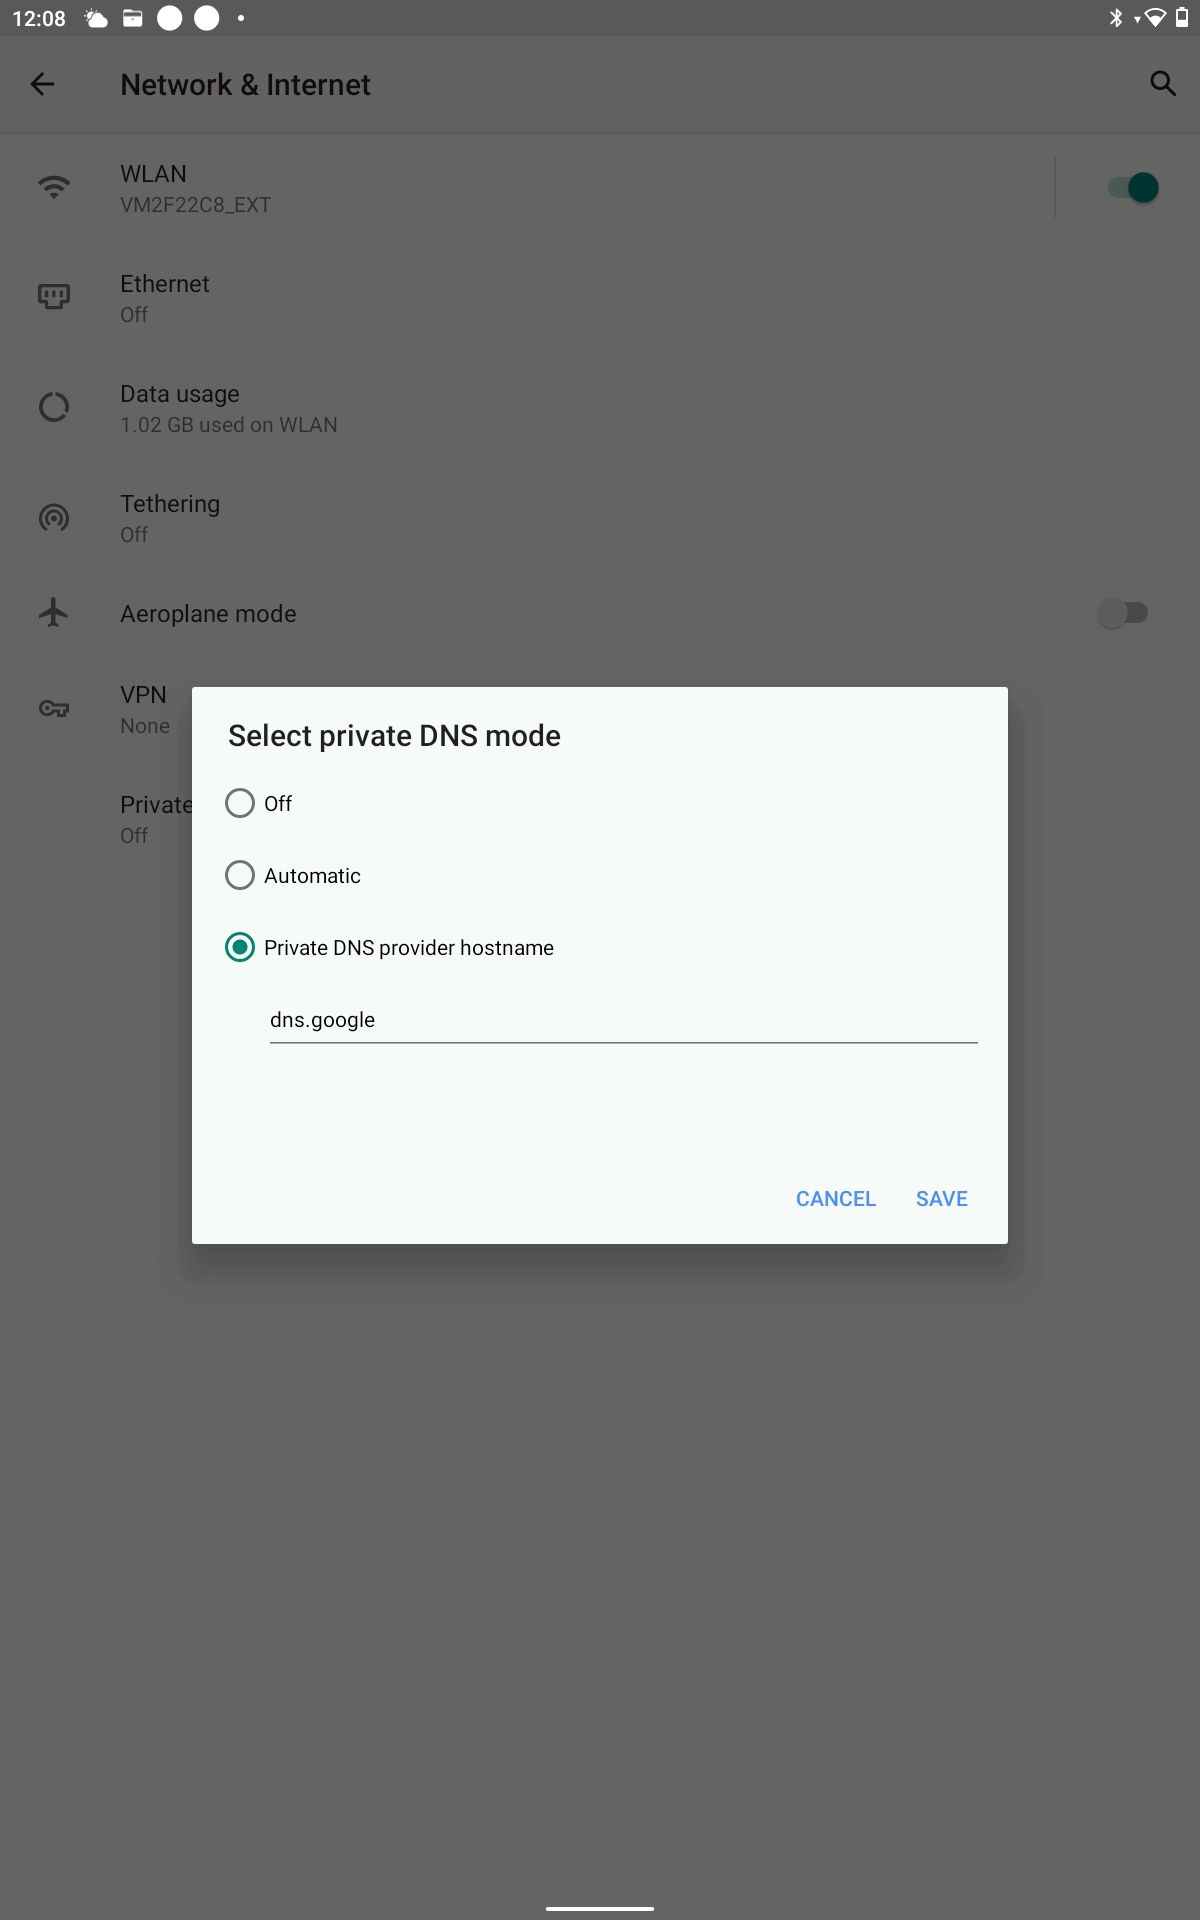
Navigate to Private DNS
- Tap on "Advanced" and select "Private DNS."

Choose Private DNS Provider
- Select "Private DNS provider hostname."
- Enter DNS Provider Hostname:
- Enter "dns.google" as the DNS provider hostname.
- Save Configuration:
- Tap "Save" to confirm and apply the Private DNS configuration.
Conclusion
Once you've adjusted your DNS settings, your WisePOS e-card reader should be able to connect to the AirPOS app smoothly. However, if you're still facing problems with the reader's connection, please reach out to our support team promptly for further assistance.
How do I contact AirPOS Support?
You can reach our support chat by clicking on the small blue box located in the bottom left corner of your screen.

Alternatively, you can email us at Support@airpos.co.uk