
How to Import Your Products in Bulk from a .CSV File Through the Backoffice

Watch the video above or read the article below to find out how to upload multiple products through the AirPOS backoffice.
If you need to add multiple items to your inventory in AirPOS the easiest method is to Batch Import these items through a CSV file that you can create in any spreadsheet software.
To get started with batch importing, firstly download our template CSV file from the AirPOS Backoffice at the top right of the Import Products screen or click Here and open it in your spreadsheet software such as Excel or Google Sheets.

You'll see that the CSV file has a number of headings all of which relate to an attribute of your individual items. These headings are:
Item Name | Cost Price | Retail Price | Barcode | Category | Tax Rate | SKU | Sell Online | Web Price | Weight | Description | Image Filename | Stock Amount (see below).
Some of these field MUST be filled. The product name, the retail price, tax rate and Category if left blank for any product then that product will be skipped.
If you are using Excel please take care that barcodes are not converted to scientific numbers in which case they'll be skipped or have leading zeros removed in which case they won't work. The following article will show you how to avoid that.
How to Format Barcodes in Excel Spreadsheets
If you are using image URLs in your import file, please copy and paste them into a browser first to ensure that they are valid image files and don't just take you to a Webpage. Any products with invalid image URLs will be skipped. You can use tools such as Photobucket or Dropbox or similar and obtain URLs for your images by uploading them to one of these applications.

You can also upload a quantity of stock for your new item in the same upload that creates the item (highlighted in yellow in the screenshot below).

When you've uploaded your file you'll be prompted to 'Confirm' or ' Cancel' the import and you can view the import to ensure that it's correct before pressing the 'Confirm' button. There is also a dropdown list of your locations where you can choose where you want the stock quantities allocated.
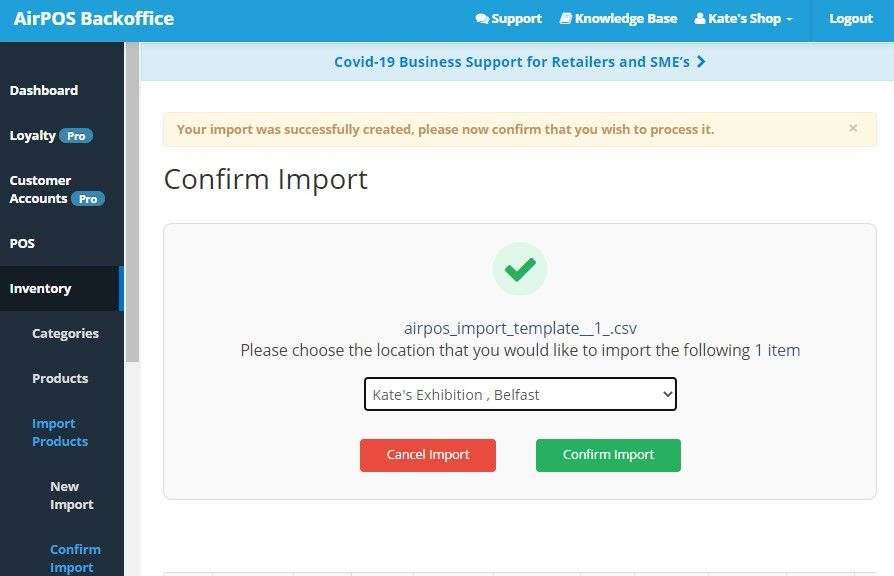
If you have multiple locations you can use the importer to upload stock quantities to one of them (or all of the stock) and then transfer stock to other locations. Please see the following article for how to do that. How To Move Stock Between Locations through the AirPOS Backoffice
The Name, Category, tax rate and Retail prices are mandatory for the upload to work. If the other fields are left blank they will be populated by default with zero in the Cost Price and Tax Rate fields and with N (no) in the sell online field.
You can bulk upload images of your products, (which will appear on your Webstore and on the POS during an Item Lookup) by copying and pasting an image URL into the 'image_filename' field of the template. You can obtain a URL for your images by loading them into Photobucket, Dropbox or similar.
NOTES
- Please note: To import subcategories, simply enter it into the category field but separate it from the parent category by using the pipe symbol ( | ) e.g. Shirts | Formal Shirts. Items in more than one category can be defined by separating the categories with the caret symbol ( ^ ). e.g. Toys ^ Action Figures.
- Each of the products you have entered from your inventory will be assigned a unique identifier so that AirPOS can better manage your stock and sales reporting
- Only use the Batch Import Template to create new items of stock in your inventory. The batch importer does not overwrite existing items and will therefore duplicate them if used to update existing items. If you would like to edit multiple items please see here for How To Use The AirPOS Bulk Editing Tool
When you've completed your spreadsheet name it and save it as a .CSV file. This is the format that the system expects. At the bottom of the 'New Import' page you'll see a prompt to 'Choose File'. Choose the file you've just created and press the green 'Create Import' button as seen below.
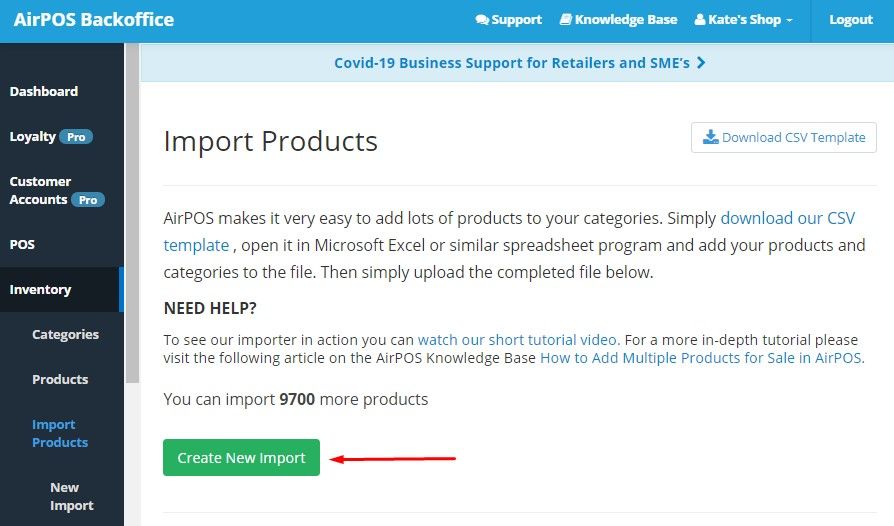
You will then be given the opportunity to view the import and any errors will be reported with a line number and the nature of the error. At this point you can 'Confirm' or 'Cancel' the Import and if you've uploaded stock quantities decide on the location to which they'll be allocated.

Note:
If you're using our Shopify integration to sell online, before you connect your account, make sure all products for upload are fully completed (name, full description, web prices, weight, image, variants [if relevant], etc.) and set to sell online. Set your main Location to "Accept Web Orders" then add web-available stock figures for all relevant products. Finally, complete the Integration steps.