
Connecting your Star Receipt Printer to AirPOS on your iPad
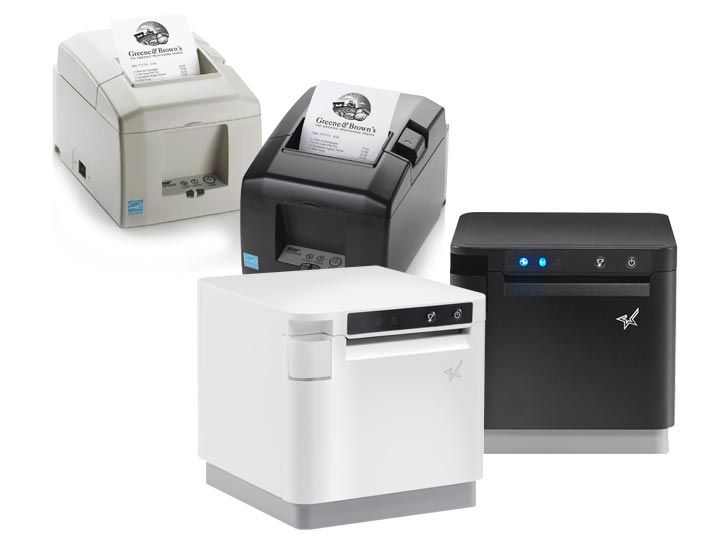
If you have bought a printer manufactured by Star Micronics adding it to your AirPOS POS Setup on your iPad is very straightforward.
NB: If your printer connects by Bluetooth you'll need to pair it with your iPad first. If your printer connects to your iPad with an Apple Lightning cable you'll need to connect the cable from the printer to the iPad first.
If your printer is the Star SM-S220 please look at the article below.
How to Setup a Star SM-S220i Printer for iPad
If your printer is the Star SM-S230i please see the article below.
How to Connect the Star SM-S230i Mobile Bluetooth Printer with AirPOS for iPad
If you have the Star SM-T3001 please see the article at the link below.
How to Setup a Star SM-T300i Mobile Printer for iPad
If your Bluetooth printer is the 'Star TSP650ii BT' press and hold in the 'Pair' button at the back of the printer until the green light starts to blink. Open 'Bluetooth Settings' on your iPad. When the printer appears as 'Star Micronics' tap on it to pair it. If prompted for a PIN the default PIN is 1234. The light at the back of the printer will turn solid blue when connected to an iPad.
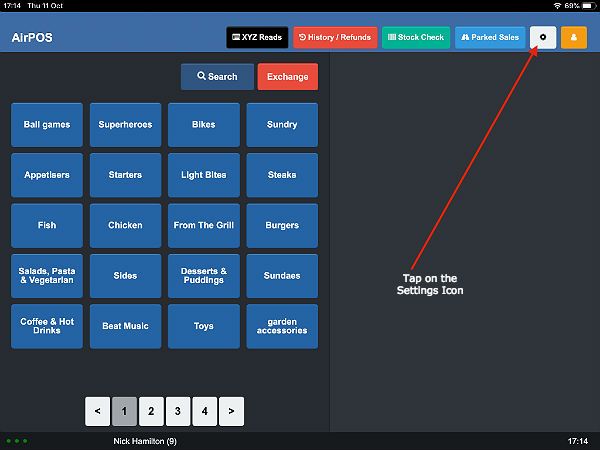
To configure your receipt printer to work with AirPOS on your iPad you'll need to open the AirPOS POS application and tap on the settings icon as shown below.
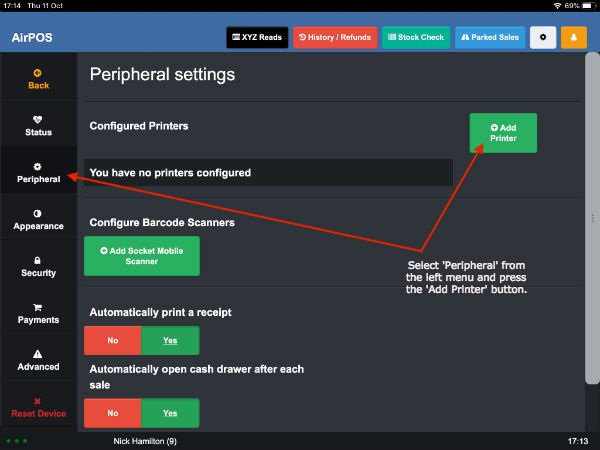
From the left margin select 'Peripheral' and then tap on the green 'Add Printer' button as seen in the screenshot below.
The AirPOS application will begin to search for available printers.
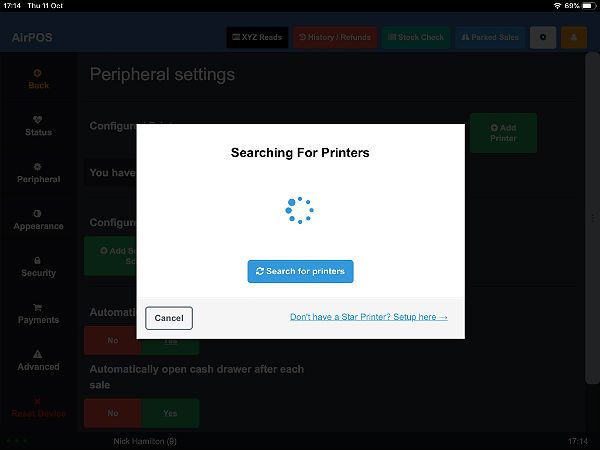
After a short period a list of available Star printers will be displayed including any connected by Bluetooth. Bluetooth printers must be paired with your iPad.
If yours is not a Star printer tap on the link 'Don't have a Star Printer? Setup Here' to add your printer manually.
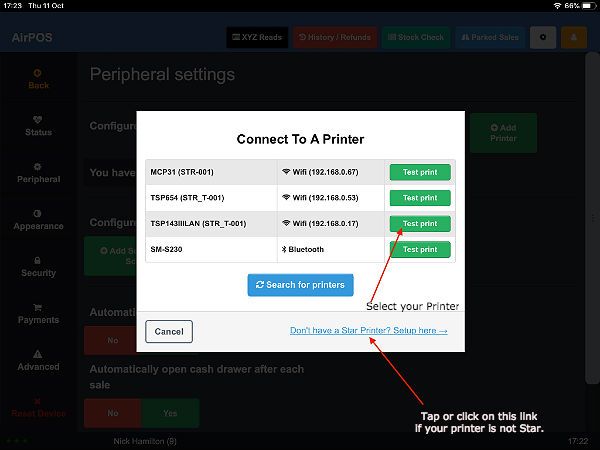
In this case we are adding a 'Star TSP100 Network Printer' with the IP Address of 192.168.0.17 We obtained this IP Address by connecting the printer to a router with an ethernet cable and then while holding down the feed button switching the printer on. This causes the printer to self print it's settings with the IP Address at the bottom of the self print.
In most cases this may not be necessary as most people will only have one Star printer in their physical environment and the AirPOS application will find the printer provided that it is online.
If you tap on the green 'Test Print' button to the right of the listed printer you'll see a popup like that below.
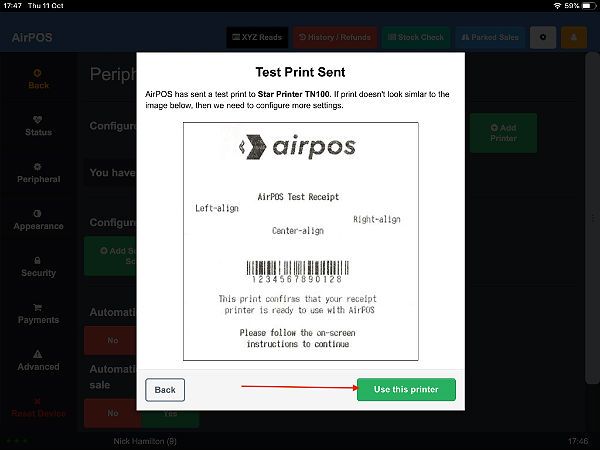
Just tap on the green 'Use this Printer' button and that's your Star Printer configured for use with AirPOS on your iPad.
While most AirPOS users have printers manufactured by Star Micronics we also support Epson and Epson compatible printers. If your printer is not a Star printer you'll need to add it manually in AirPOS. When you've tapped on the green 'Add Printer' button in your 'Peripheral' settings tap on the link 'Don't have a Star Printer? Setup here'.
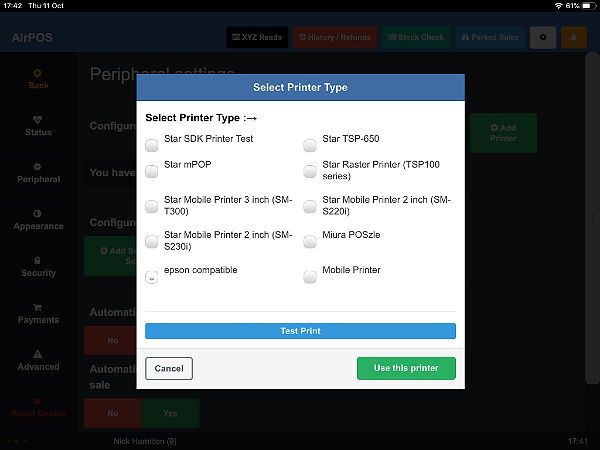
If your printer is Bluetooth then pair it to your iPad. When you select Bluetooth in the add printer screen it should appear in a blue box on the screen. Tap on it then on the 'Next' button. In the printer type popup select the 'epson compatible' option and press the green 'Use this printer' button.
In the case of an Epson network printer we'll add an 'Epson TM-T20'. The IP Address is 192.168.0.177 and we obtained this by inserting a pin into the pinhole at the back of the printer just below the ethernet port with the red arrow in the image below.
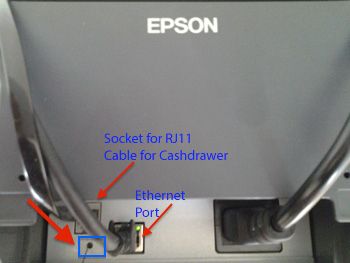
This will cause the printer to self print with it's IP Address at the bottom of the self print. With the 'Epson TM-T88' series the self print can in most cases be triggered by turning the printer on while holding down the feed button.
In the 'Add Printer' screen tap on Network and type the IP Address into the box beside IP Address then press 'Next' as shown below.
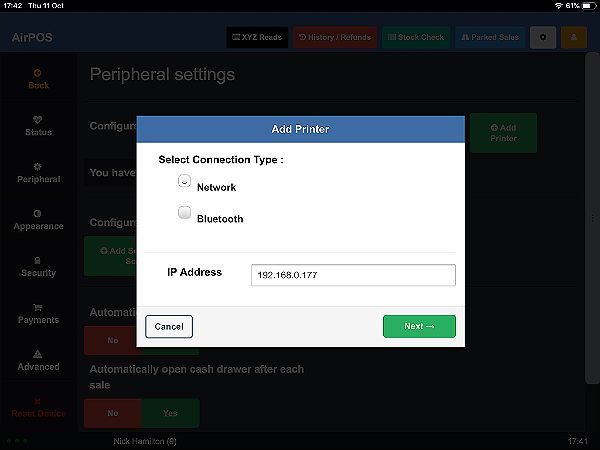
You'll see the printer type popup. Tap on the 'Epson compatible' option and press the green 'Use this printer' button.
That is your printer configured to use with AirPOS.