
AirPOS Starter Pro Bundle Setup Guide on iPad

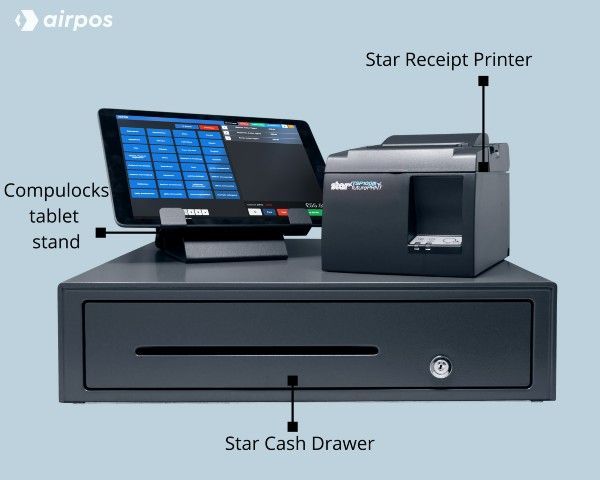
The Starter Pro Bundle Hardware includes a cash drawer, receipt printer and secure lockable tablet stand. The starter bundle is available for both iPad and Android devices.
For Hardware please visit our hardware store below.
Connecting the Printer.
**We strongly recommend a brand new dedicated Apple lightning cable that is not also used for charging iPhones or other iPads.**
The TSP143IIIU USB Printer from Star Micronics is able to be connected directly to an iPad using the Apple Lightning Cable. This allows direct communication between the iPad and the printer while simultaneously charging. At the back of the printer there are three ports as shown below.
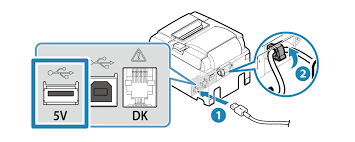
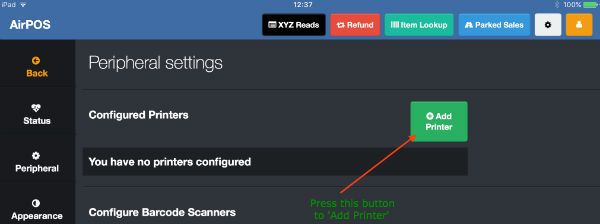
Plug the lightning cable into the iPad and the USB end into the left port ( 1 above ). Make sure that the charging symbol at the top right of your iPad is green signifying that the printer is connected. The next step is to configure the printer in AirPOS. Open the AirPOS application and tap on the settings cogwheel at the top of the screen. Select 'Peripherals' from the left margin. Press the 'Add Printer' button in your peripheral settings as shown below.
In the next screen you'll see a popup to say that AirPOS is 'Searching'.
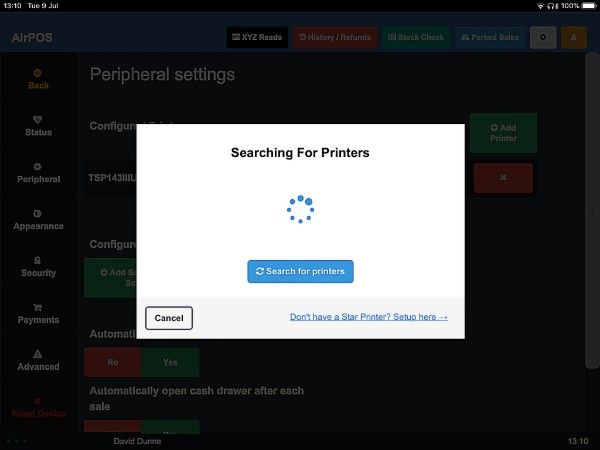
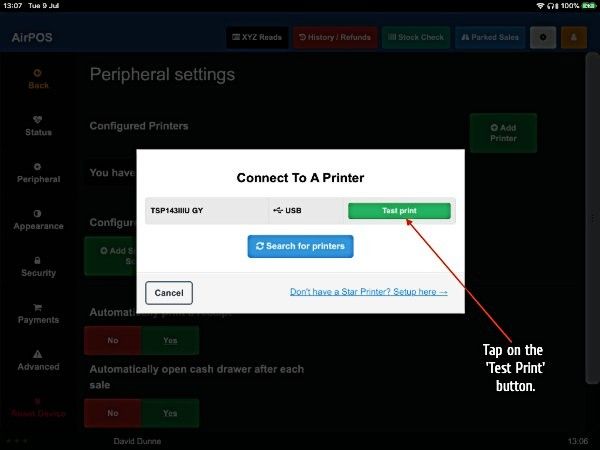
After a few moments you'll see your printer listed as 'TSP143IIIU GY' with a USB symbol to the right of it. Tap on the 'Test print' button.
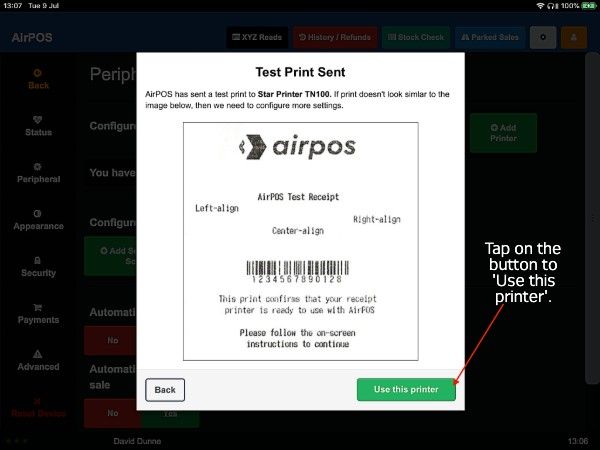
You'll see an image of the test print with a button to 'Use this printer'. Press that button to save the printer in AirPOS and that's the setup complete.
Connecting the Cash Drawer.
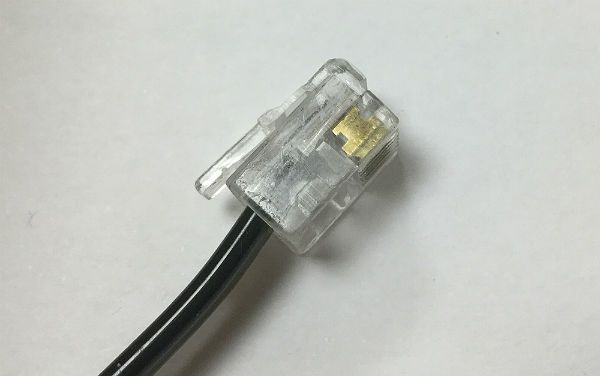
Leading from the back of the cash drawer is a cable the end of which looks a bit like a telephone connection or small Ethernet connection. This is known as an RJ11 cable.
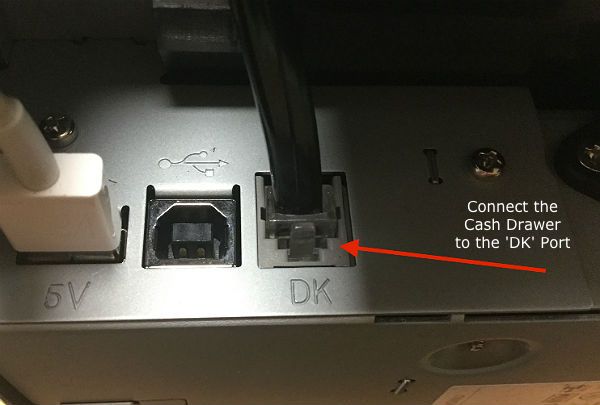
The Cash Drawer is kicked by an electrical impulse from the printer so the cash drawer connects into the printer at the port marked ‘DK’ (Drawer Kick) using this cable which comes out of the back of the cash drawer.
Tablet Stand. The Maclocks Universal Tablet Holder and Lock is an easy and simple way to securely display your iPad or Android tablet.

The base of the stand acts as a secure anchor point for the included cable lock when it is bolted down to the counter-top surface. First clean an area on the back of the tablet with the included alcohol prep pad. The adhesive plate lock uses 3M VHB bonding tape, an industrial strength solution that if given the recommended amount of time to set (10 hours is ideal to allow for the bonding process to finish), is extremely secure. Peel the backing from the plate lock and apply it to the cleaned area at the back of the tablet
Included is the cable lock that "ties" everything together and secures the tablet. The security cable lock first needs to be tethered around a secure object, anchor point or wired through the bolted stand only then do you lock it to the adhesive security slot plate (after tablet bonding process) to fully secure the tablet.