Customer Accounts is a feature to allow your customers to have an account which they can pay down over a period of time. When you go into the backoffice you'll see a screen similar to the image below with a link in the left margin for 'Loyalty' and 'Customer Accounts'.
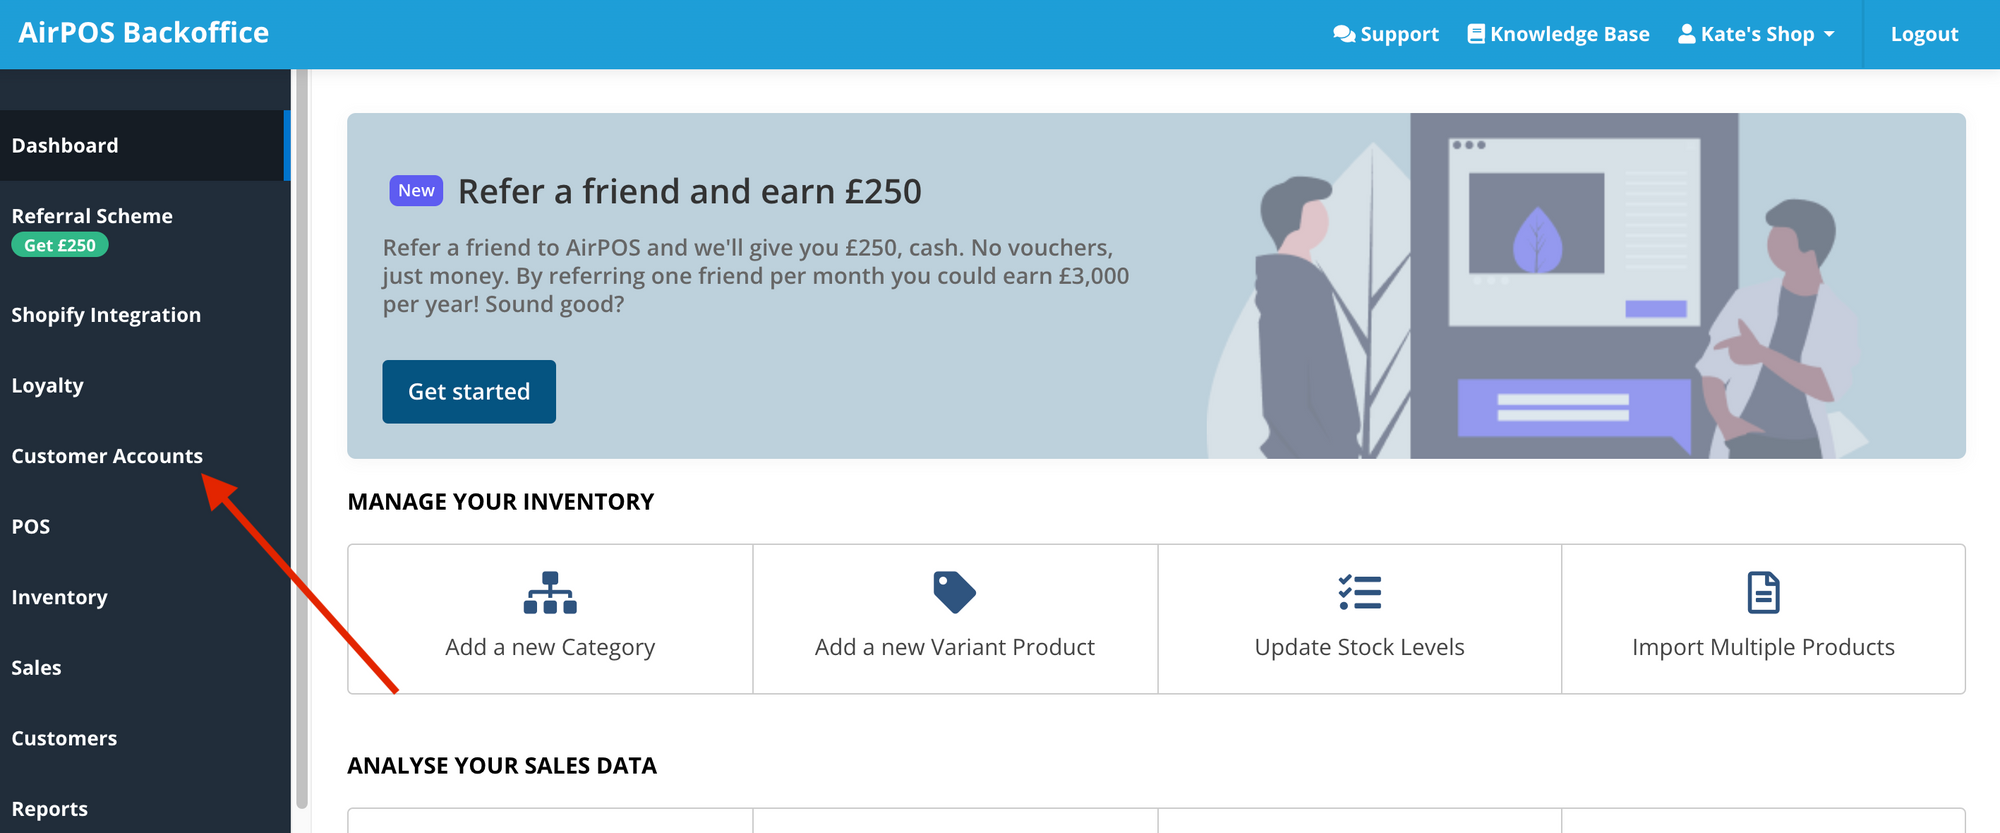
If you click or tap on 'Customer Accounts' your screen will change to one similar to that below. You'll see a slider switch to enable using customer accounts. Just set that so that it says 'Enabled' as shown below.

You will also need to enable each customer to have an account. This is also done in the backoffice. Click or tap on 'Customers' from the left navigation margin of your backoffice and select the customer you want to allow an account for.
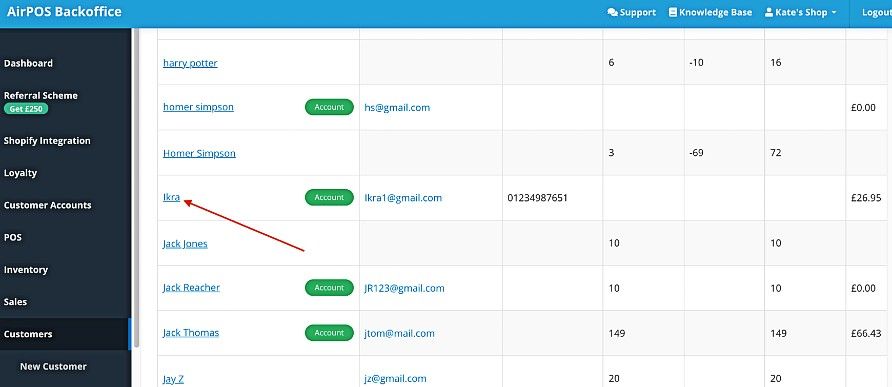
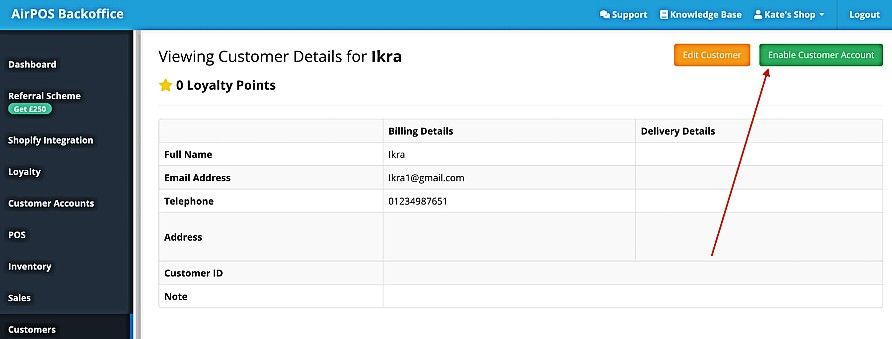
Tap on their name to open their details. You'll see at the top right of the screen a button to 'Enable Customer Account'.
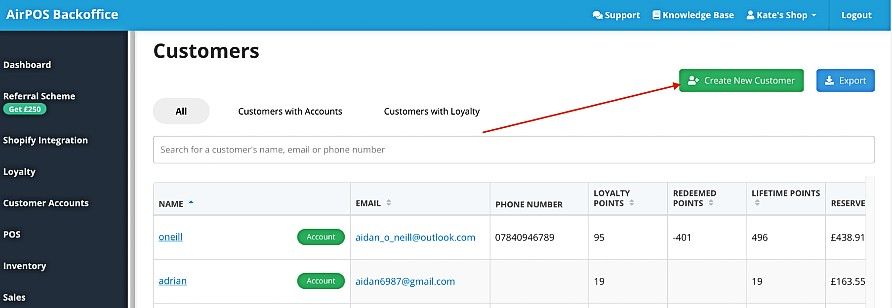
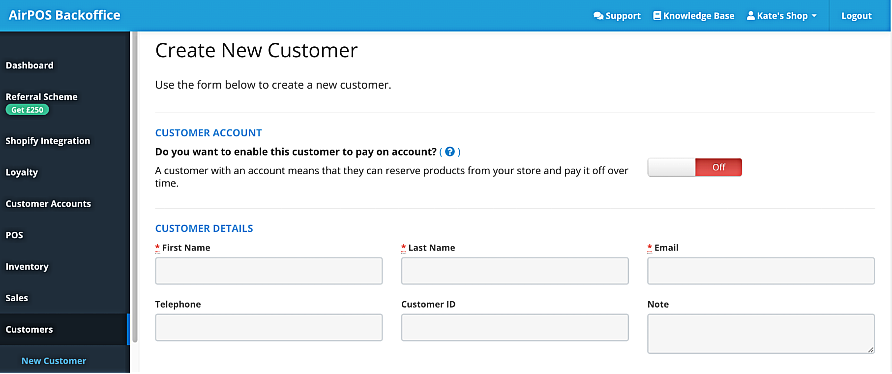
If the customer doesn't exist among your list of customers in the backoffice you can use the 'Create New Customer' button to create an entry for them.
It's then just a matter of completing the form. You can allow them to have an account or you can enable them at a later stage.
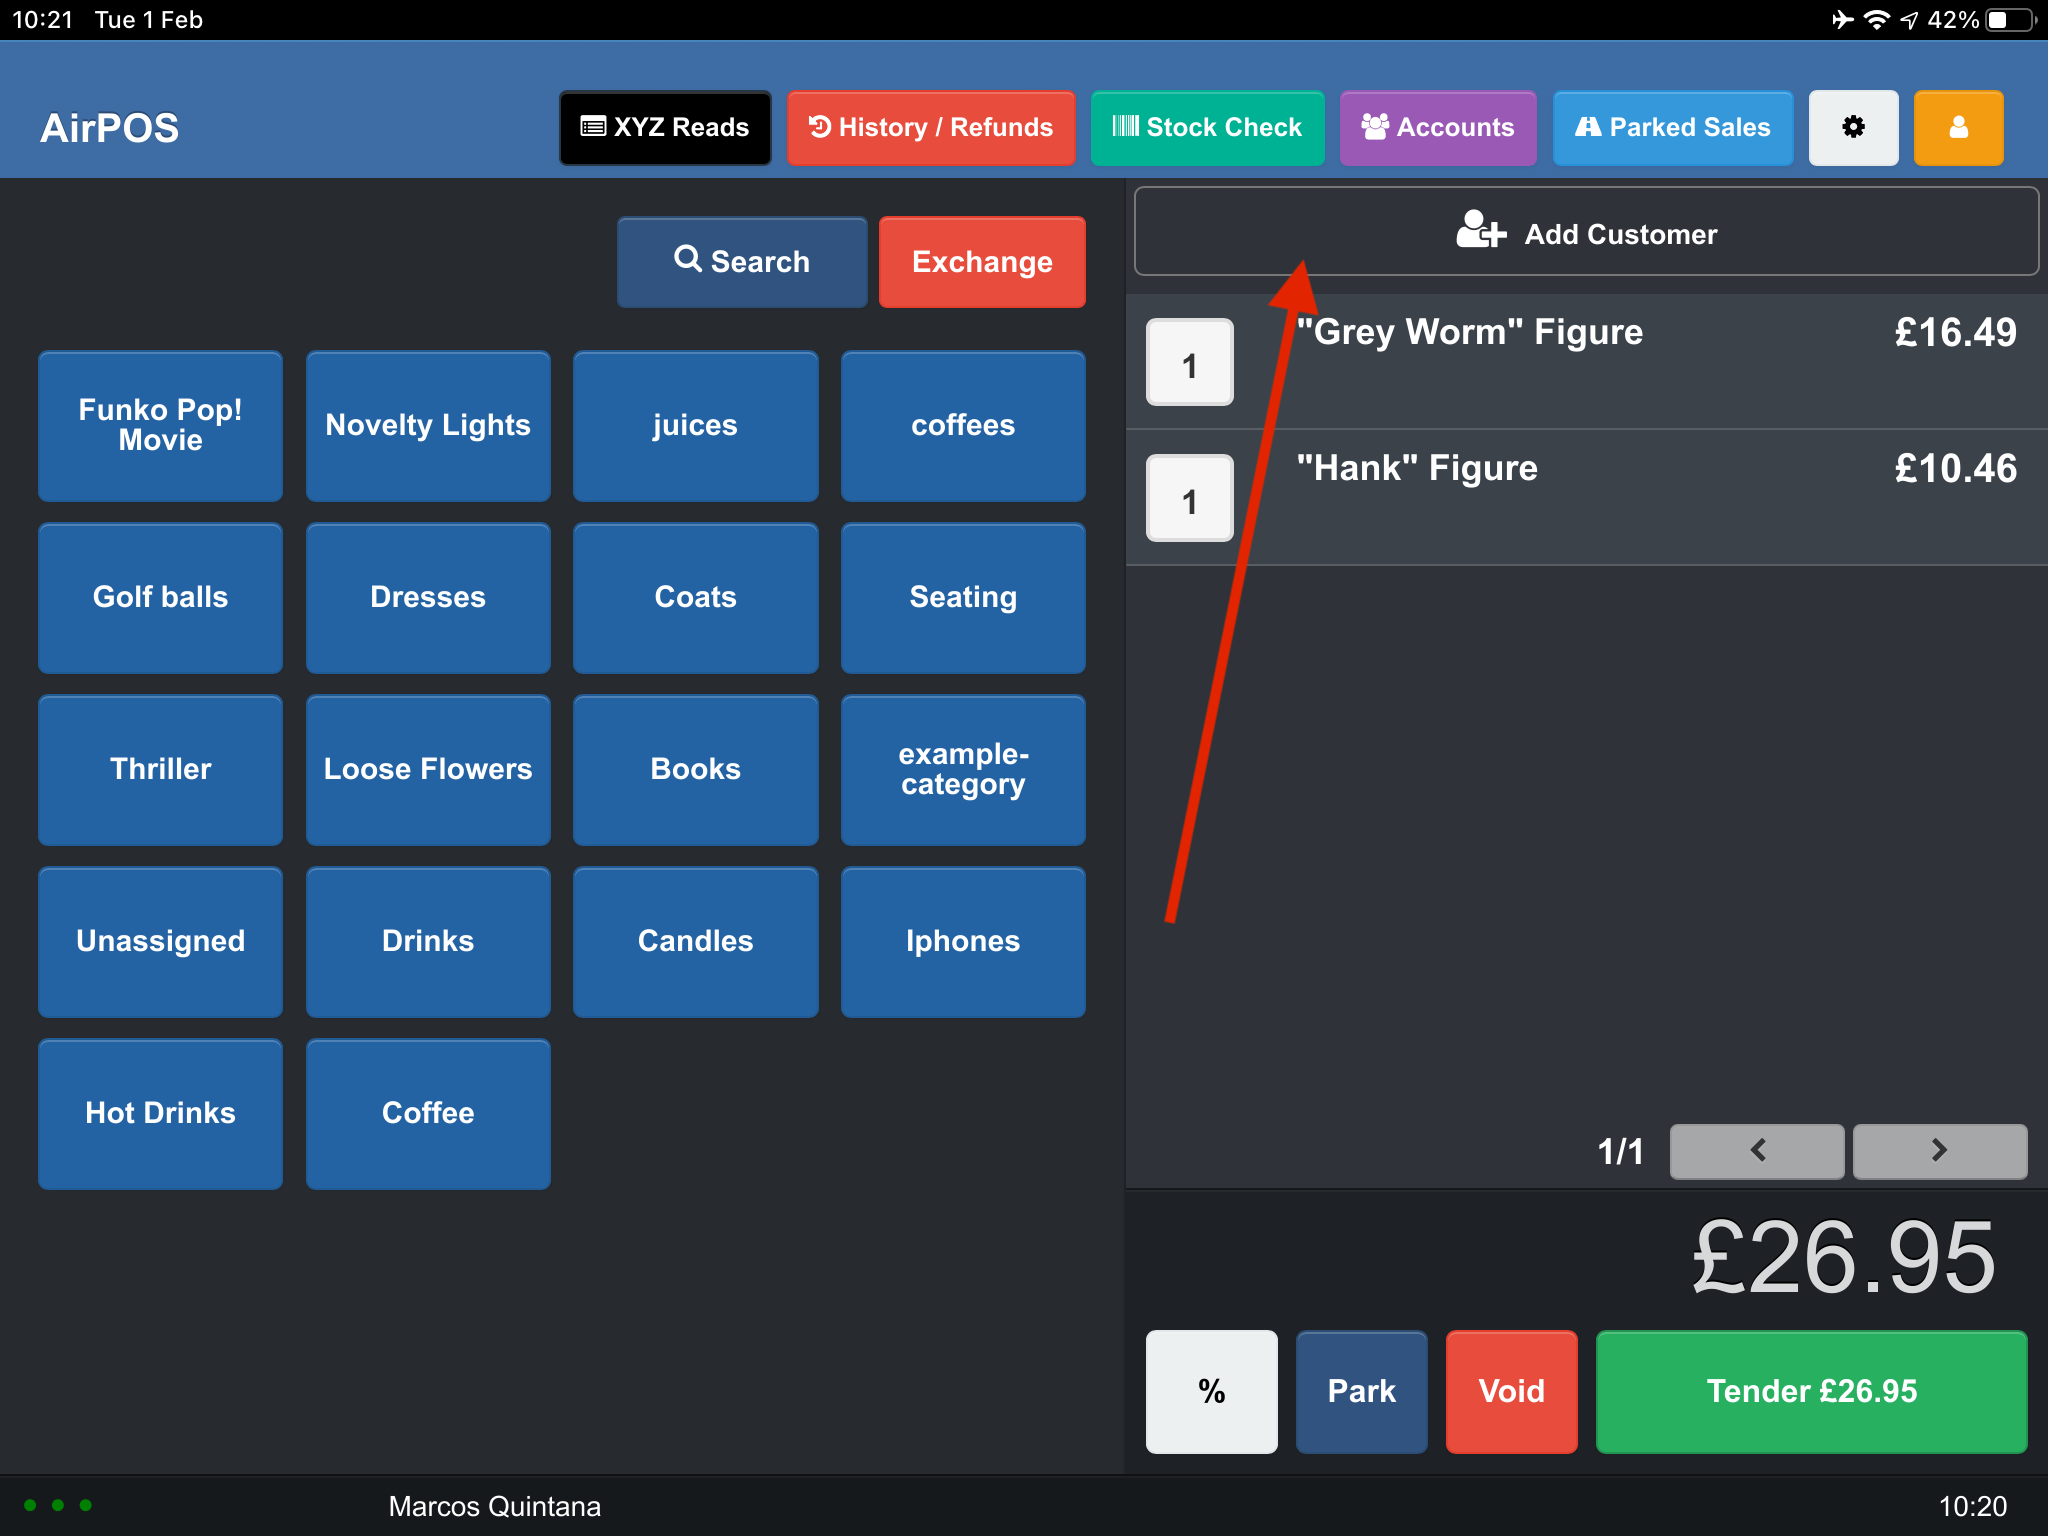
If you now open the AirPOS POS application you will notice the 'Add Customer' button, above the cart and the 'Accounts' button in the horizontal menu at the top of the screen. After enabling the customer to have an account and when those changes made in the backoffice have synchronised with the POS application you will be able to add products to the cart which can then be put on the customer's account for later payment. Tap on the 'Add Customer' button at the top of the cart.
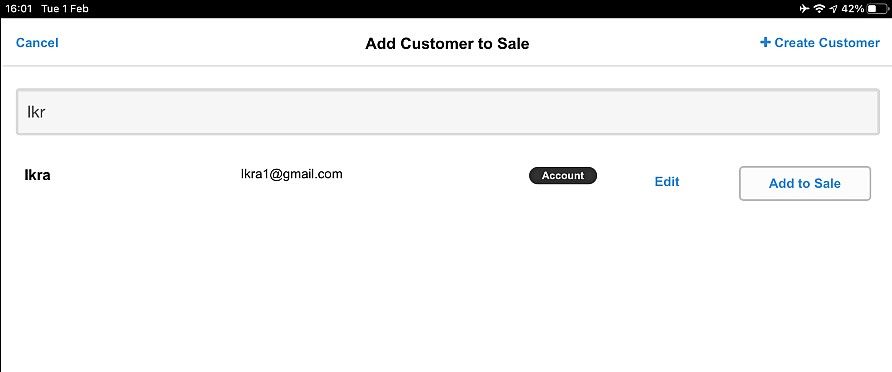
A search bar will open in which you can search for a customer by name, email or phone number. The application will natively search as you type. When the customer's name that you are looking appears just tap on the 'Add to Sale' button to attach them to the cart. You can add the customer prior to adding products to the cart or after the cart has been created. You can also create a new customer here but you can only enable them for customer accounts in the backoffice.
In the screen below the customer who has just been enabled to have an account, Ikra, has been added to the transaction.
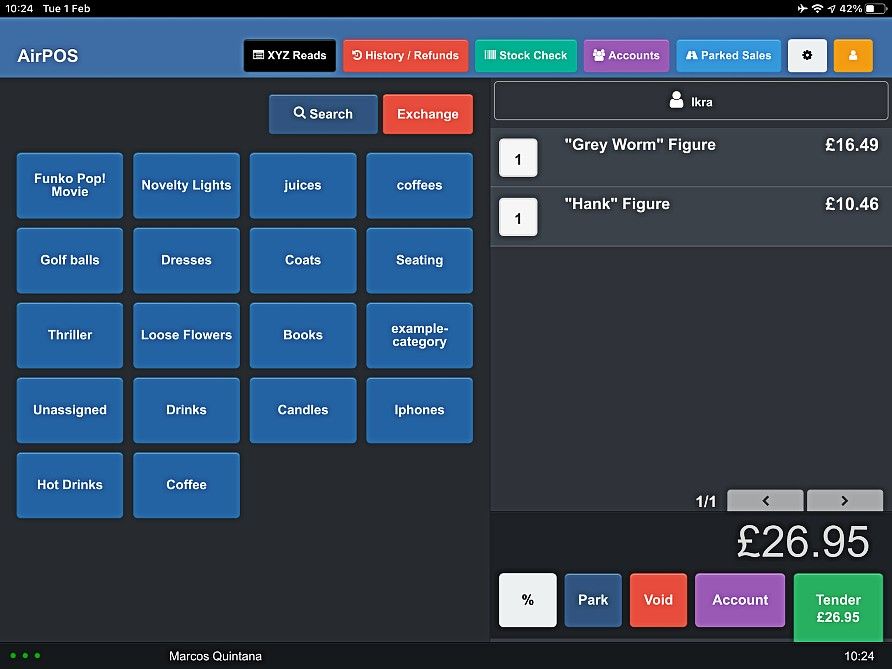
To put the items in the cart onto their account just press the 'Account' button at the bottom of the cart. You'll see a popup asking you to confirm that the sale is to be added to that account.
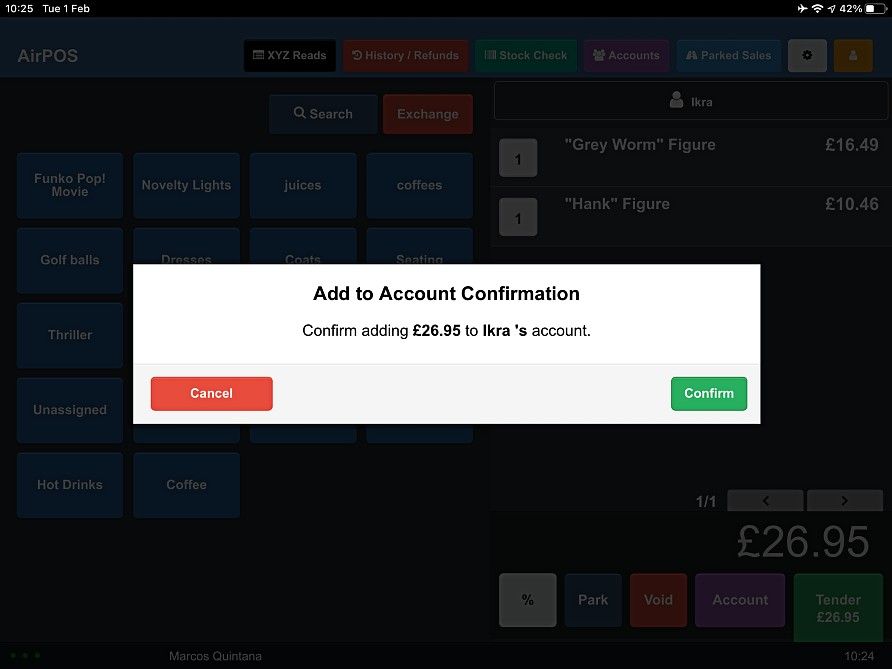
Just press Confirm and you'll see another popup with a number of options.
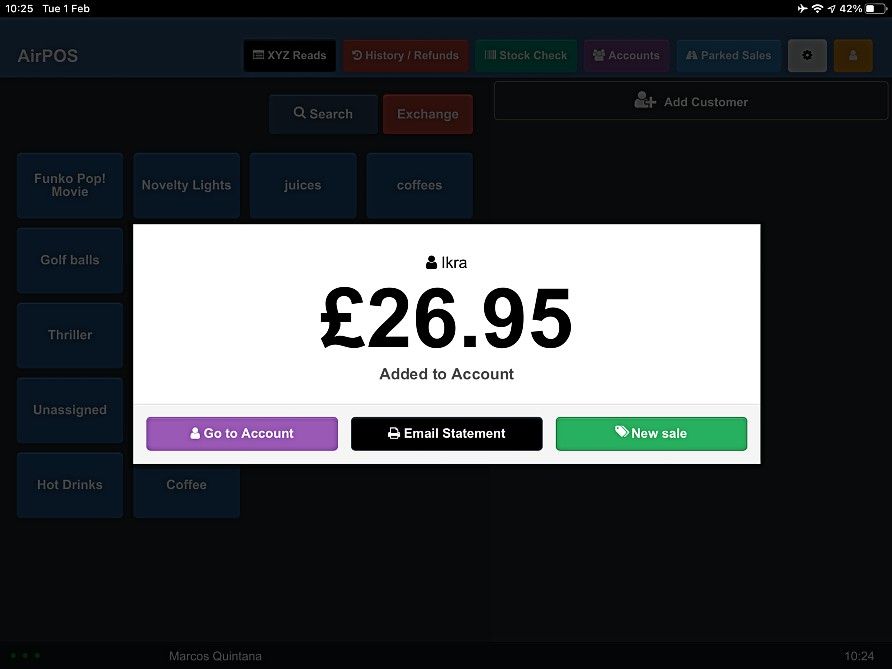
The customer, Ikra, may choose to make a payment towards his account at this stage in which case press the 'Go to Account' button otherwise press the 'New Sale' button. You can also email them a statement at this point.
Taking payments towards accounts.
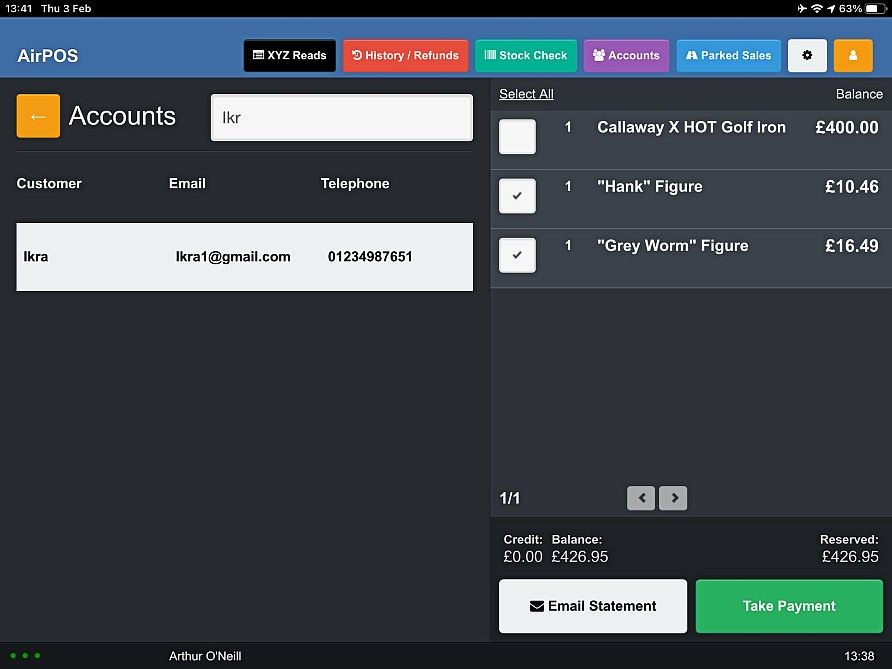
If a customer wishes to make a payment towards their account this should be done on the POS. For example the customer, Ikra wants to pay £20 towards his account. To locate his account on the POS tap on the 'Accounts' button at the top of the screen and select his name from the list of customers with an account or use the search box to search using the name, email address or phone number. The products held on account will then populate the cart.
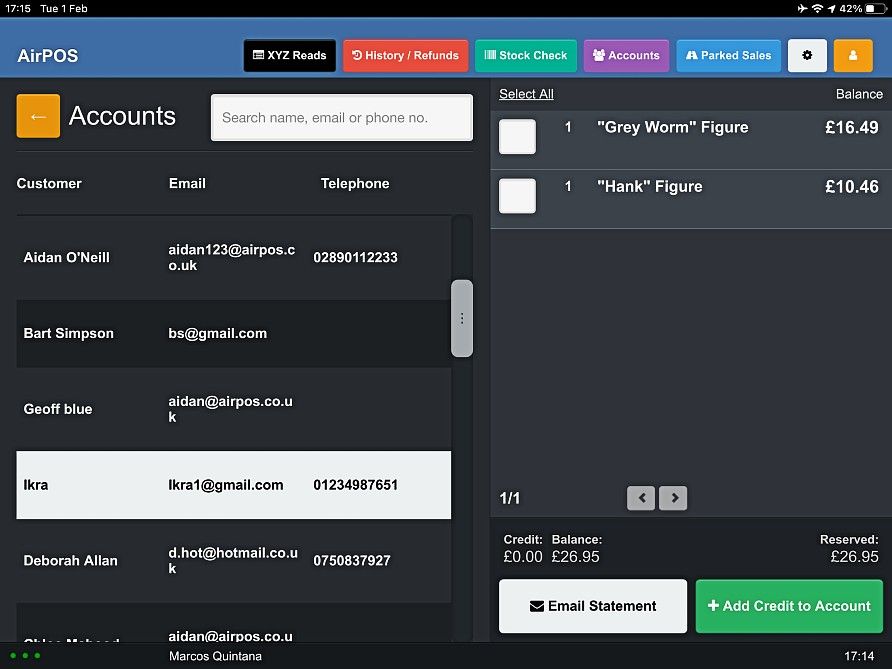
Select an item in the cart that is more than £20. In this case select both items as together they come to more than £20.
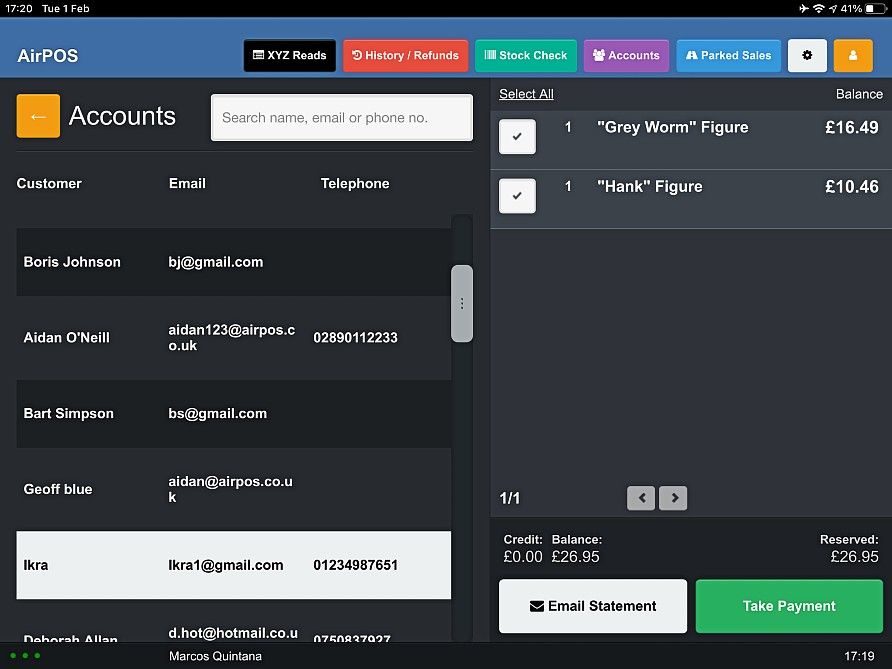
Tap on the green 'Take Payment' button at the bottom of the cart and the tender type popup will appear. Select the payment type, cash or card. Use the 'Keypad' button to type '20.00' or use the predefined £20 button.
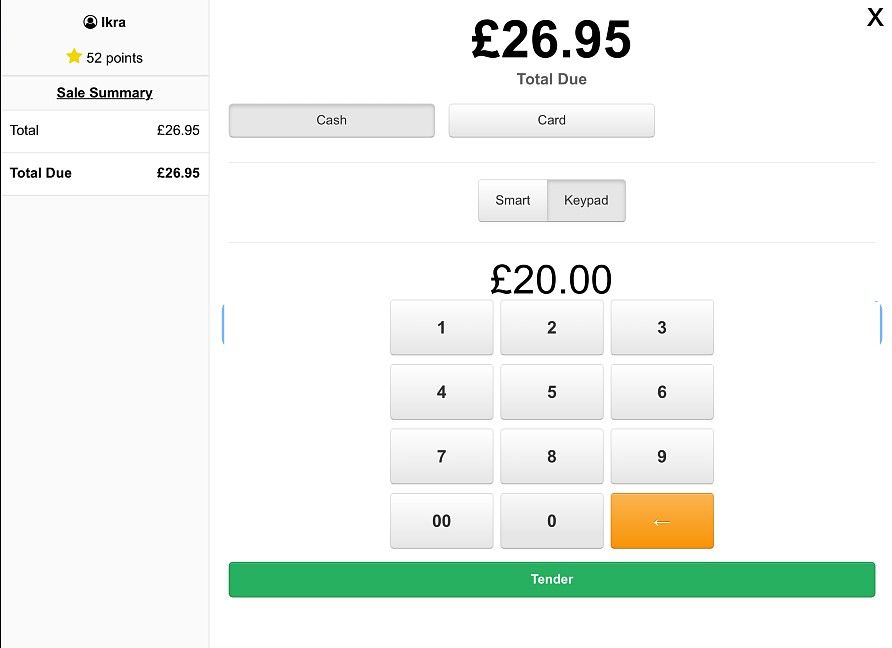
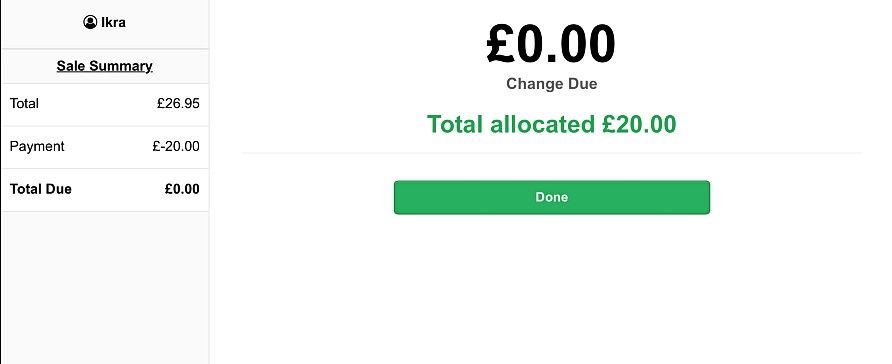
Press the 'Tender' button. You'll see that £20.00 has been allocated towards payment of the account. Press done and return to the cart.
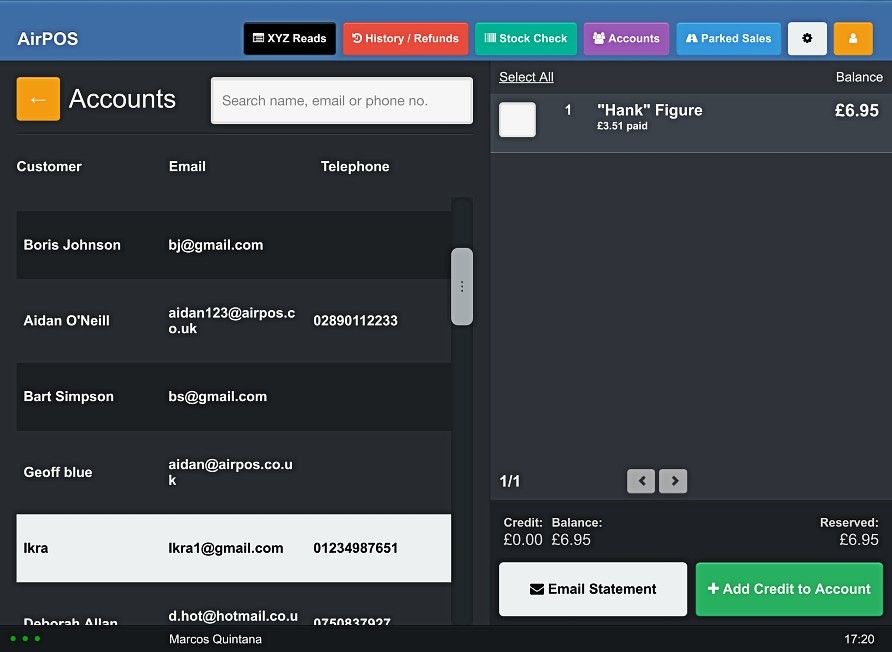
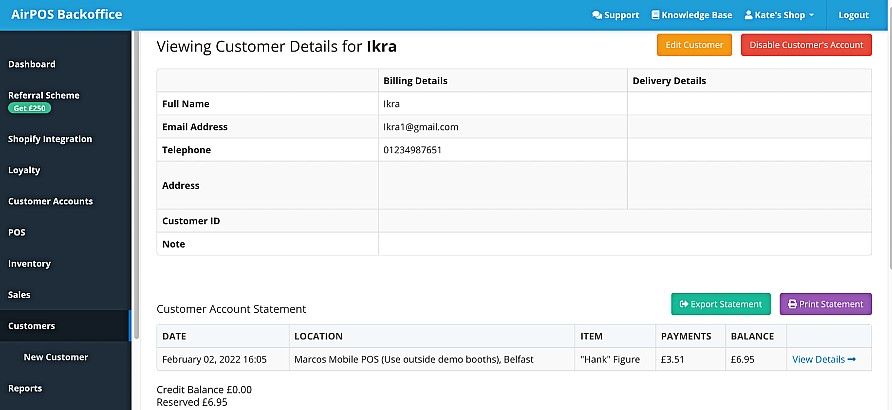
When a customer with an account makes a payment towards their account the payment is attributed to the first item in the list. You can see that one item has been paid off and the other has had £3.51 paid towards it leaving an account balance of £6.95 on the second item that was on account.
Press the 'Back' button at the top left to return to your catalogue.
To check his balance and to forward him a statement tap on 'Accounts from the top of the POS screen and select his name from the list of account holders.
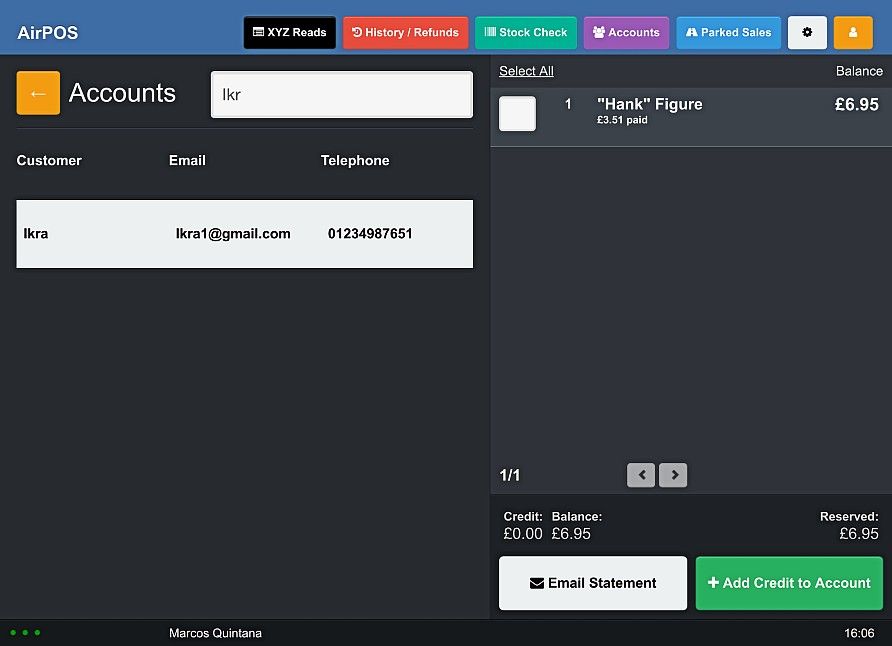
You can also confirm their account balance in the backoffice under the 'Customers' tab.
If when making a payment towards an account the payment exceeds the value of the products selected in the cart the customer will have the option of having the balance added as credit to his account or of receiving the balance as change.
In the example above the customer wishes to pay £50 towards his account and two products have been selected. Press the 'Take Payment' button and you'll see the tender popup. Use the keypad to enter the amount and press the tender button. You'll see a message similar to that below.
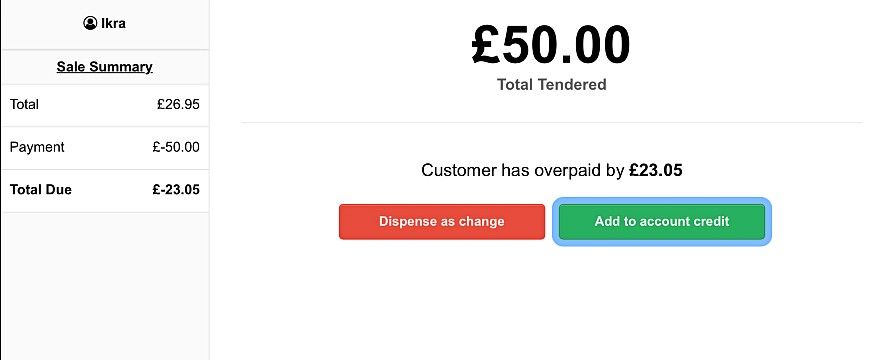
If the customer chooses to add the balance to his account as a credit press the green button. Otherwise press the red and issue them their change. If the balance is to be added to the account you'll see something similar to the image below.
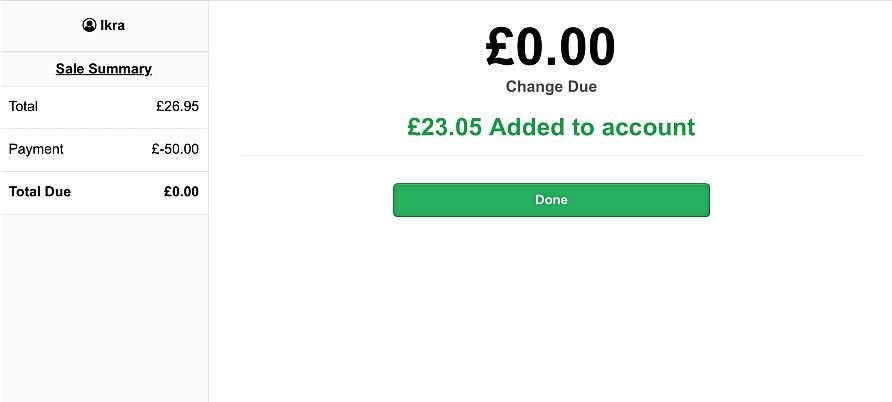
Press 'Done' and return to the cart.
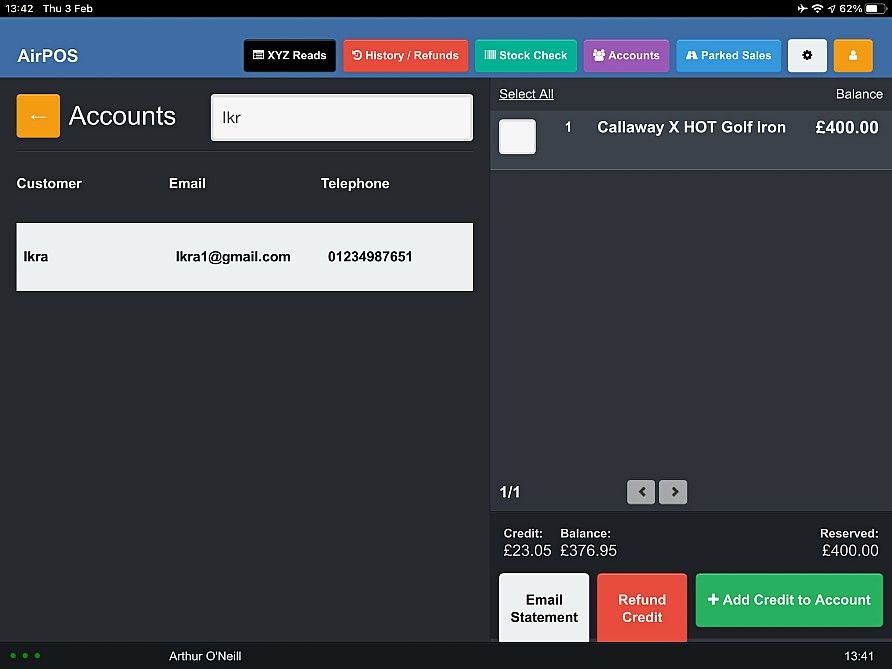
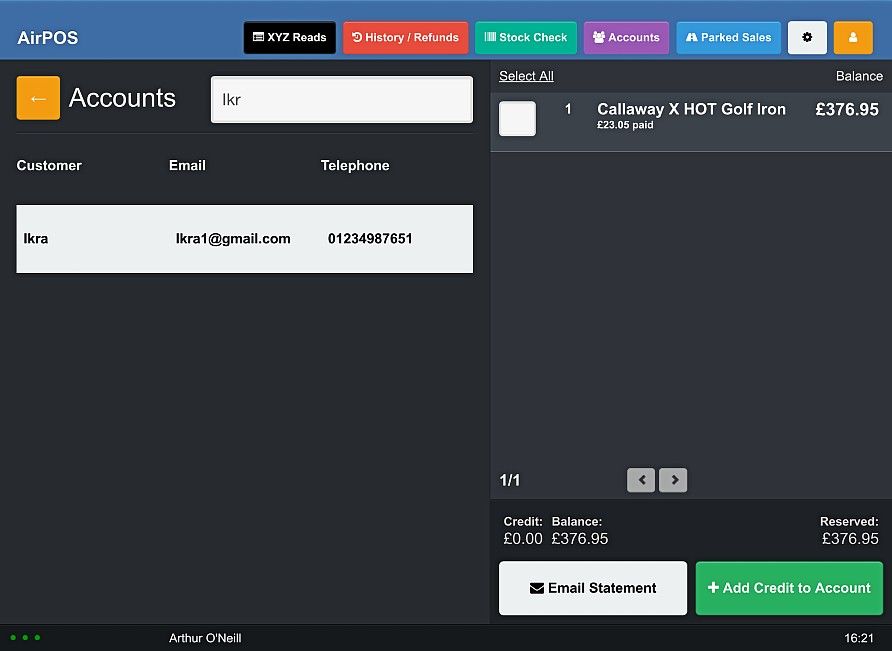
As you can see the account now has a credit balance of £23.05. If required this can be applied to the outstanding balance. Select the item in the cart and press the 'Take Payment' button.
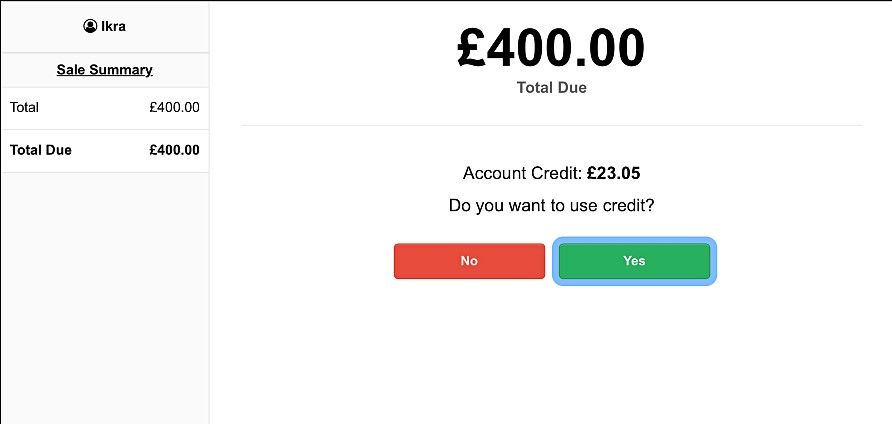
Press 'Yes'. If prompted to make another payment press 'No' and then press 'Done' and the balance will be reduced. Payments to accounts where a product on an account is paid off will be treated as completed transactions. Payments towards accounts where the products are not completely paid for will be recorded on you 'XYZ Read' at the end of the day but will not be recorded as completed transactions for that day.
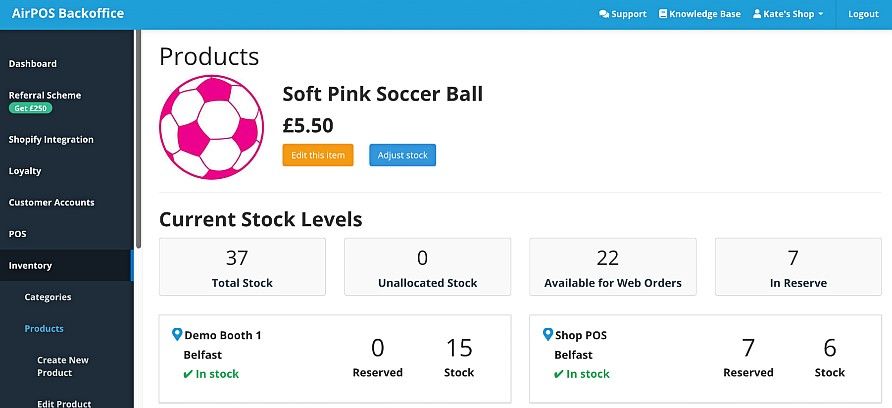
When a product is added to someone's account the available stock is reduced accordingly and the corresponding stock for the products added to an account becomes 'Reserved'. In the example below you can see that there are 8 of the product 'Soft Pink Soccer Ball' available at the 'Shop POS, Belfast' location and 5 are reserved.
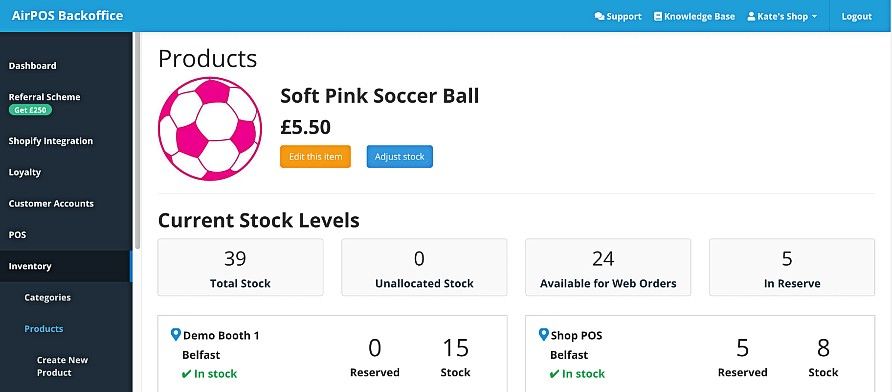
If another two are added to a customer's account the available stock is reduced and the reserved stock is increased by two as shown below.
Disabling Customer Accounts.
Customer Accounts can be switched off in the backoffice by selecting 'Customer Accounts' from the left navigation. You'll see the enabled switch.

Tap on it to disable and you'll get a warning.
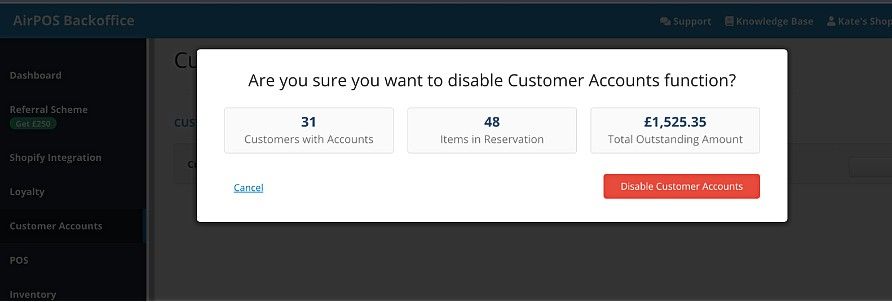
If you press the 'Confirm disabling account' button all of their reserved items will be returned to stock and the sales attributed to their account will be voided. All accounts will be closed.
You can disable individual customer accounts using the 'Customers' tab in the backoffice.
NB: While you can add and create customers on the POS we recommend that you do this in the backoffice as this is the only place you will be able to enable customer accounts for the new customer.
For this feature to function properly your POS MUST be online.
Sales made on Account will not be posted into Xero until a product is paid for in full or complete.