How to use the Dymo LabelWriter to Print Barcoded Labels for your Products

Setting Up Your Printer

The first thing to do is to download and install the DYMO Label software from support.dymo.com Do not connect the printer to your computer until after the software installation is complete.
- Plug the power cord into the adaptor.
- Plug the adaptor into the connector on the bottom of the printer.
- Plug the other end of the power cable into the mains.
- Insert the USB cable into the back of the printer.
- When the software is installed, connect the other end of the USB cable into an available USB port on your computer.
Creating your Import File.
Your file will need to contain all of the information that you require on your labels. Typically this would include the name of the product, the barcode number and the price of the product. When imported into the Dymo software the printer will print this information and generate a barcode that corresponds to the number in your file. When you've finished creating your file save it and name it as a .CSV file.
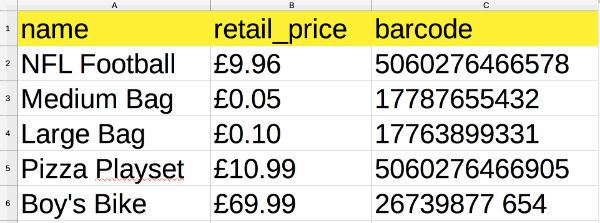
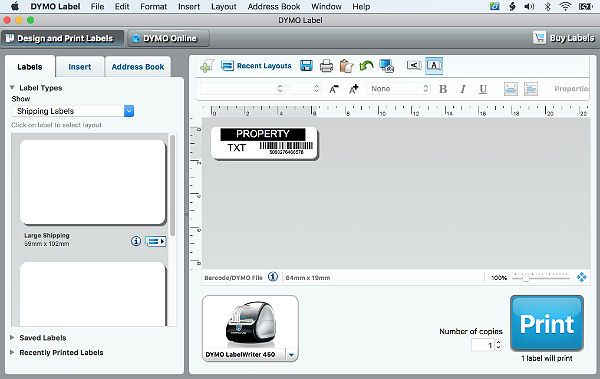
We've created a file and called it 'new_labels.csv'. When you open the Dymo software for the first time you can import a file for your labels using the default label layout or you can create your own label template. For now we'll use the default. When you open the Dymo app you'll see something like the image below.
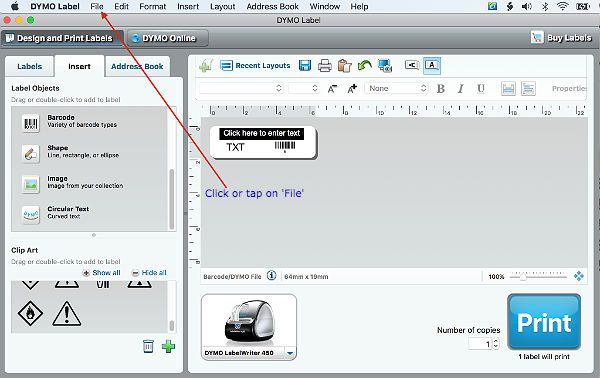
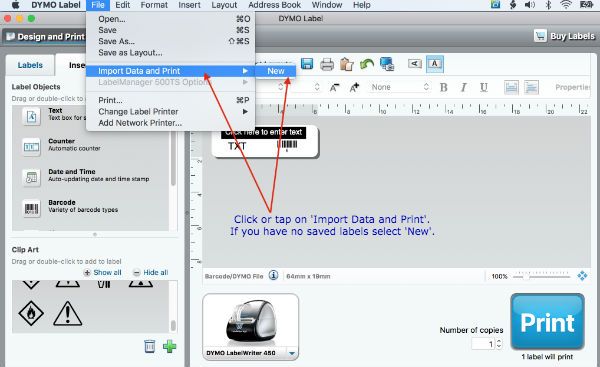
Click on 'File' at the top of the screen as shown below.
In the refreshed screen click on 'Import Data and Print' and select 'New' as seen in the image below.
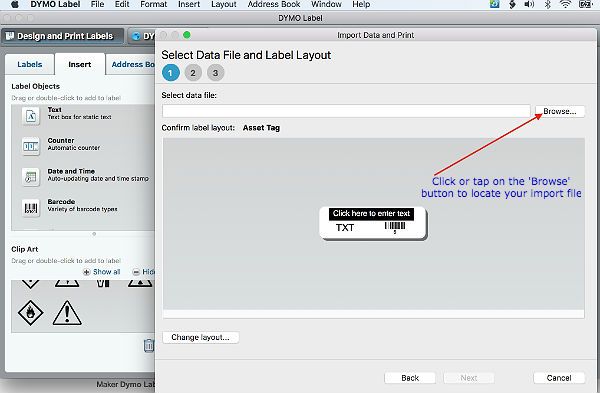
In the refreshed screen click on the 'Browse...' button to locate your input file.
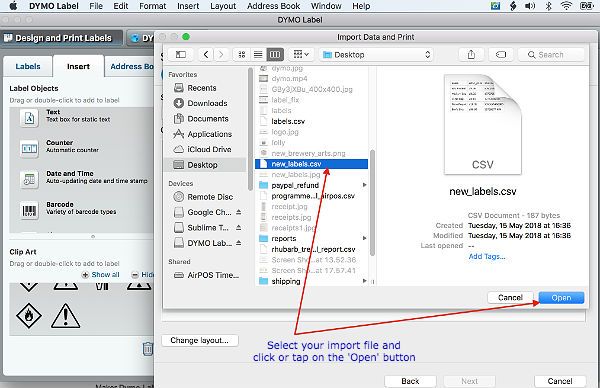
When you've located the file select it and click 'Open' as shown below.
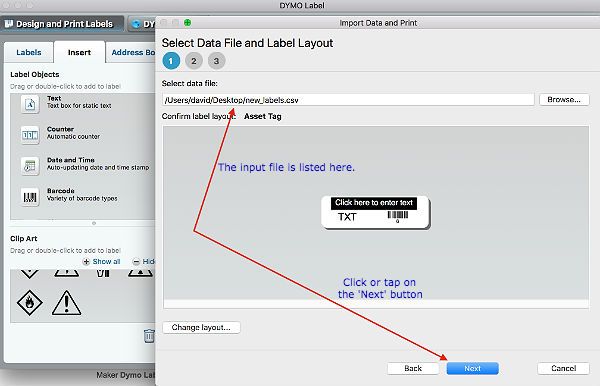
In the next screen you'll see the import file. Click 'Next'.
In the next screen below you can arrange the data fields on your label by clicking in the data field of the label and then clicking on the field name of the input file below in order.
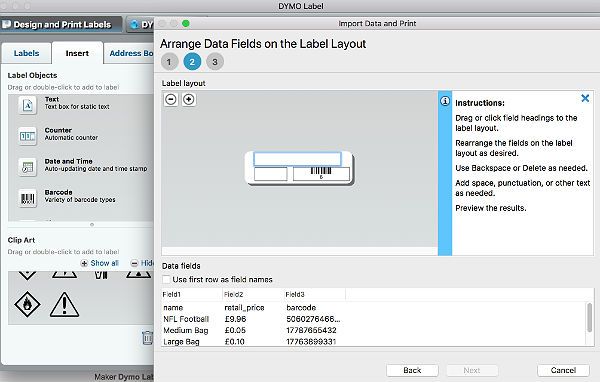
In the image below the first field of the label is 'Field1' which corresponds to the name field of the file. The 'retail_price' field of the file corresponds to 'Field2' of the label and 'Field3' of the label corresponds to the barcode. The printer will generate a barcode from the number that populates this field.
It's therefore very important that only the number is used to generate the barcode. If you click in any of the label fields you'll see that a space has been added to 'Field1 ', 'Field2 ' and 'Field3 ' which is the barcode field. Use the backspace or delete button on your keyboard to remove the space in the barcode field otherwise a different barcode will be generated than that for the number alone and your product will not be found when you scan the barcode on the label.
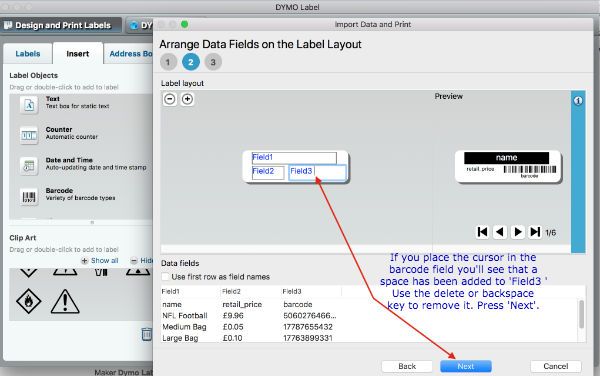
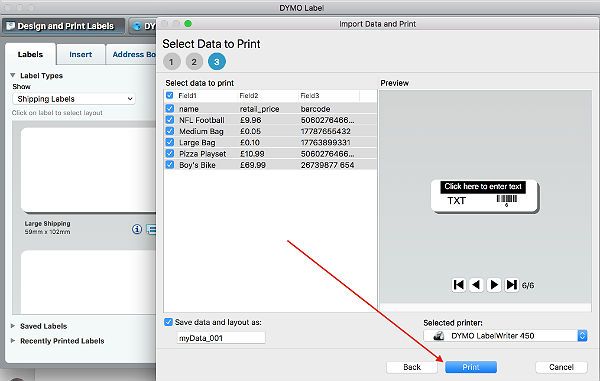
When you click or tap on the 'Next' button the dymo label printer is ready to start printing your labels. Just tap or click on the 'Print' button and the labels will be printed one by one until the end of the input file.
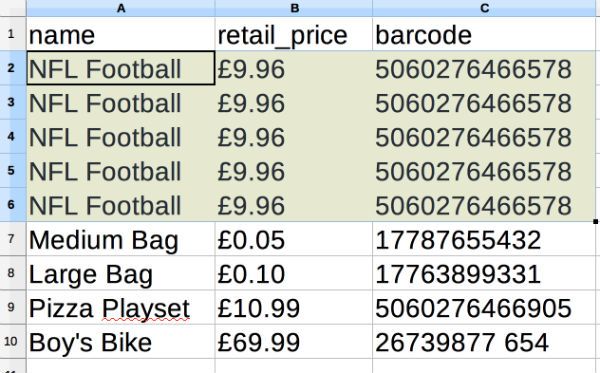
If you want multiple labels for the same product then to achieve that you'll need to enter the same data in the input file for the same number of times as the number of labels you need. Using the same 'new_labels' file as above, for example, if five labels were needed for the 'NFL Football' product you would have the same entry in the file for the 'NFL Football' five times. If you insert four empty lines below the 'NFL Football' listing you can replicate the text cells in a column.