
How To Setup Your Locations through the Backoffice

Setting up a Location
By design AirPOS is flexible in serving both small vendors and also larger, multi-site operations as required. The AirPOS ePOS desktop client can be installed and configured easily in any location. AirPOS allows true flexibility in scaling up and scaling down client installations in accordance with demand.
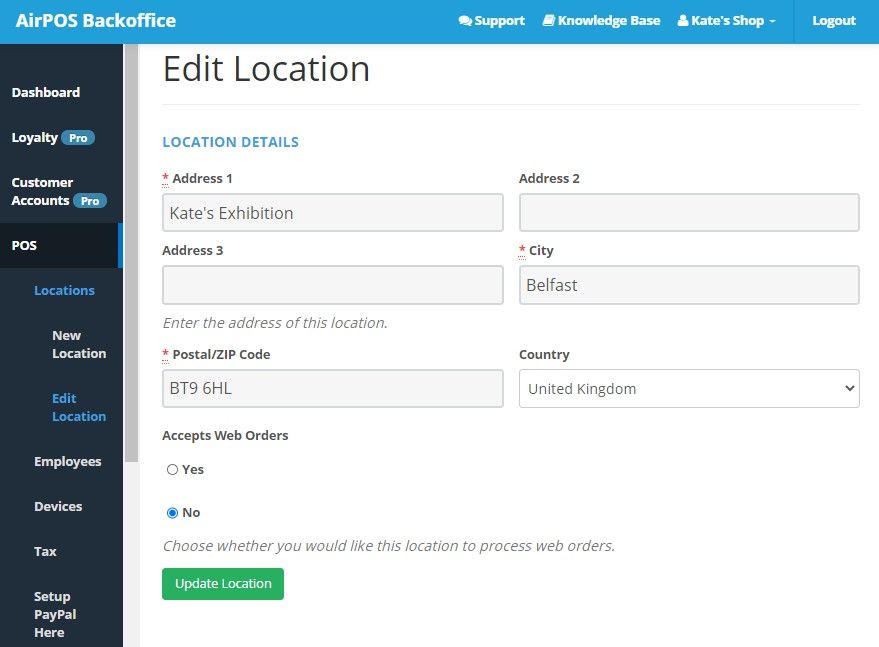
Setting up locations therefore couldn’t be easier. For a single retailer for example you would simply edit the default location with the details of your store location and click “Create Location” and it will appear in your POS tab under locations as can be seen;
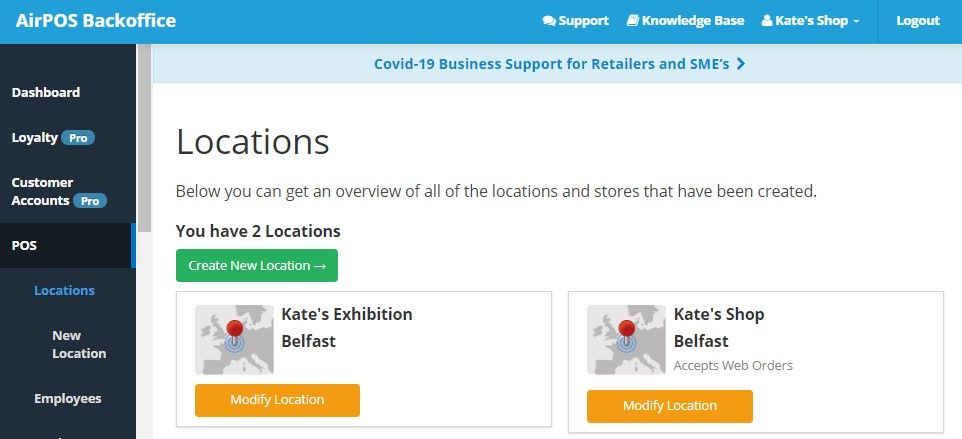
For larger operations, it’s the same idea. Click on POS in the left panel of the Backoffice and select 'Locations'. Click on the 'Create New Location' and enter the address details of the new location, whether or not this location accepts Web orders and press the 'Create Location' button. Enter all of the locations at which you will have points of sale and they will all appear in your POS tab under locations. In order to preserve historical sales data it is not possible to delete a location but if you no longer wish to use a specific location just ensure that all employees and devices are de-allocated from that location. You can do this in the Backoffice by clicking on POS in the left hand panel and then modify your employees and devices.