
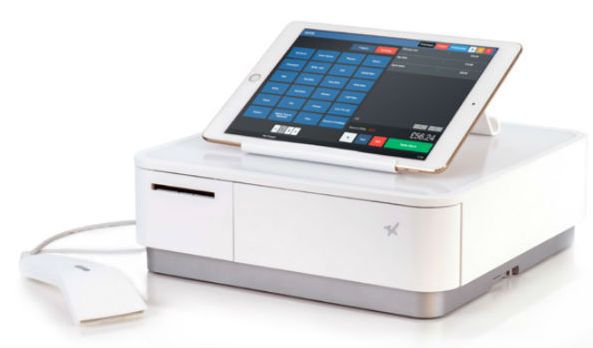
Connecting the Star mPOP Combined Cash Drawer and Printer on iPad

The Star mPOP is an all in one POS device designed to work with mPOS software such as AirPOS. The unit contains a thermal printer and built-in cash drawer that allows a tablet or desktop POS to connect to it in order to print receipts and store cash. The mPOP also supports an optional barcode scanner.
Firstly plug in the mPOP to the mains and if you are planning to use the scanner, connect it using the USB ports on the bottom of the unit before opening the AirPOS application..

Next we're going to connect AirPOS to the Star mPOP via bluetooth, so that we can tell AirPOS that we want to use the mPOP to print receipts, behave as a cash drawer and also for scanning barcodes
Firstly we have to connect the mPOP to the iPad. To do this:
- Press the Home button on the iPad to return to the Home screen
- Locate the Settings app on the iPad and tap to open it
- On the left hand menu in the Settings app tap on the Bluetooth menu item
- If Bluetooth is turned off press the slider to turn it on
- The iPad will start searching for devices, under devices you should see something like STAR mPOP-G9904
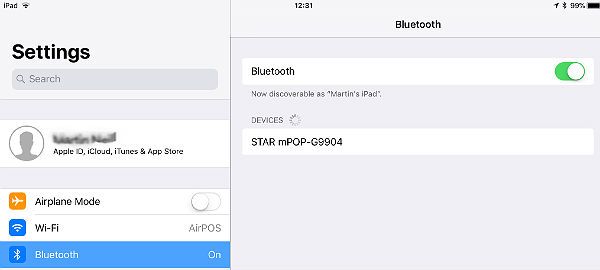
- Tap on this Star mPOP listing to begin pairing the iPad to the mPOP unit
- If you are asked for a PIN code enter 1234
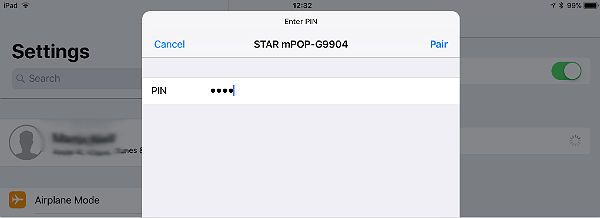
- The STAR mPOP listing should appear under My Devices when connected
Next we're going to setup the mPOP in the AirPOS POS App.
- Press the Home button on your iPad to go back to the 'Home' screen, find the AirPOS POS App and tap on the AirPOS logo to open it
- Login if need be with your PIN code to access the app screen
- Next press the settings button (it looks like a cog wheel in the right corner of the POS)
- On the Settings screen press the 'Peripheral' menu item on the left hand side of the App window
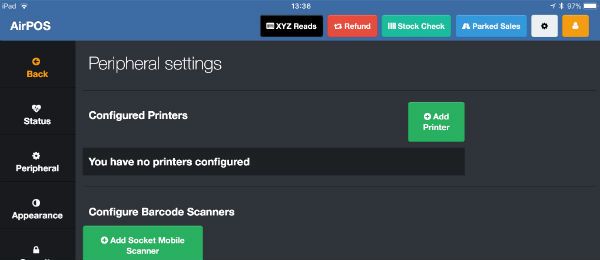
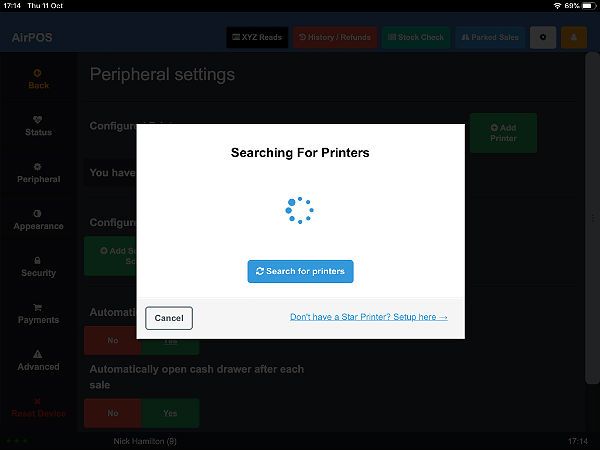
You will see a screen and an 'Add Printer' button, press this (see above).
The screen will change to tell you that AirPOS is 'Searching For Printers' while it looks for all nearby Star printers.
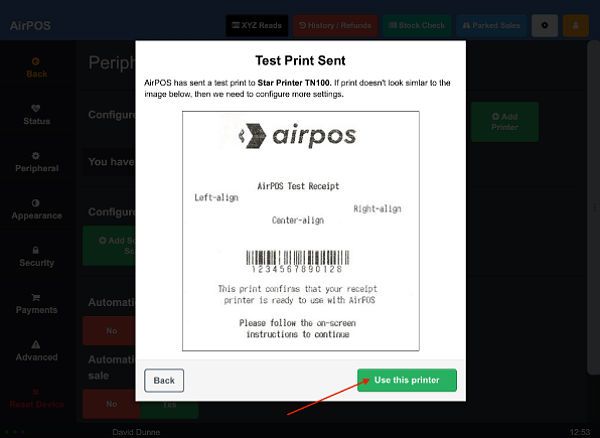
After a few moments the screen will display all available Star printers including the recently paired mPOP. Tap on the 'Test Print' button to the right of the mPOP as shown below.

You'll see a screen like that below and your mPOP should print a test print. Tap on the green 'Use this printer' button.
Your screen will change to one similar to the image below.
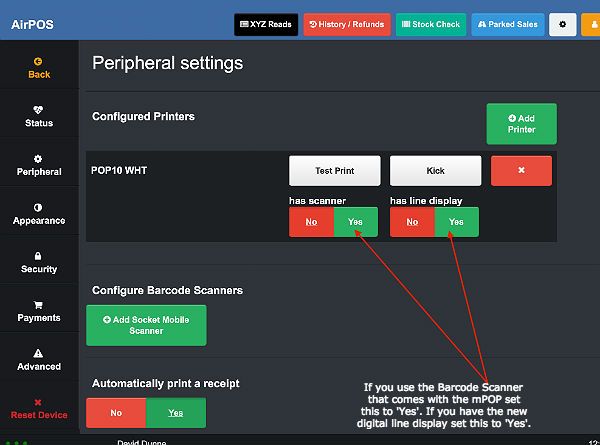
If you are using the optional barcode scanner set the scanner option to 'Yes'. When attached to the mPOP USB ports on the bottom it should simply function allowing you to scan barcodes into AirPOS. You will see a 'Scanner Connected' pop up appear in the AirPOS app when the scanner is connected and ready for use at the bottom left of your POS screen.
If you have the new digital line display connected by USB to the mPOP set the option to 'Yes' and this will display your cart for the benefit of your customer.
NOTES
- After each transaction please make sure that the cash drawer on the mPOP is properly closed, as if it is even slightly open the unit will not print receipts.
- mPOP Utility.
Star Micronics have released a utility which can be helpful in the installation of your mPOP and troubleshooting faults. The mPOP utility for iPad and Android tablet can be downloaded at the following link, mPOP Utility or by searching for 'mPOP Utility' in the App Store or Play Store respectively. It can be used for...
Pairing and Auto Connect by Bluetooth (iPad).
The mPOP has an Auto Connection feature for iPad only. If you are using one iPad with the mPOP it is recommended to turn this on. To do this ensure the mPOP is connected by Bluetooth to your iPad. Open the 'mPOP Utility'. You should see 'Unselected State' flashing on the screen as seen below.
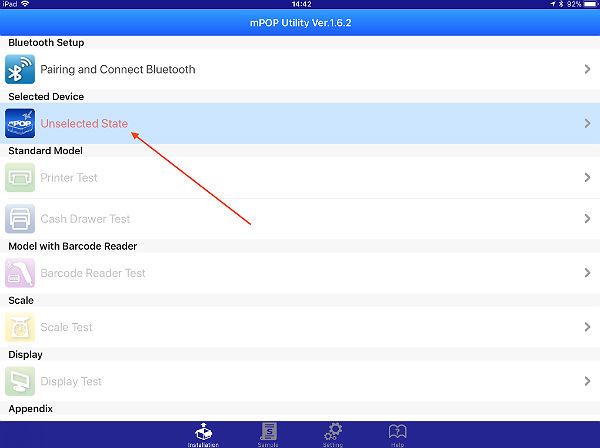
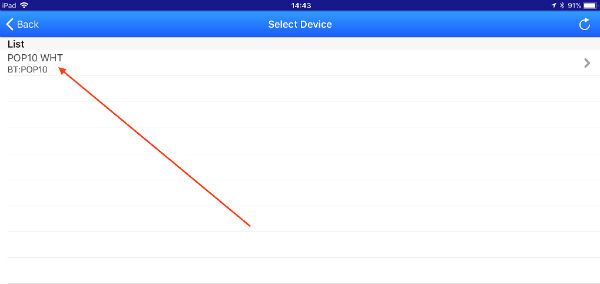
Tap on this bar and the screen should look like this next one. Tap on your device which should appear at the top left in the list of available devices.
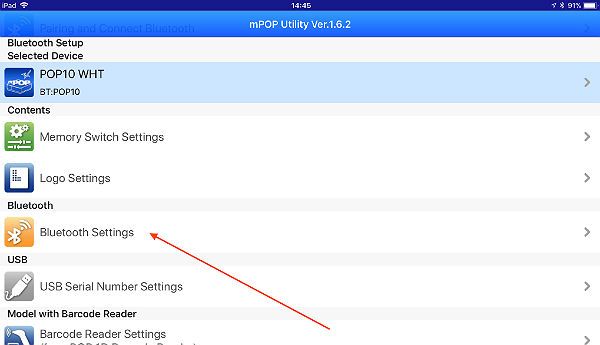
Press the 'Back' button at the top left and from the refreshed screen tap on Bluetooth settings as shown below.
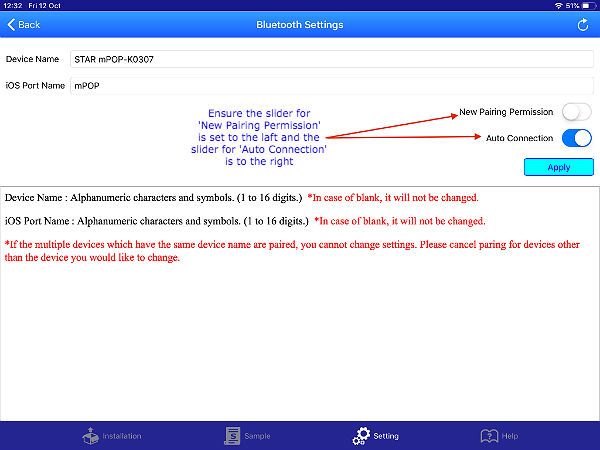
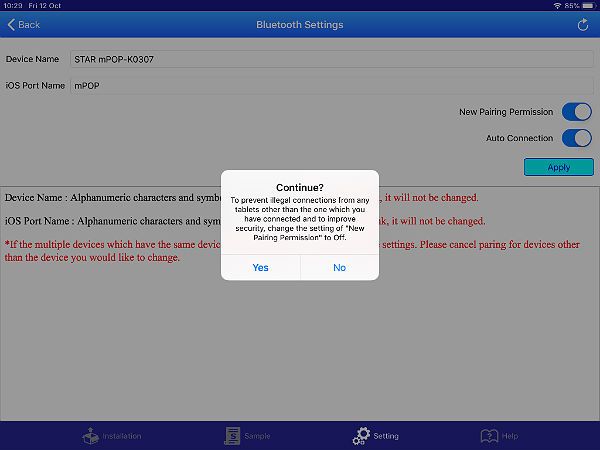
In the Bluetooth settings screen slide the switch for 'Auto connection' to the right. If you are turning on Auto-Connect so that the mPOP automatically connects to your iPad you will not want the mPOP pairing with another device so ensure 'New Pairing Permission' is off by putting the slider to the left and tap on 'Apply' as seen here.
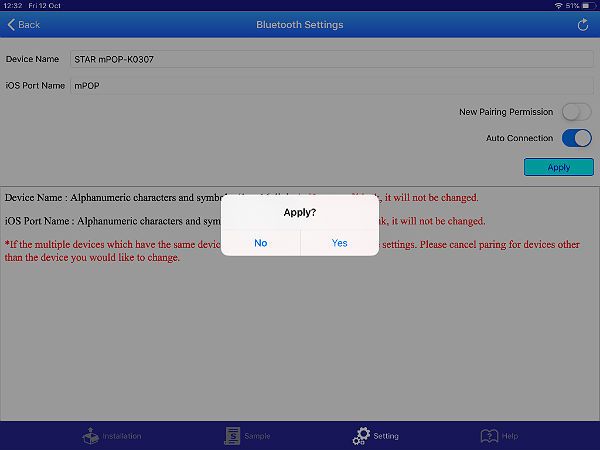
A popup will appear prompting you to apply the change. Tap on 'Yes'.
A fresh popup will appear prompting you to turn off 'New Pairing Permission'. Tap on 'Yes'. If at a later stage you want to use the mPOP with another iPad you'll need to change those settings back again.
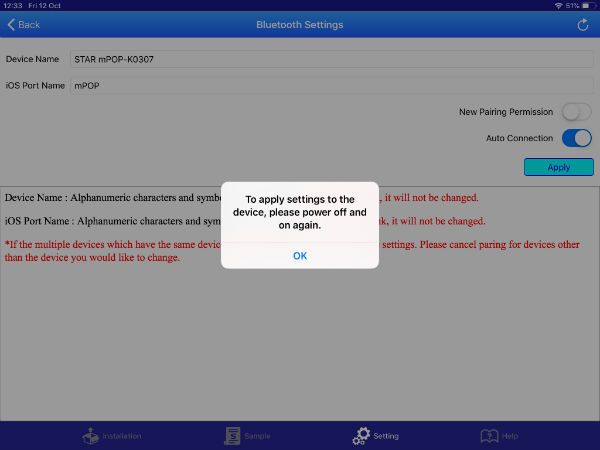
After a moment a new popup will appear to prompt you to switch off the mPOP and then switch it on again. When you've done that tap on 'OK'.
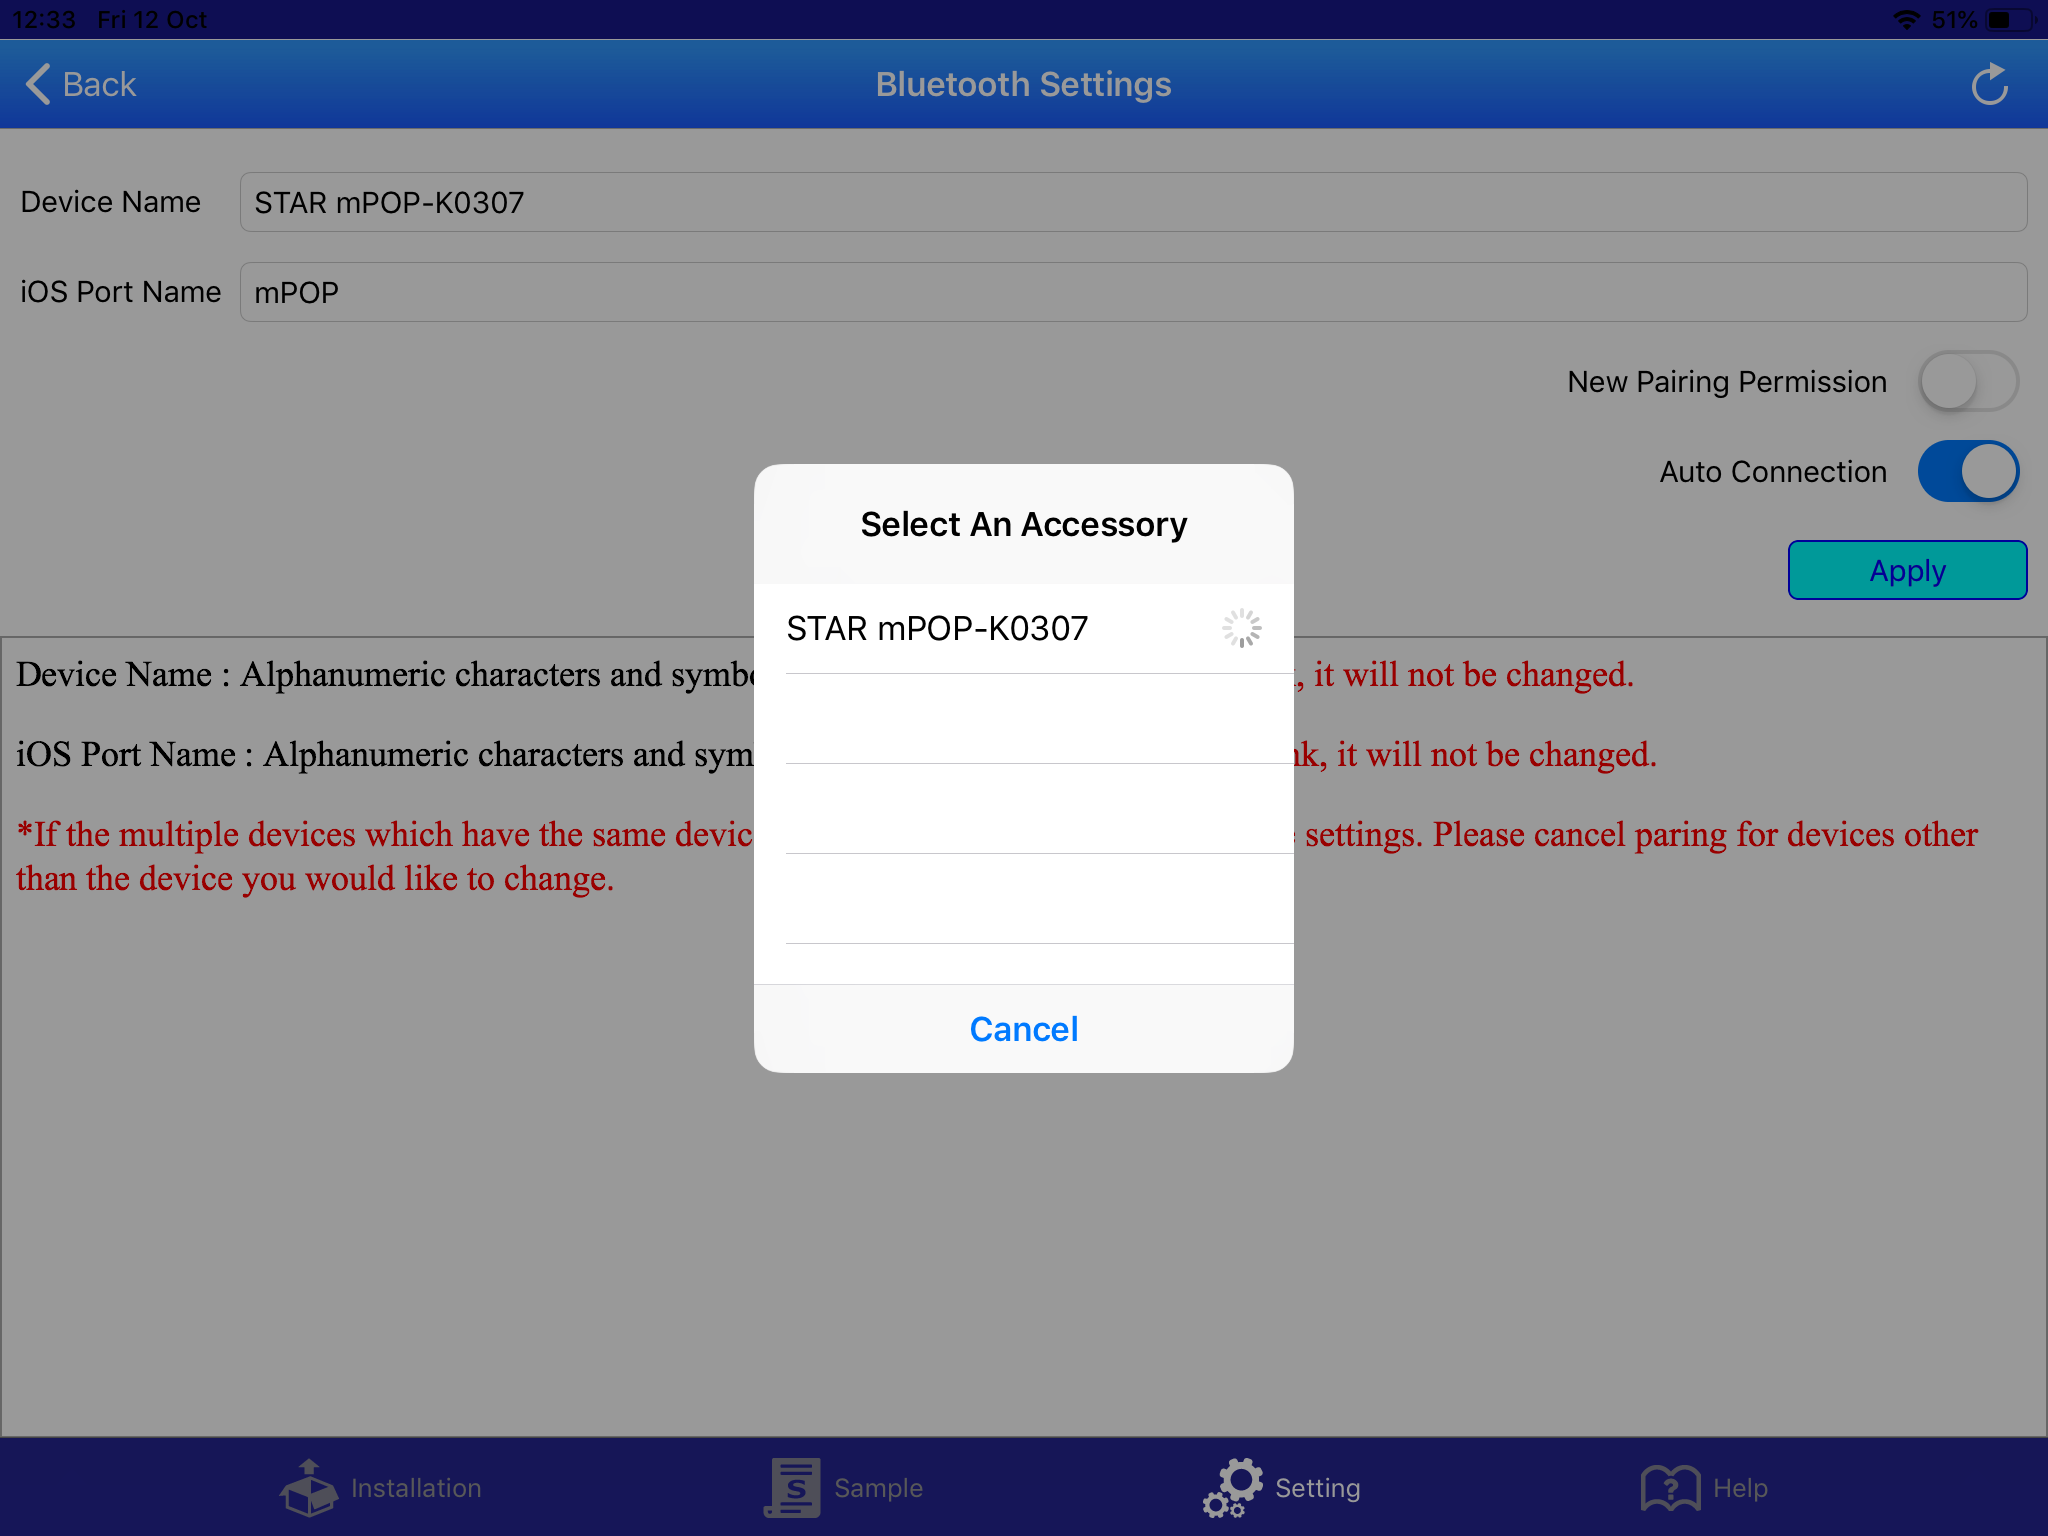
A popup will appear asking you to select the device. After a few moments the mPOP will appear. Just tap on it.
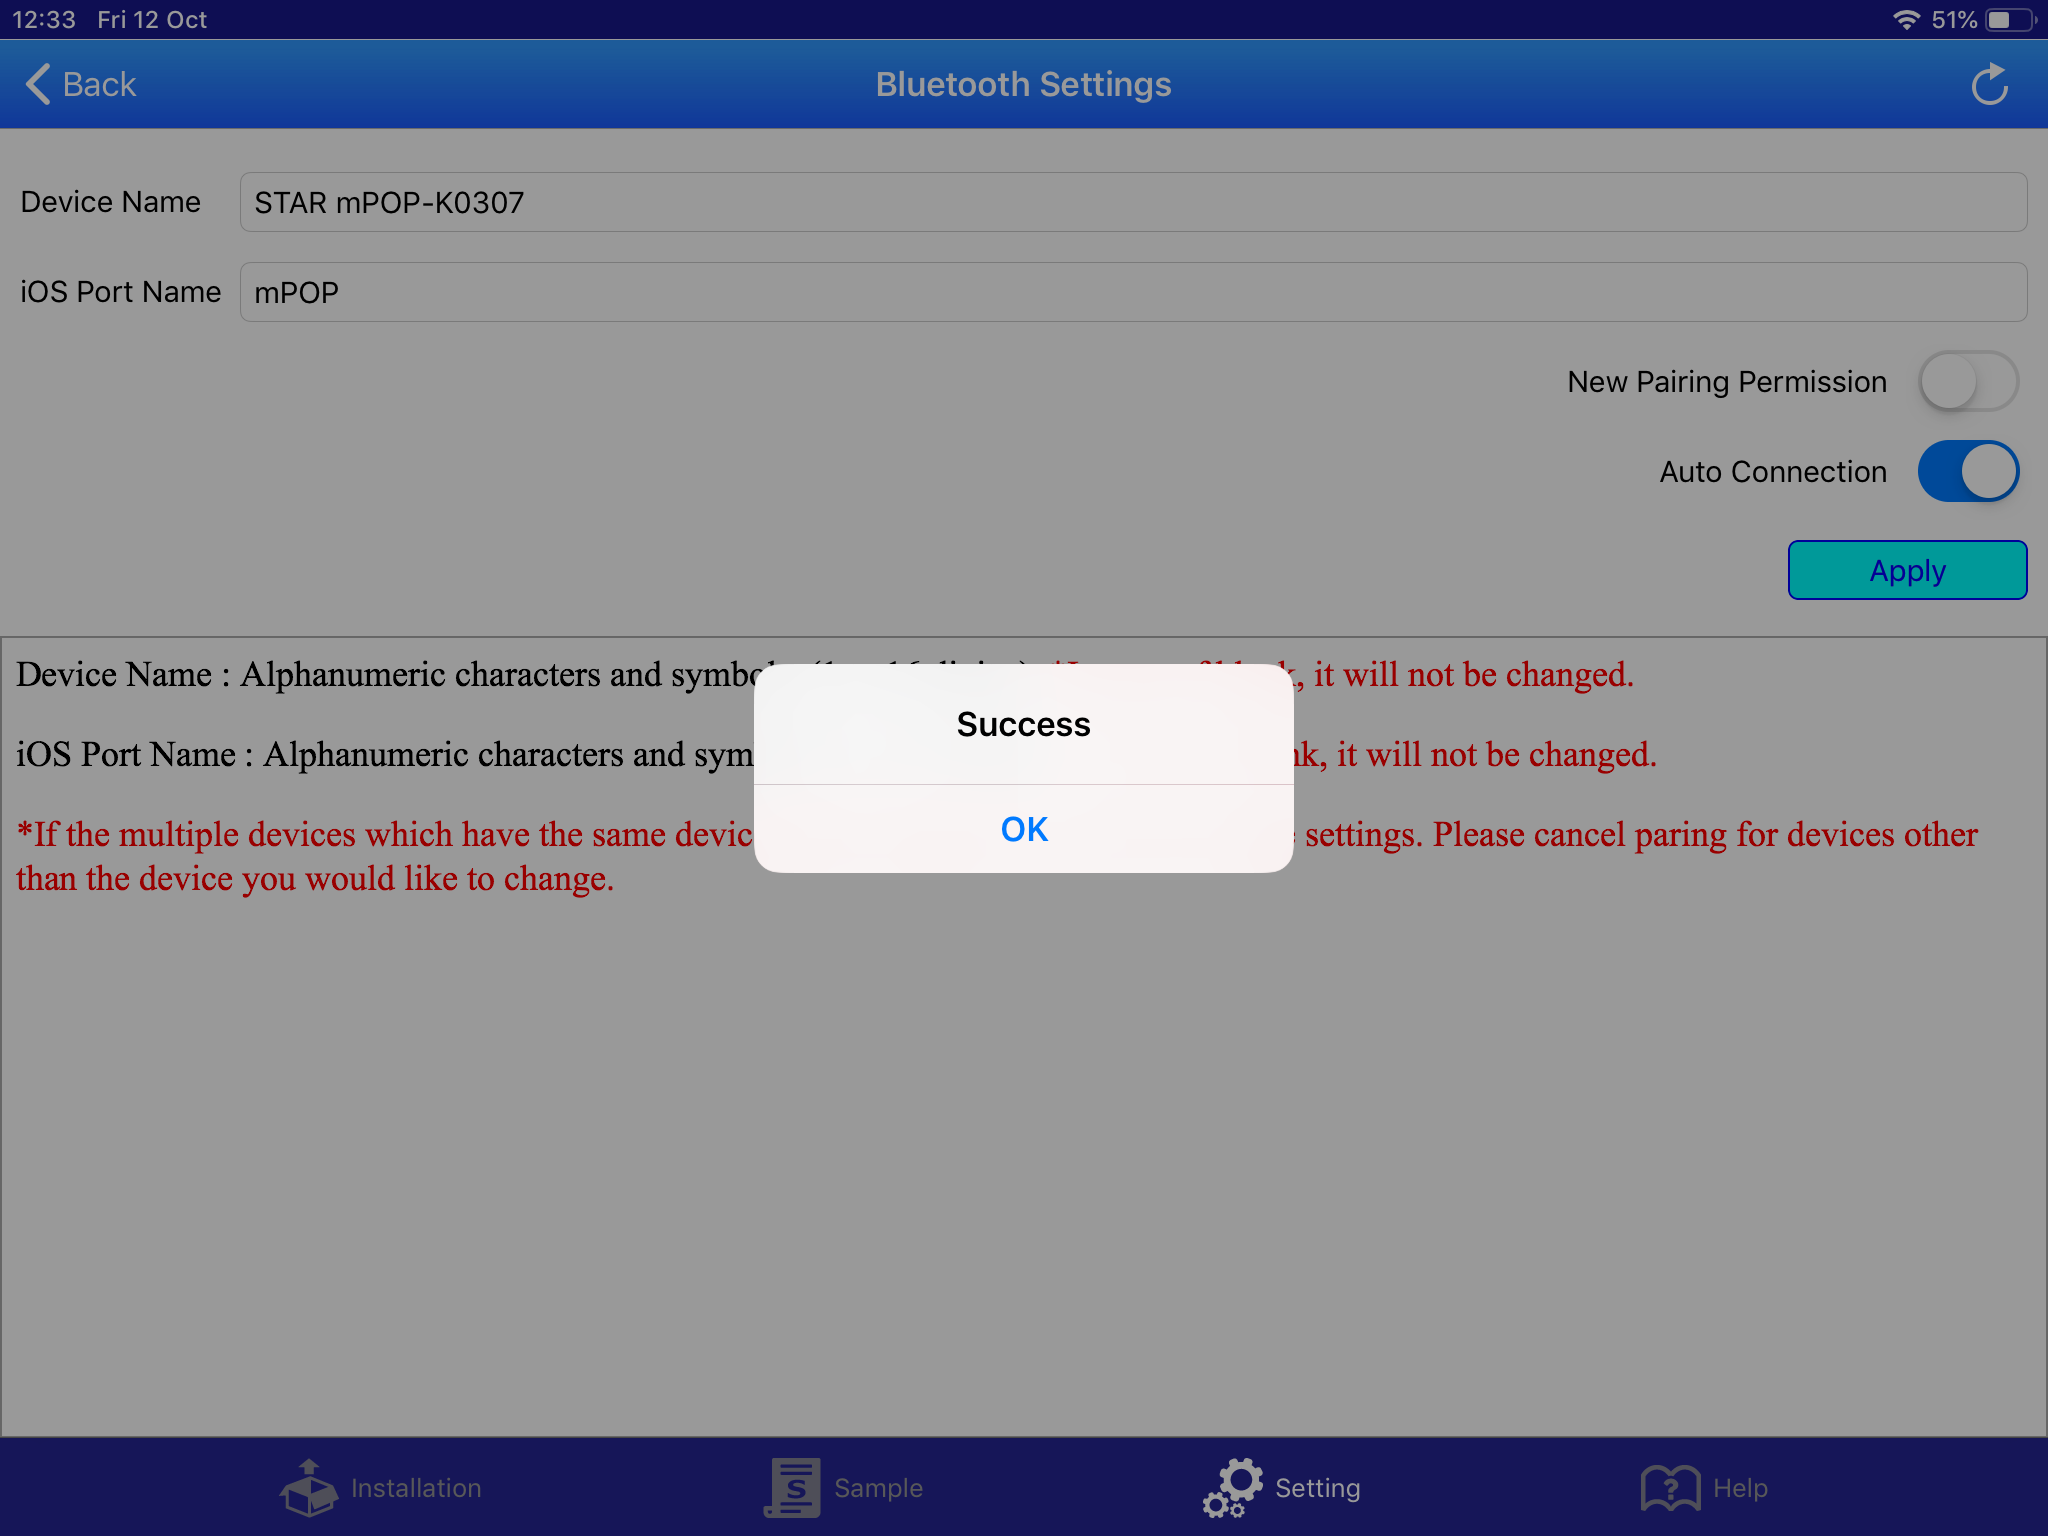
A few moments later you should see a popup like that below to confirm the operation was a success.
The mPOP utility can also be used to test that the printer is printing and that the cash drawer kicks. If you have the model with the barcode reader it can be used to test the reader.
mPOP Troubleshooting.
Power LED does not come on.
- If the Power LED does not turn on even when the power is turned on, it may mean that the power cable is not properly connected. Please check.
- It may also mean that the electrical outlet is loose. Check and make sure that the power outlet is properly connected.
Unable to connect the tablet (cannot pair with Bluetooth).
- Check that the power cable is properly connected.
- Check that there aren't any other tablets/devices connected to the mPOP.
- Check that the mPOP isn't connected to another iOS device such as an iPad or iPhone. If it is then end the connection and try connecting to another host device.
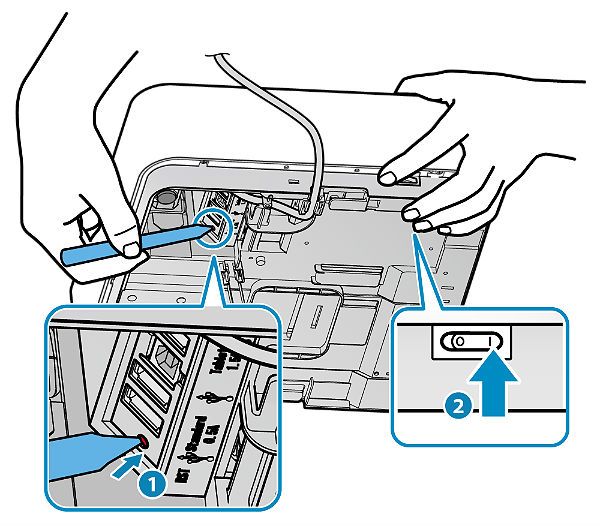
- If the mPOP was previously used with another tablet you may receive a notification to say that the wrong PIN or passkey was used, even when Bluetooth has been switched off on the previous device. In this event it may be useful to reset the mPOP to it's factory Bluetooth settings. To do this press and hold the reset button (1) while switching on the power (2) as shown below. Keep pressing the Bluetooth reset button without releasing it. When the initialization starts, the Power LED and the Error LED located on the top surface of mPOP will blink.
- Check that the mPOP isn't connected via USB to a PC. If a USB connection is used for communicating with a PC the USB connection takes precedence over Bluetooth and a Bluetooth connection is not possible.
- Check that 'New Pairing Permissions' in the mPOP Utility is not set to 'OFF'. If it is then repairing with previously connected tablets or new tablets is prevented. If you check Bluetooth Settings in the mPOP Utility, 'New Pairing Permission' should look like the following image.
Cash Drawer does not open.
- Check that the power is switched on and the cable is properly connected.
- Check that there is a Bluetooth connection with the host tablet.
- Check that there are no coins, bills or foreign objects stuck inside which are preventing the drawer from opening. You can pull the front face of the drawer forward to confirm.
- An object over 8kg in weight placed on top of the unit can also prevent the drawer opening. You can manually open the drawer in one of two ways:
- Using the lock release lever (1) Put the mPOP on it's side and locate the lock release lever at the back and towards the middle of the mPOP. Insert something slim and tapered in the hole of the lock release lever (2) (like a pen) and by sliding this towards the front, the cash drawer will open (see below).

Multi-Function button.
This is a little red button on the side of the mPOP machine behind the paper tray. When enabled it can be used to open the cash drawer.
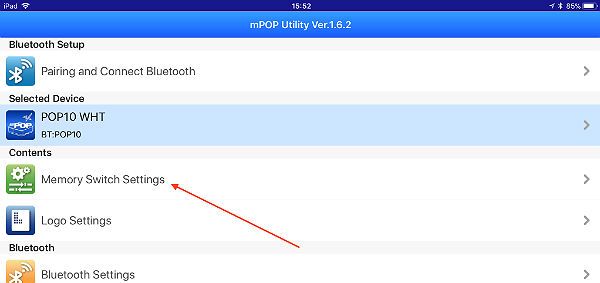
- To enable this you'll need to use the mPOP utility. Open the mPOP Utility application and select the mPOP from the available list of devices then tap on the 'Settings' tab on the bottom to access the 'Memory Switch Settings'.
- Tap on 'Memory Switch Settings' and scroll down to 'Cash Drawer Control'.
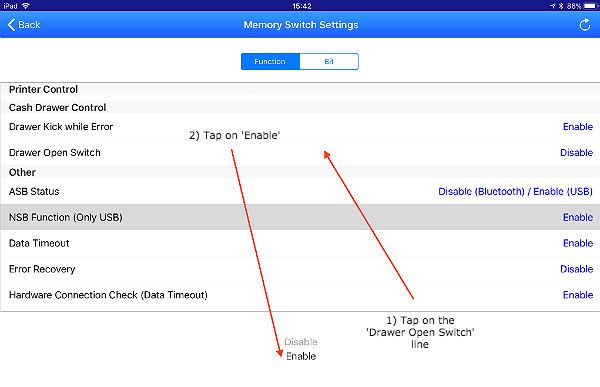
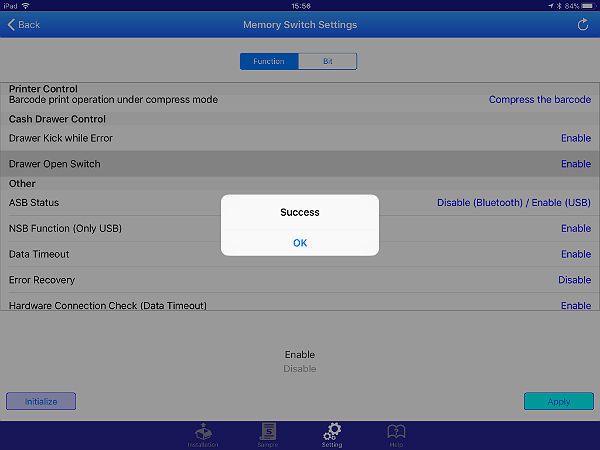
- Tap on 'Cash Drawer Enable Switch' then tap on 'Enable' at the bottom of the screen and touch 'Apply'.
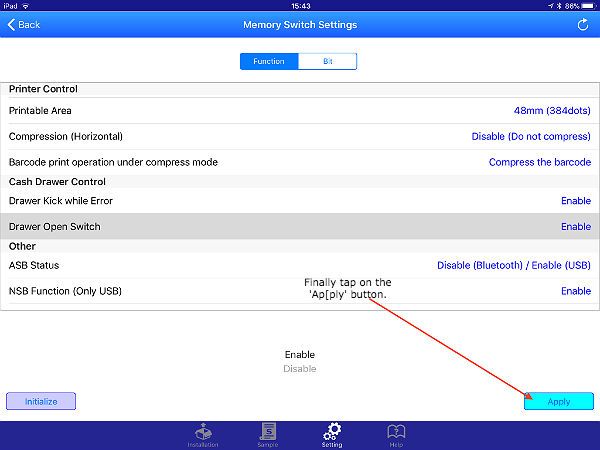
- A small popup should appear to tell you that you've successfully changed the setting.
Receipt is not printing properly.
- Check that the power cable is properly connected. If a white sheet is being ejected instead of a receipt, then it may be possible that the paper roll is set in the opposite direction.
- Check the direction of the paper roll to make sure that the paper is set correctly. please have a look at the following link for Paper Setup
- Is the correct paper being used? Please see Paper Roll Specifications
- If the Power LED is blinking or the Error LED is lit or blinking, check the status of the mPOP by visiting the following link LED Display
Is there a paper jam?
- Push the front of the printer to open then pull out the printer. Pull the lever forward to open the printer cover and remove all jammed paper and fragments.
Can you get the printer to self-print?
- To do this turn the printer off and open the printer. Pull the printer out and locate the multi-function button behind the paper tray. While holding down the multifunction button turn the power on. Release the button when printing starts.
Resetting the Bluetooth Settings.
Beside the USB ports underneath the mPOP is a small red pinhole. This is the Bluetooth reset button. Turn off the power using the switch on the side. While pressing the Bluetooth reset button located on the bottom surface of mPOP, turn on the power switch located on the side of the mPOP. Keep pressing the Bluetooth reset button without releasing it. When the initialisation operation starts, the Power LED and the Error LED located on the top surface of mPOP will blink. When blinking starts, release the Bluetooth reset button. When the initialisation operation has finished, the LED will stop blinking, and only the Power LED will remain lit.