How to Automatically Generate Product Variants in your Backoffice

What are Product Variants?
Let's say you have a range of t-shirts. They are all t-shirts but they vary in size, colour or style for example. In AirPOS, both on the POS and for AirPOS e-commerce, you will want to create a range of this type of product for example a small, red, skinny fit t-shirt or an XL, blue t-shirt. Our product variants feature will allow you to quickly and simply generate a range of products from a Master Product.Automatically Generating Product Variants in AirPOS.
The first step is to create your 'Master Product'. For the purposes of this explanation imagine a clothing and accessories retailer who has a new line in T-Shirts based on the popular television series 'Game of Thrones' which comes with with six different designs in five sizes.
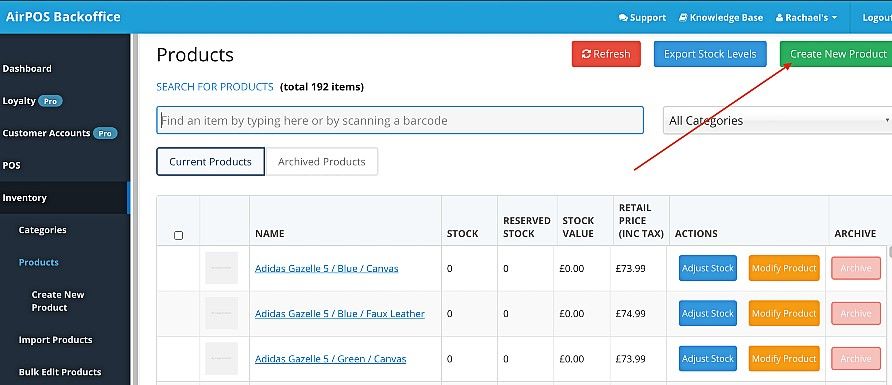
Click or tap on 'Inventory' from the left-hand menu of your Backoffice and your entire inventory will be displayed. At the top right you'll see a button called 'Create New Product'.
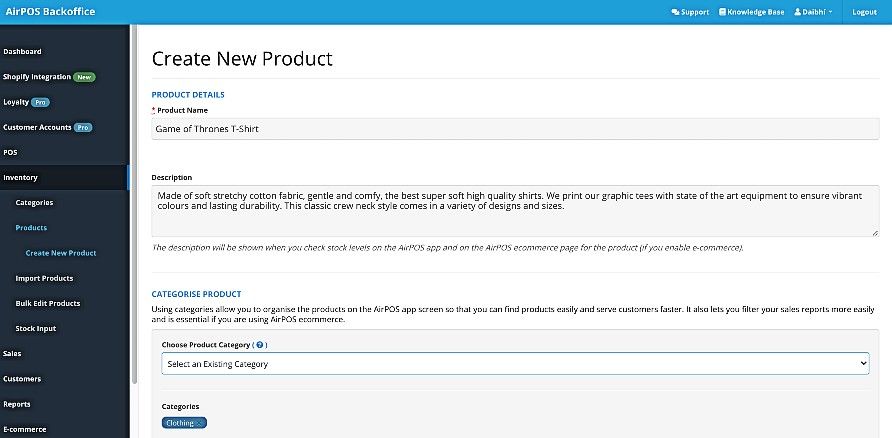
The 'Create New Product' screen will appear. Here you name the Master Product (eg Game of Thrones T Shirt), enter it's cost and retail prices, select the tax rate and assign it to a category.
Scroll down. You can add an image here for your master product. This image will be the default image for any variants for which you don't upload an image.
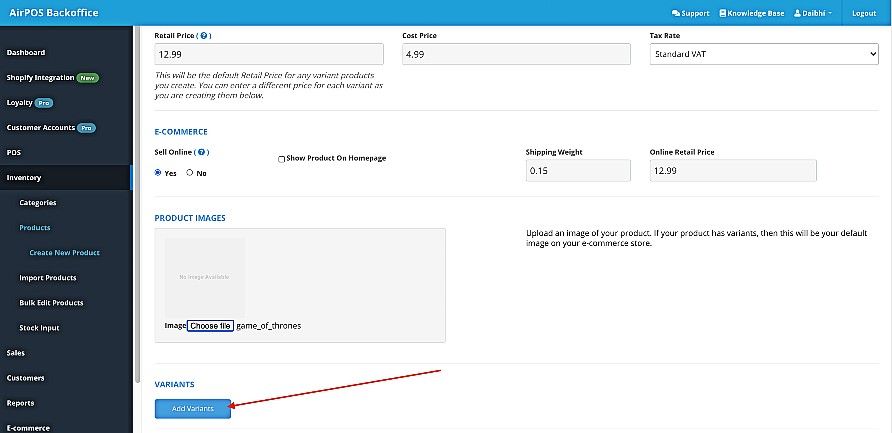
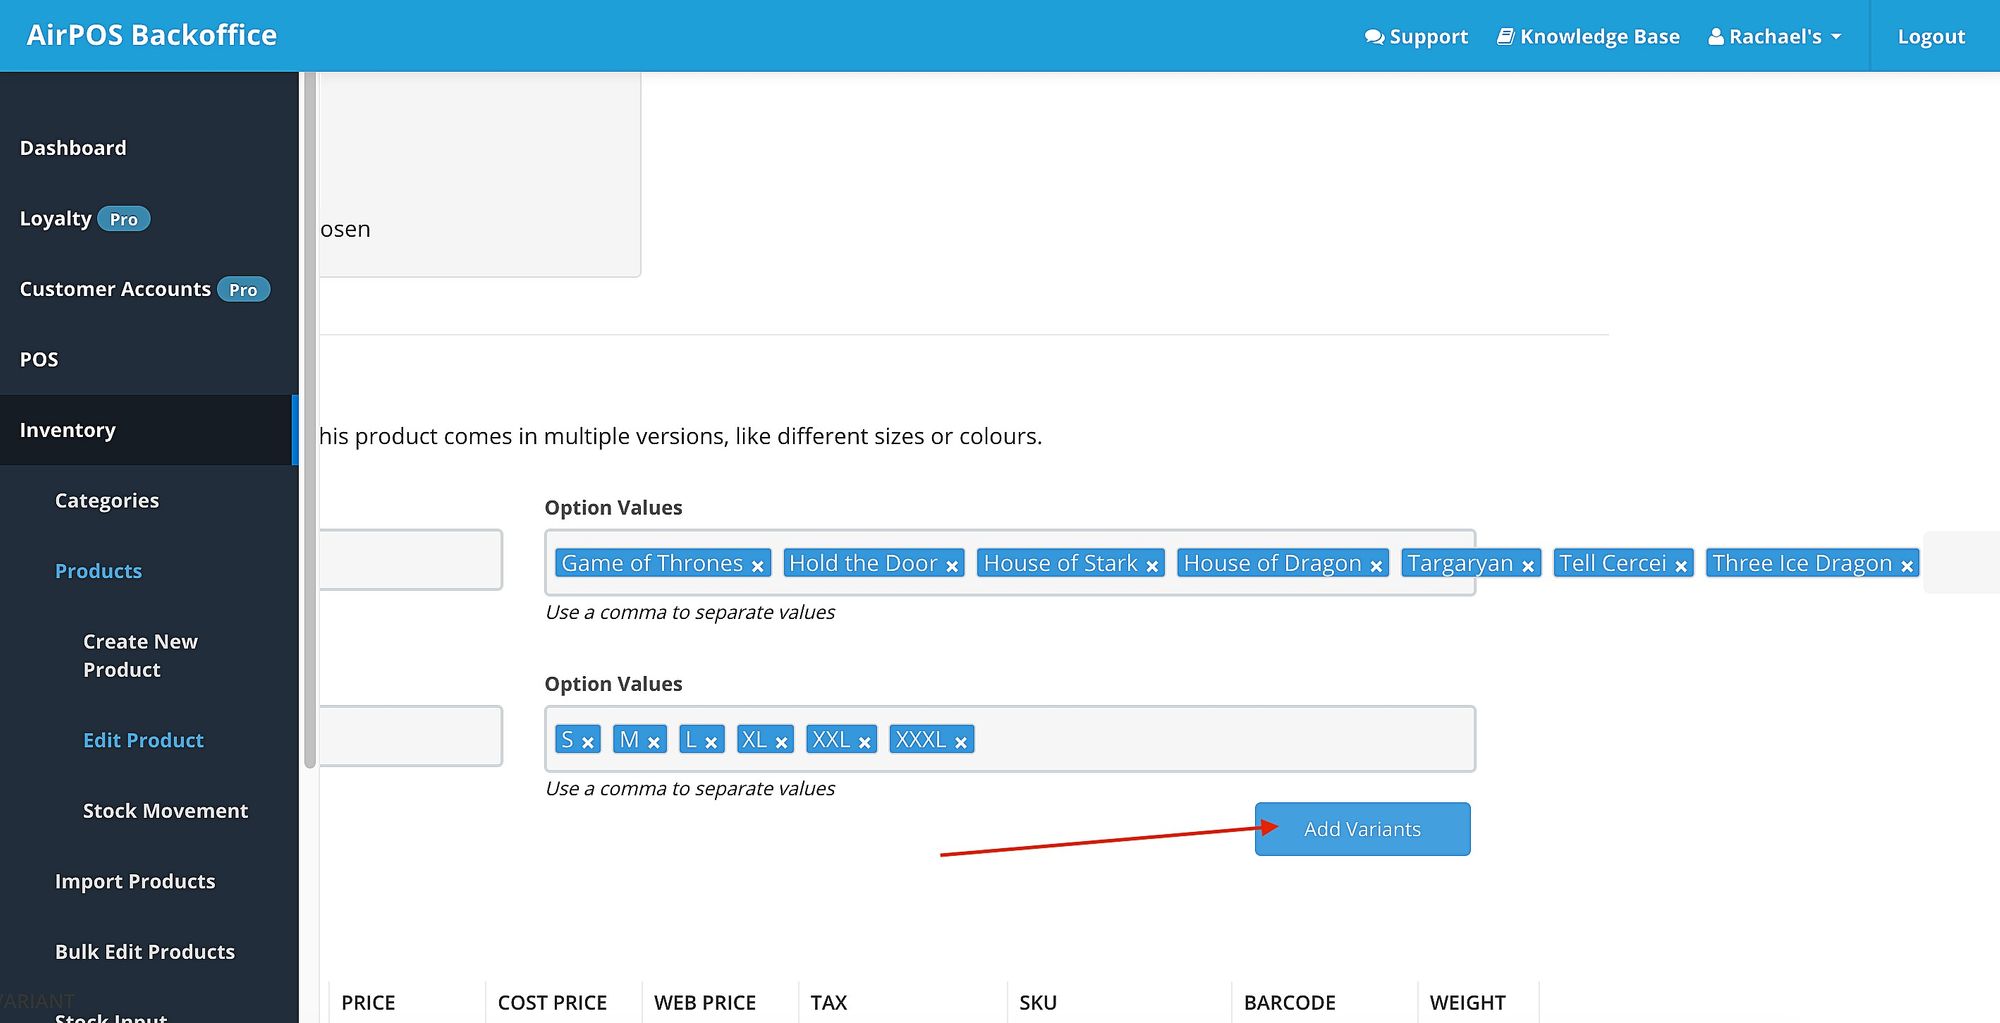
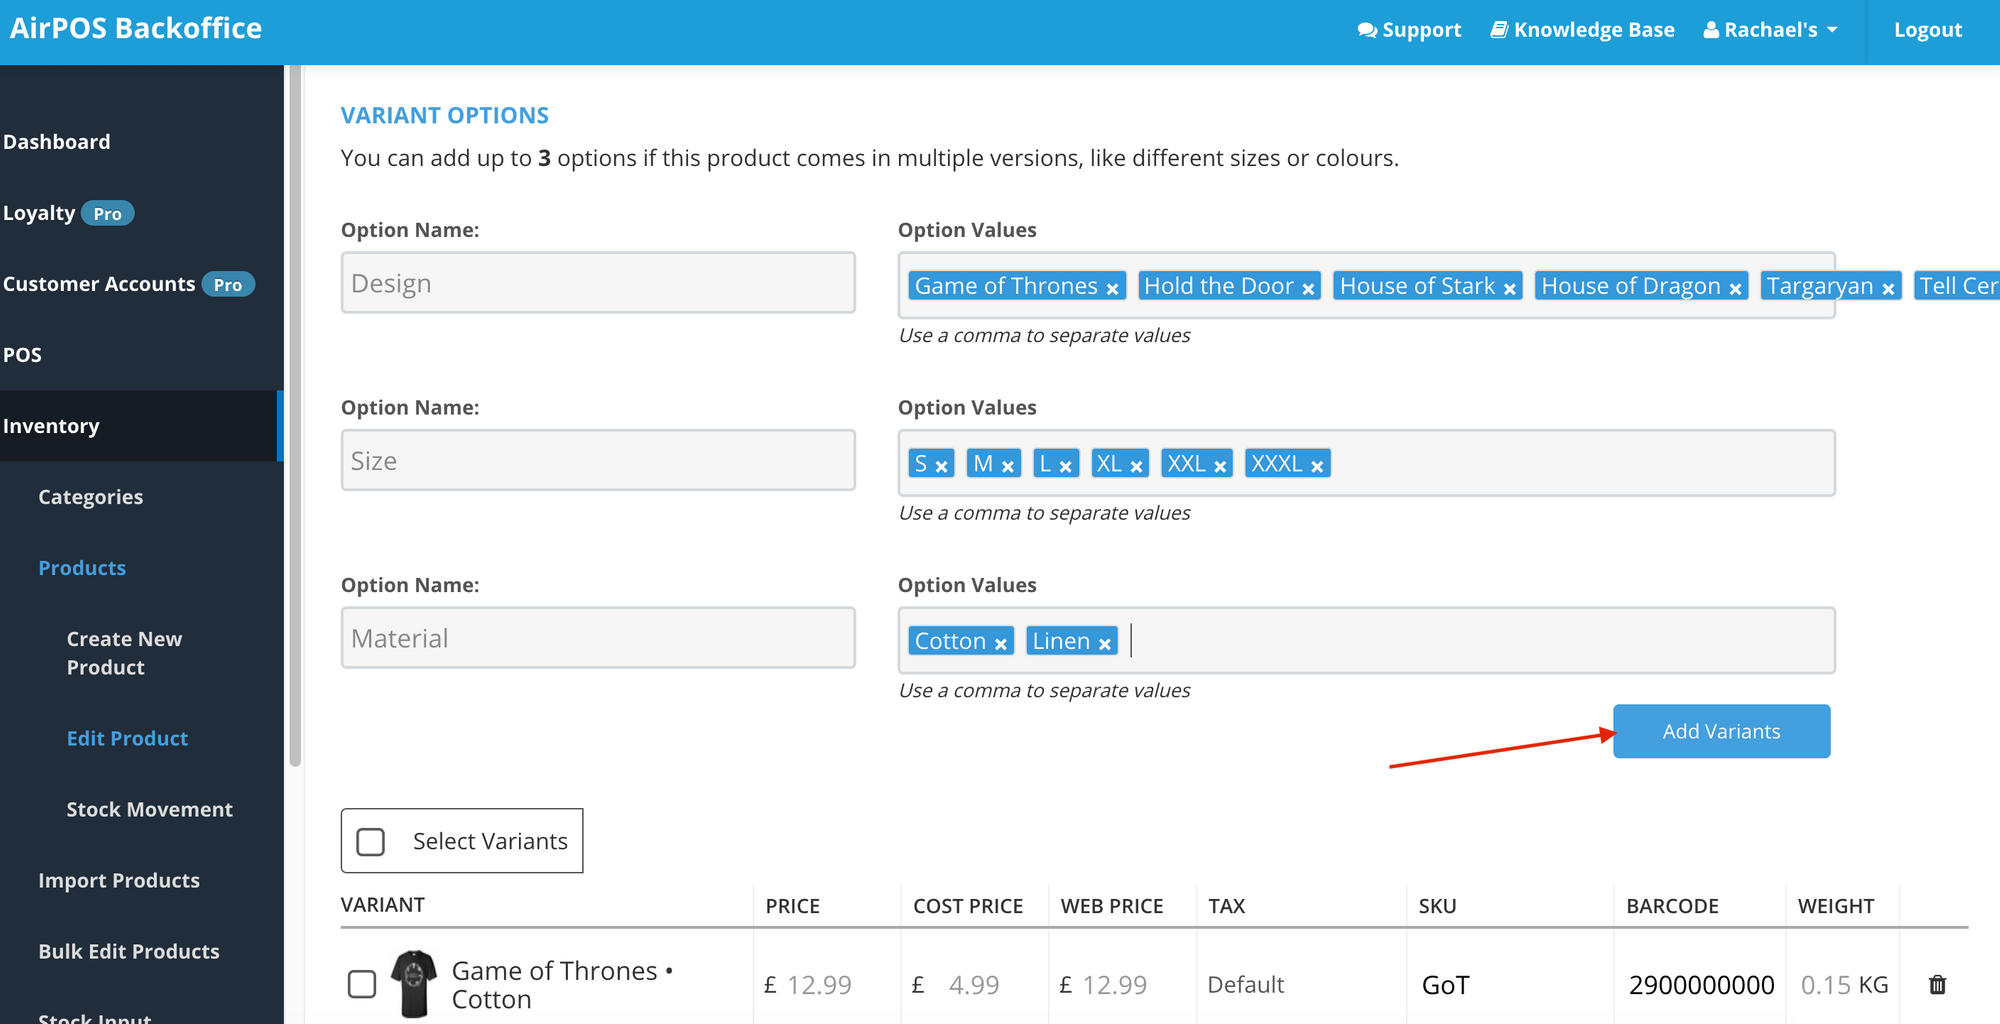
If you scroll down the screen you'll see a button to "Add Variants". Press that button. In the left hand box type the name of the variant option. In this case it's based on the design printed on the t-shirt so we can just call it 'Style'. In the box on the right type the names of the styles which are going to be the option values followed by a comma or a return. When you have entered all the values tap on the blue 'Add Variants' button to select those variants you wish to add to your inventory.
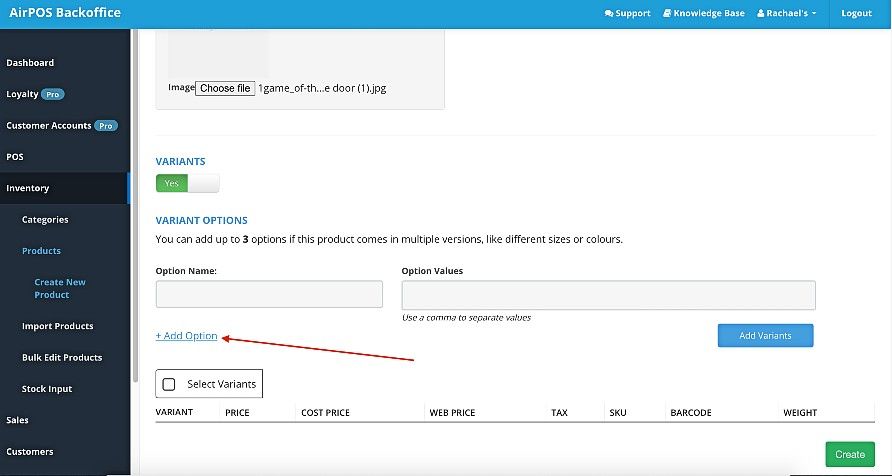
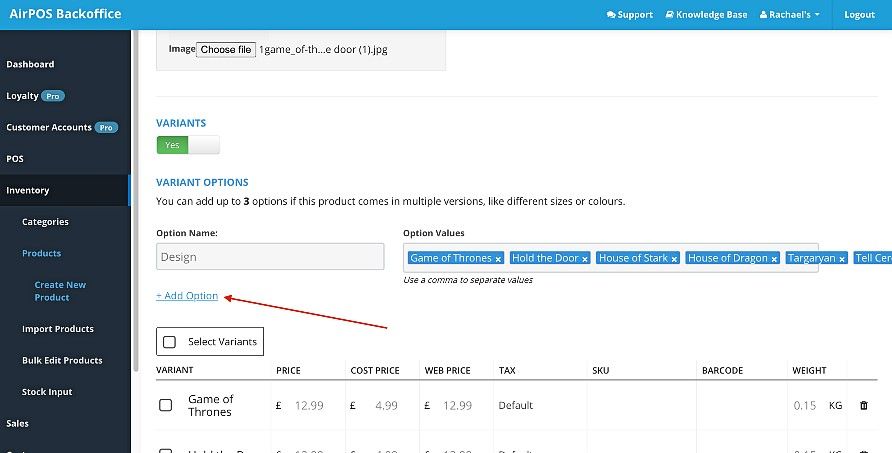
Once you've enabled variants for this product your screen will look like that above. Click or tap on the '+ Add Option' link to enter the first variant option which is going to be 'Design'. Type 'Design' into the 'Option Name' box above and in the option values box type the values which are 'Game of Thrones', 'Hold the Door', House of Stark', 'House of Dragon', 'Targaryan', and 'Tell Cercei' using a comma or return to seperate the values. When the values have been typed a blue 'Add Variants' button is enabled. Click or tap on it.
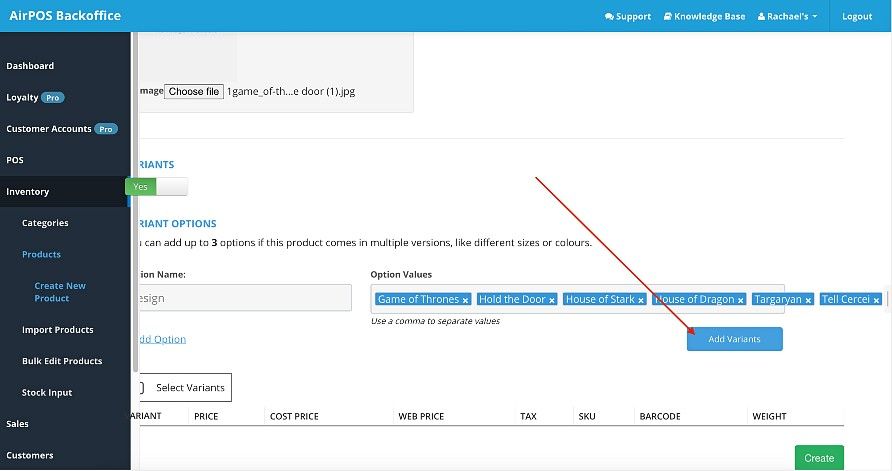
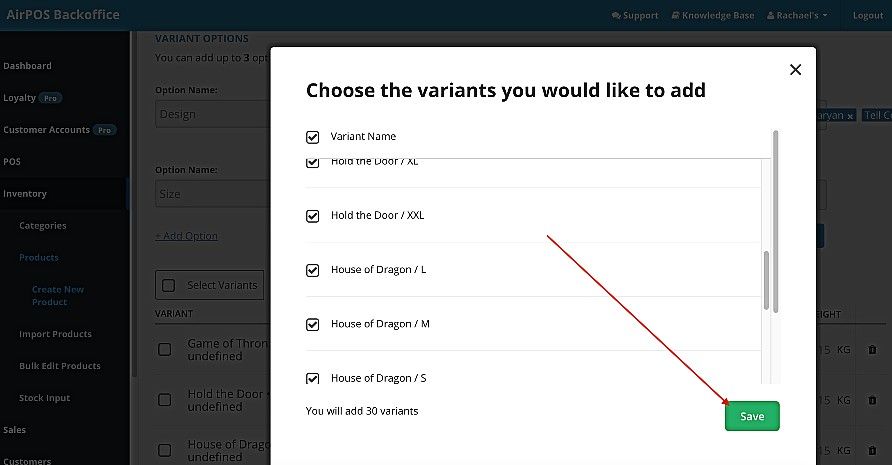
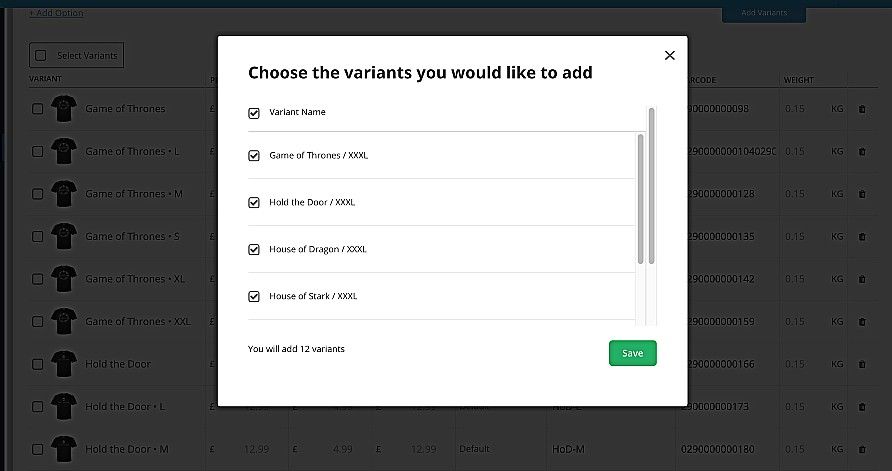
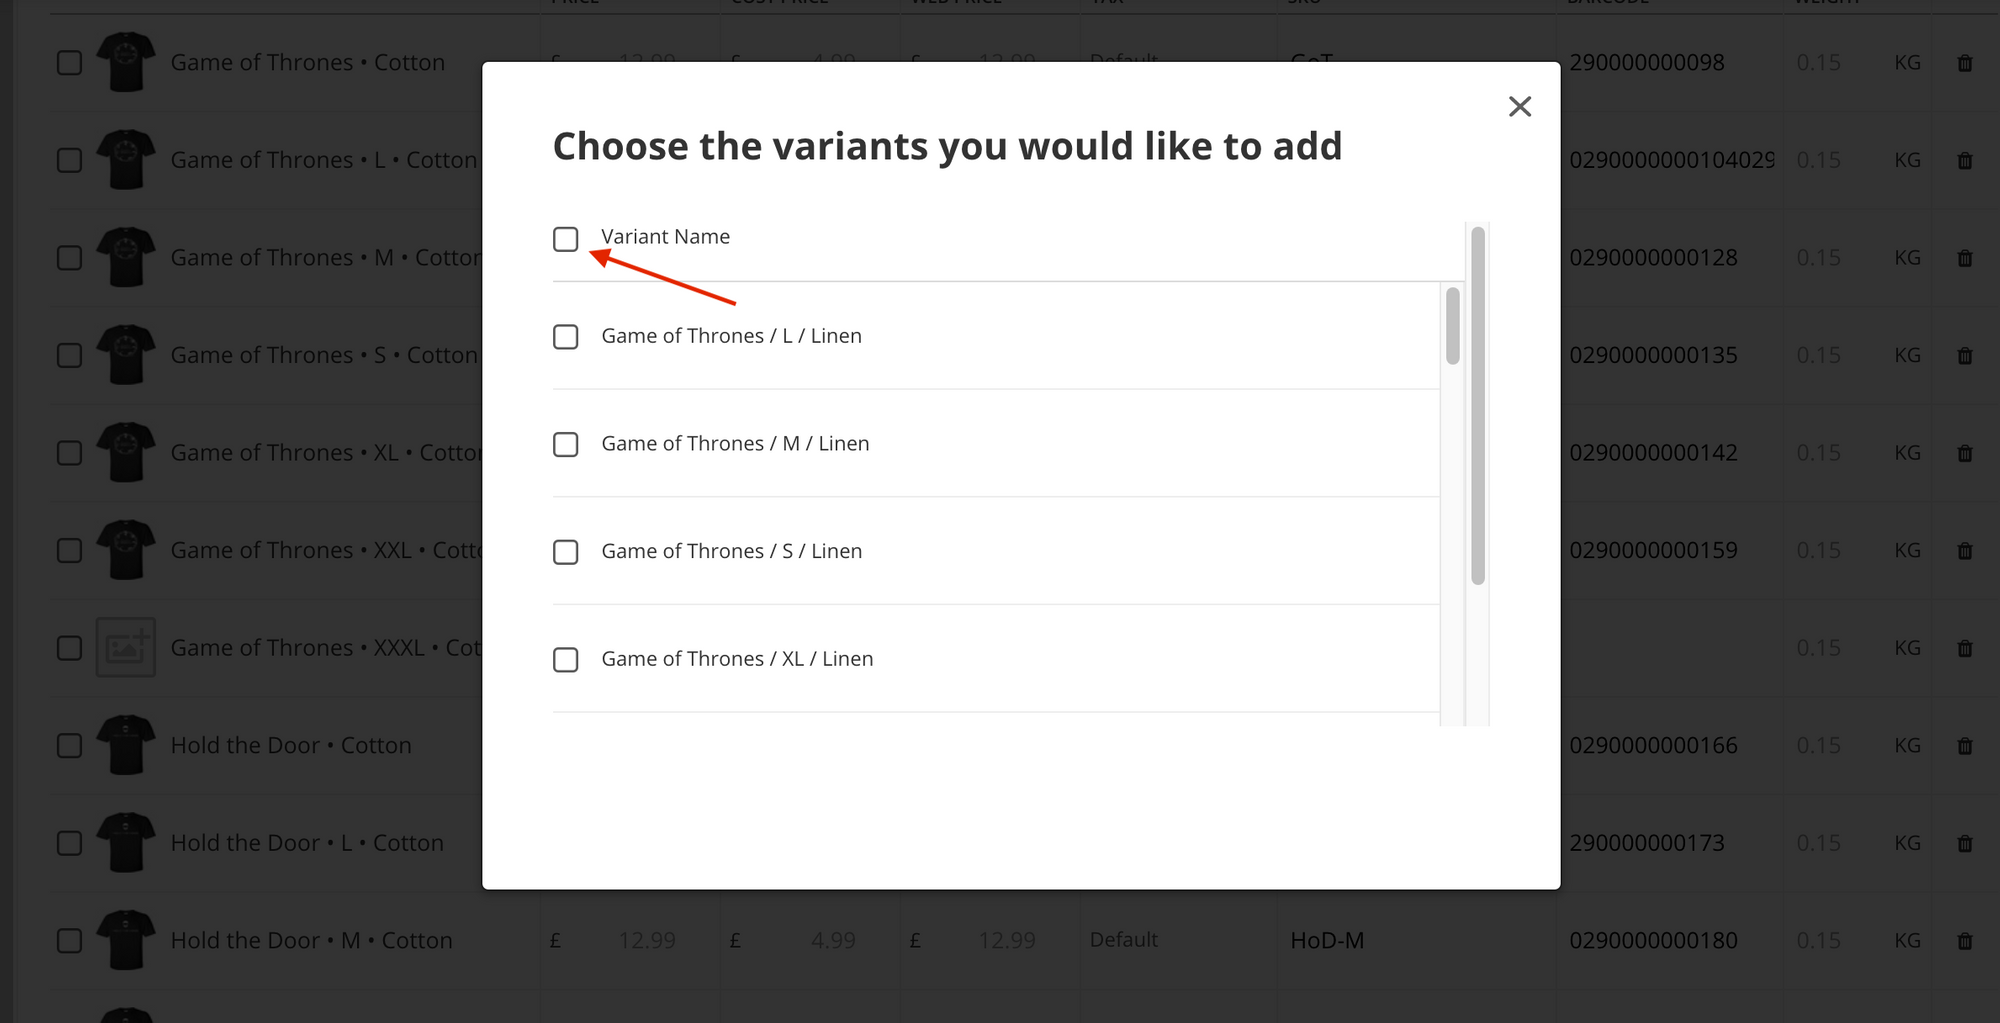
A popup will appear similar to the one in the image below.
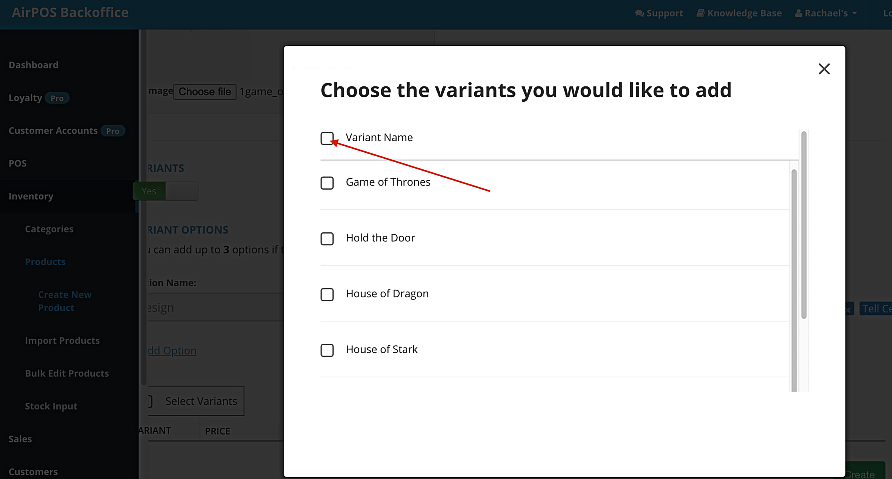
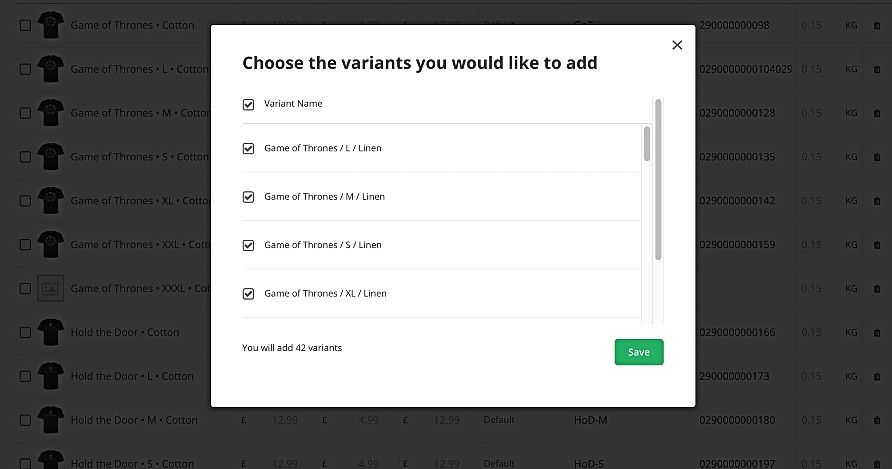
At the top of the screen is a tick box for 'Variant Name'. Tick that and all the variants for this option will be selected and the 'Save' button will appear as shown below.
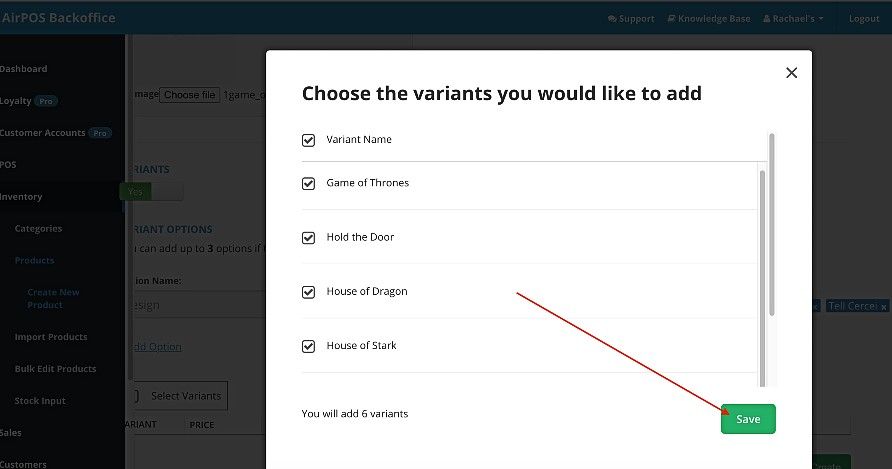
Press that 'Save' button and you'll see a screen similar to the one below.
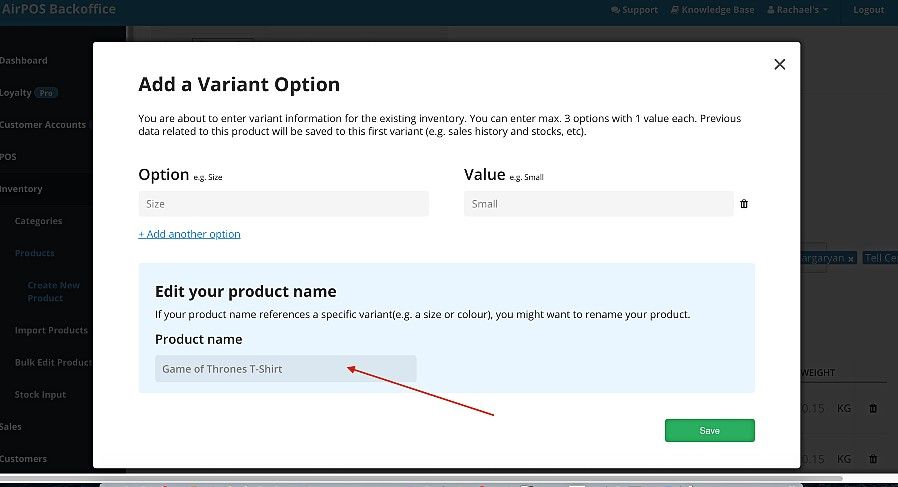
The next step is to add the size options. To do this tap on the '+ Add Option' link and you'll see a popup where you can name the variant option and a value. The name is important as it should be the name of the master product without any variants in design or size. Press the 'Save' button.
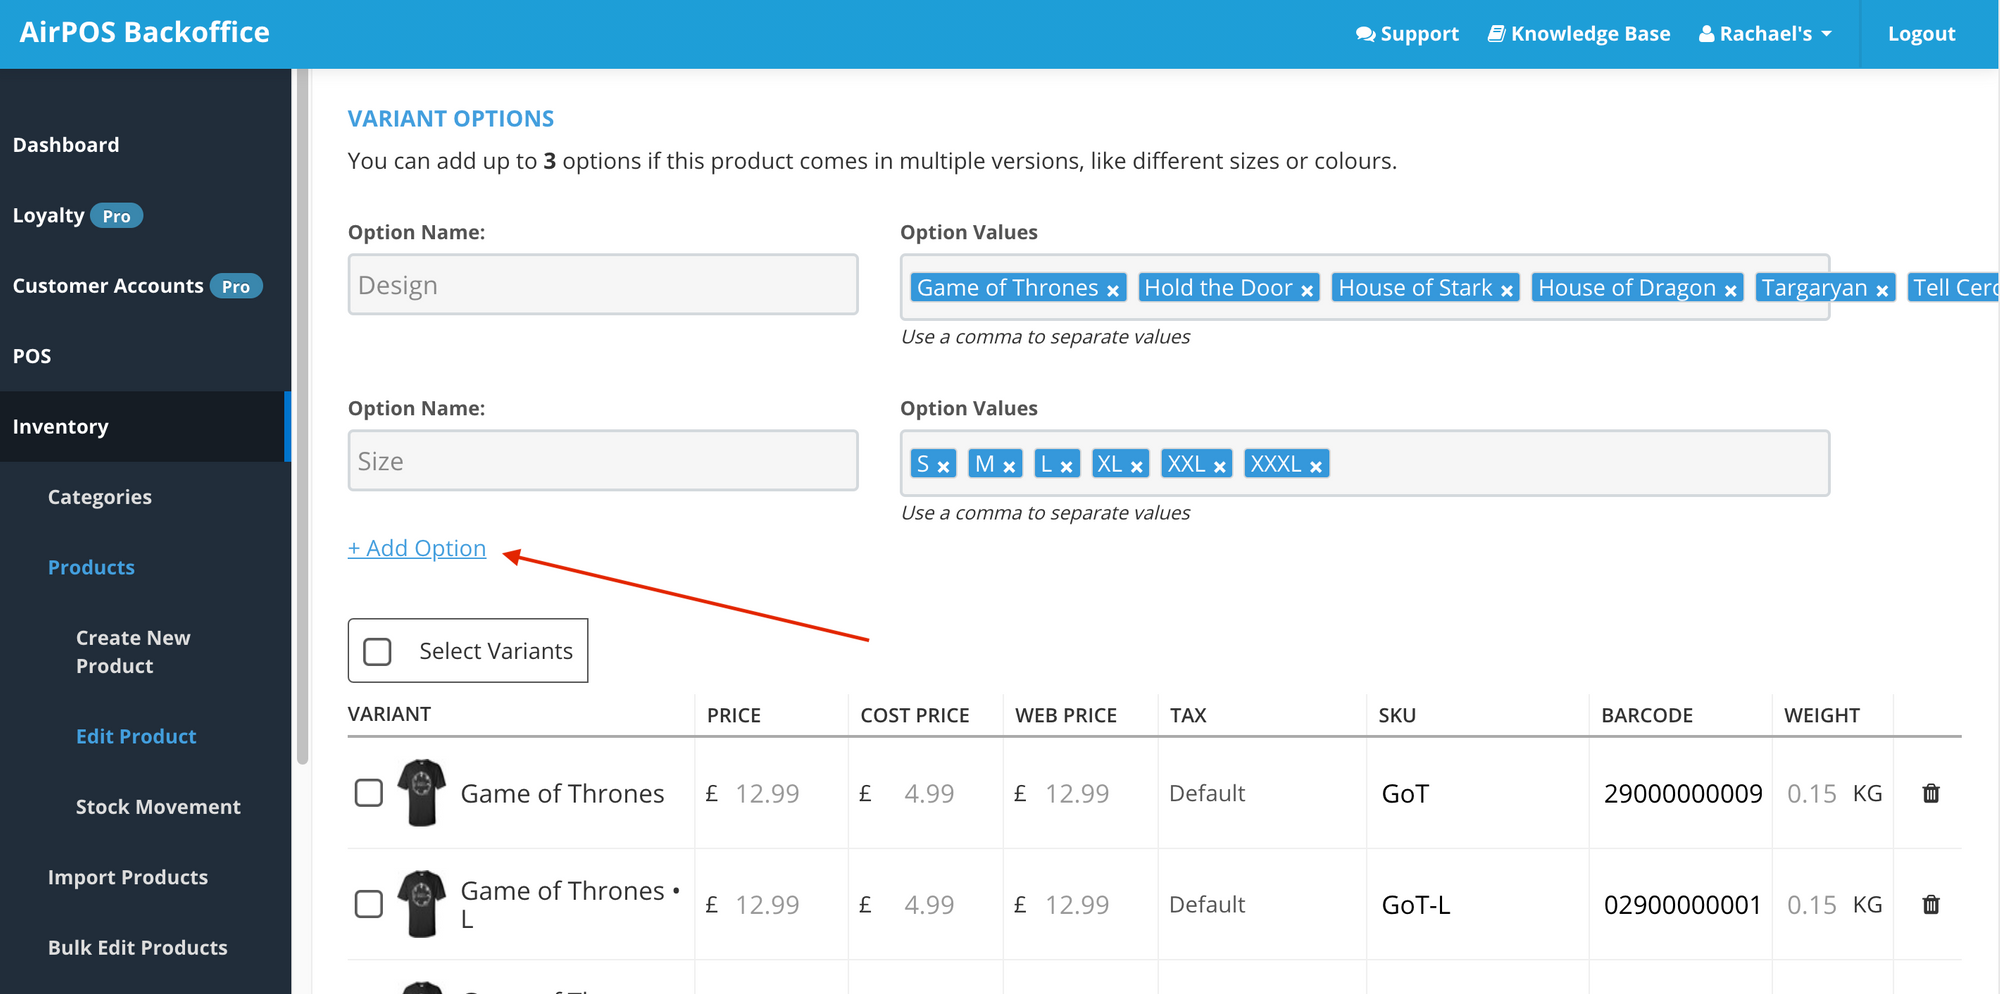
Your screen should now look like that in the image below.
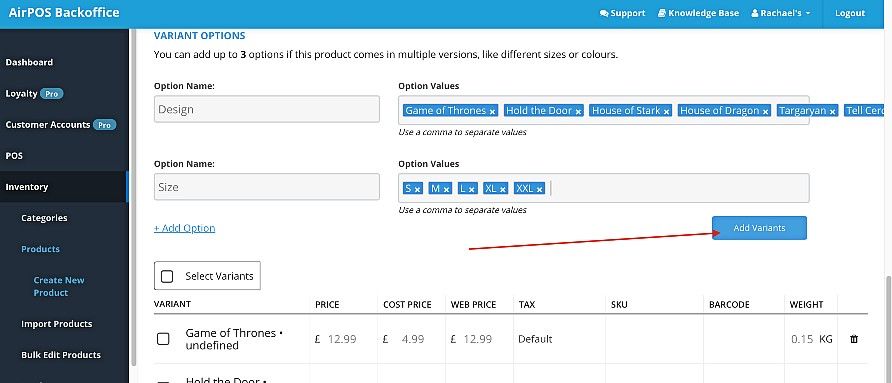
Again it's a matter of typing the name of the option and typing the values, 'S', 'M', 'L', 'XL' and 'XXL'. The blue 'Add Variants' button appears. Press it and a popup like that below will appear.
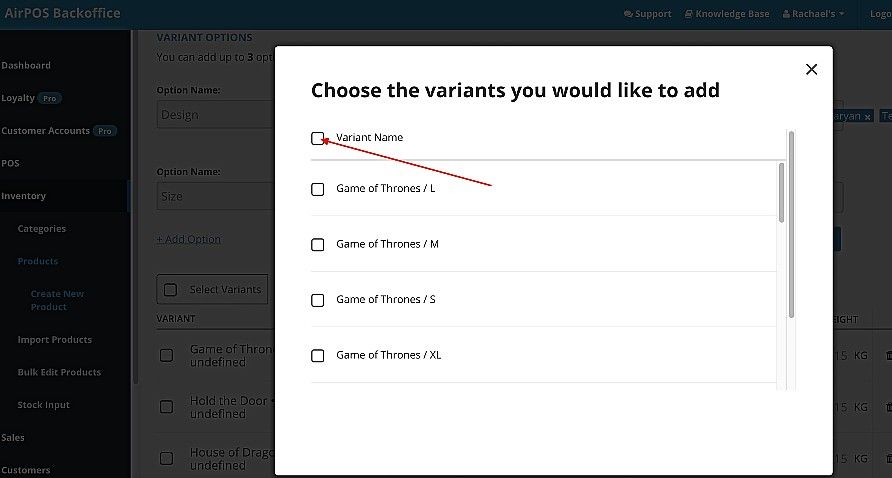
Again select 'Variant Name' and all of the variants will be selected.
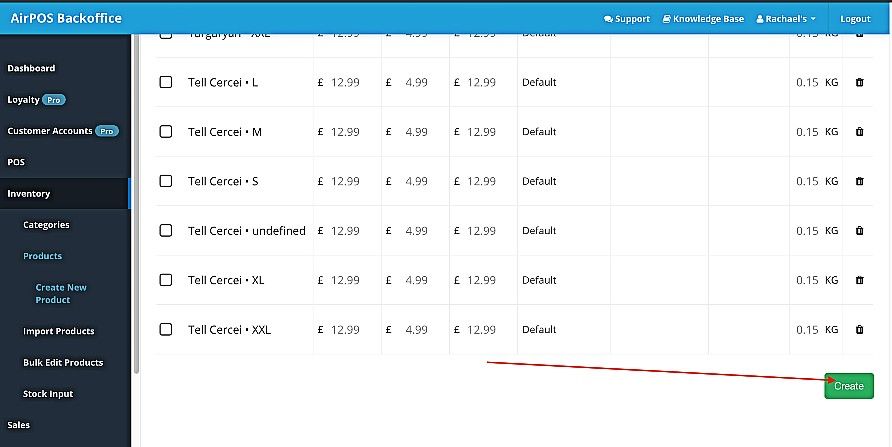
Press Save then scroll down your screen to the bottom and press the green 'Create' button as shown below.
AirPOS will automatically generate a range of variants based on the types you have input. You may have up to three types of variants such as 'Colour', 'Size', 'Material' etc. and up to 100 individual variants for each master product.
Now that you have created the master product and it's variants you can edit the variants to add barcodes, SKU's and separate images from that of the master image if you have different styles or colours. To save processing time and avoid the possibility of the image failing to upload it is advised at the moment to add the barcodes and SKUs and update the product before adding images separately.
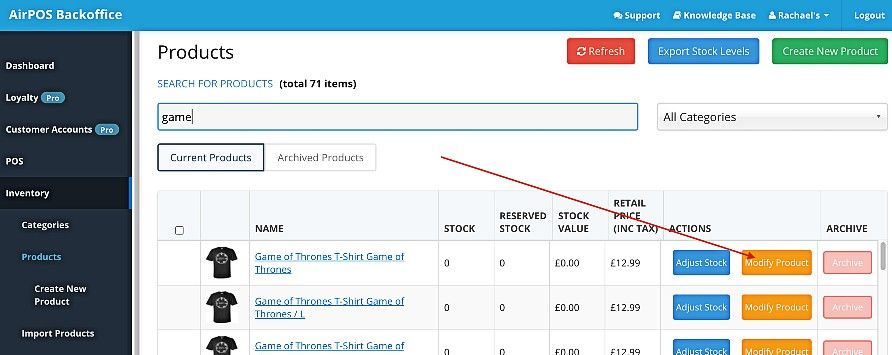
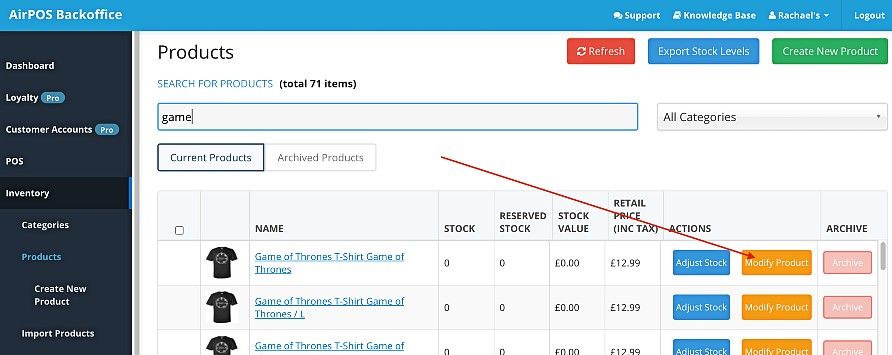
Go back to the Inventory screen and search for the new product. When it appears tap on the 'Modify Product' button for any of the variants as shown below.
This will take you to the screen where you can edit the master product.

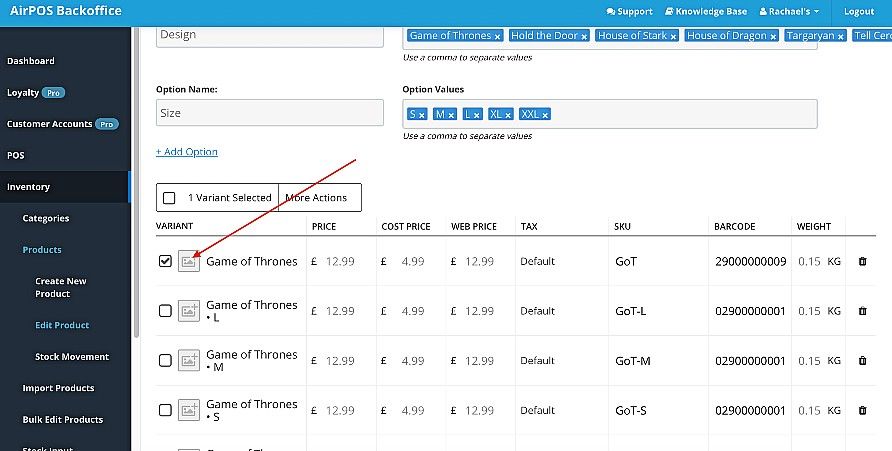
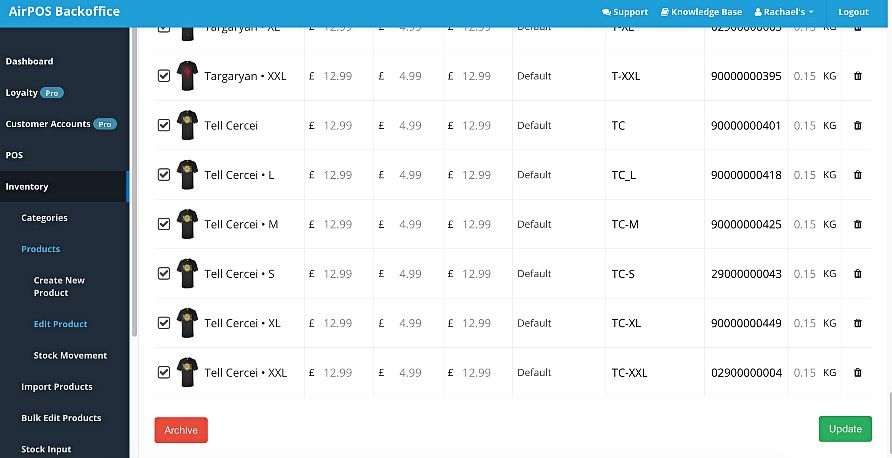
Scroll down and you will come to the variants. If you are adding barcodes and or SKUs to all the product at the top of the list of variants is a selection box which if you select will select all of the variants listed or you can just select those you wish to edit.
When you've added the SKUs and barcodes press the update button at the bottom of the screen.
Once updated go back to the screen to edit the master product and scroll down. Select each variant and click or tap on the image icon beside the selection box.
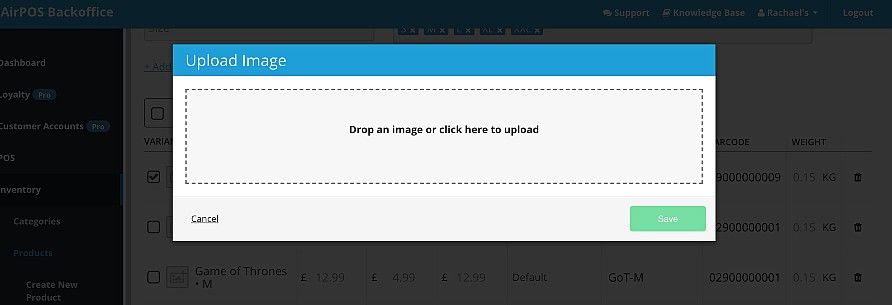
You'll see a popup like the one above where you can select an image. Once selected the 'Save' button is enabled and just press it.
When you have completed adding the images press 'Update'.
Editing and Adding Variants to a Master Product.
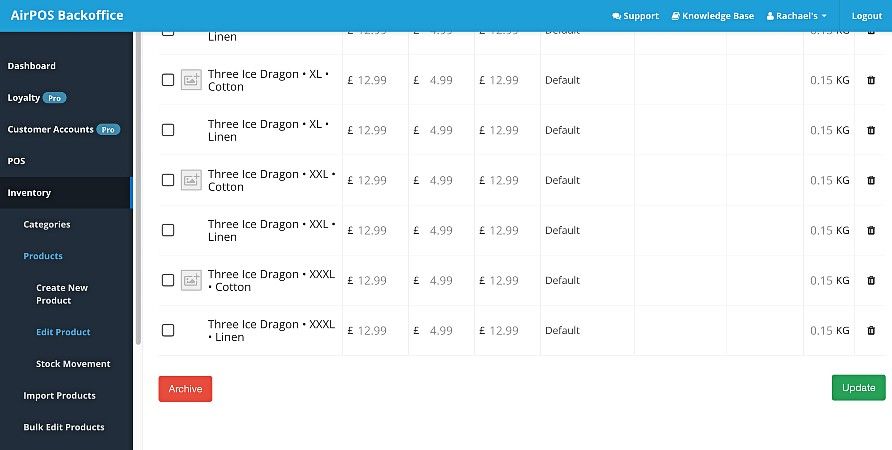
A new design for the Game of Thrones line, 'Three Ice Dragons" with a new size, triple extra large has become available and needs to be added to the existing range.
The first step is to locate the master product in your inventory screen and tap or click on the 'Modify Product' button for any of the variants in the inventory screen as shown below.
Scroll down the screen until you see where the variant options are. In the design options field type 'Three Ice Dragons" and press the return key. In the size options box type "XXXL" and a comma or press return.
Press the 'Add Variants' button and you will see a popup in which you can select any of the listed variants or if you select 'Variant Name' at the top you can select them all.

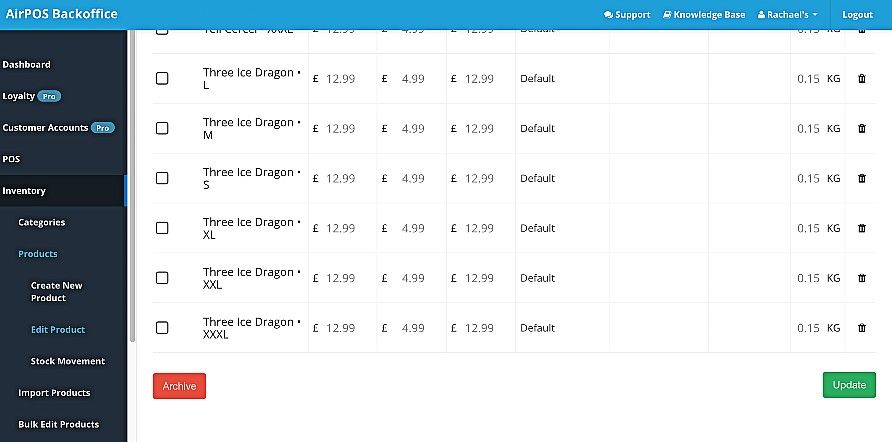
The 'Save' button will appear as shown below. Press 'Save'.
Finally scroll down the screen and update the product.
If this product should then become available in cotton and linen it is possible to a third variant option. Locate the master product in your inventory screen and tap or click on the 'Modify Product' button for any of the variants in the inventory screen. Scroll down the editing product screen until you see the variant options.
Click on the '+ Add Options' link and a popup will appear with suggested options.
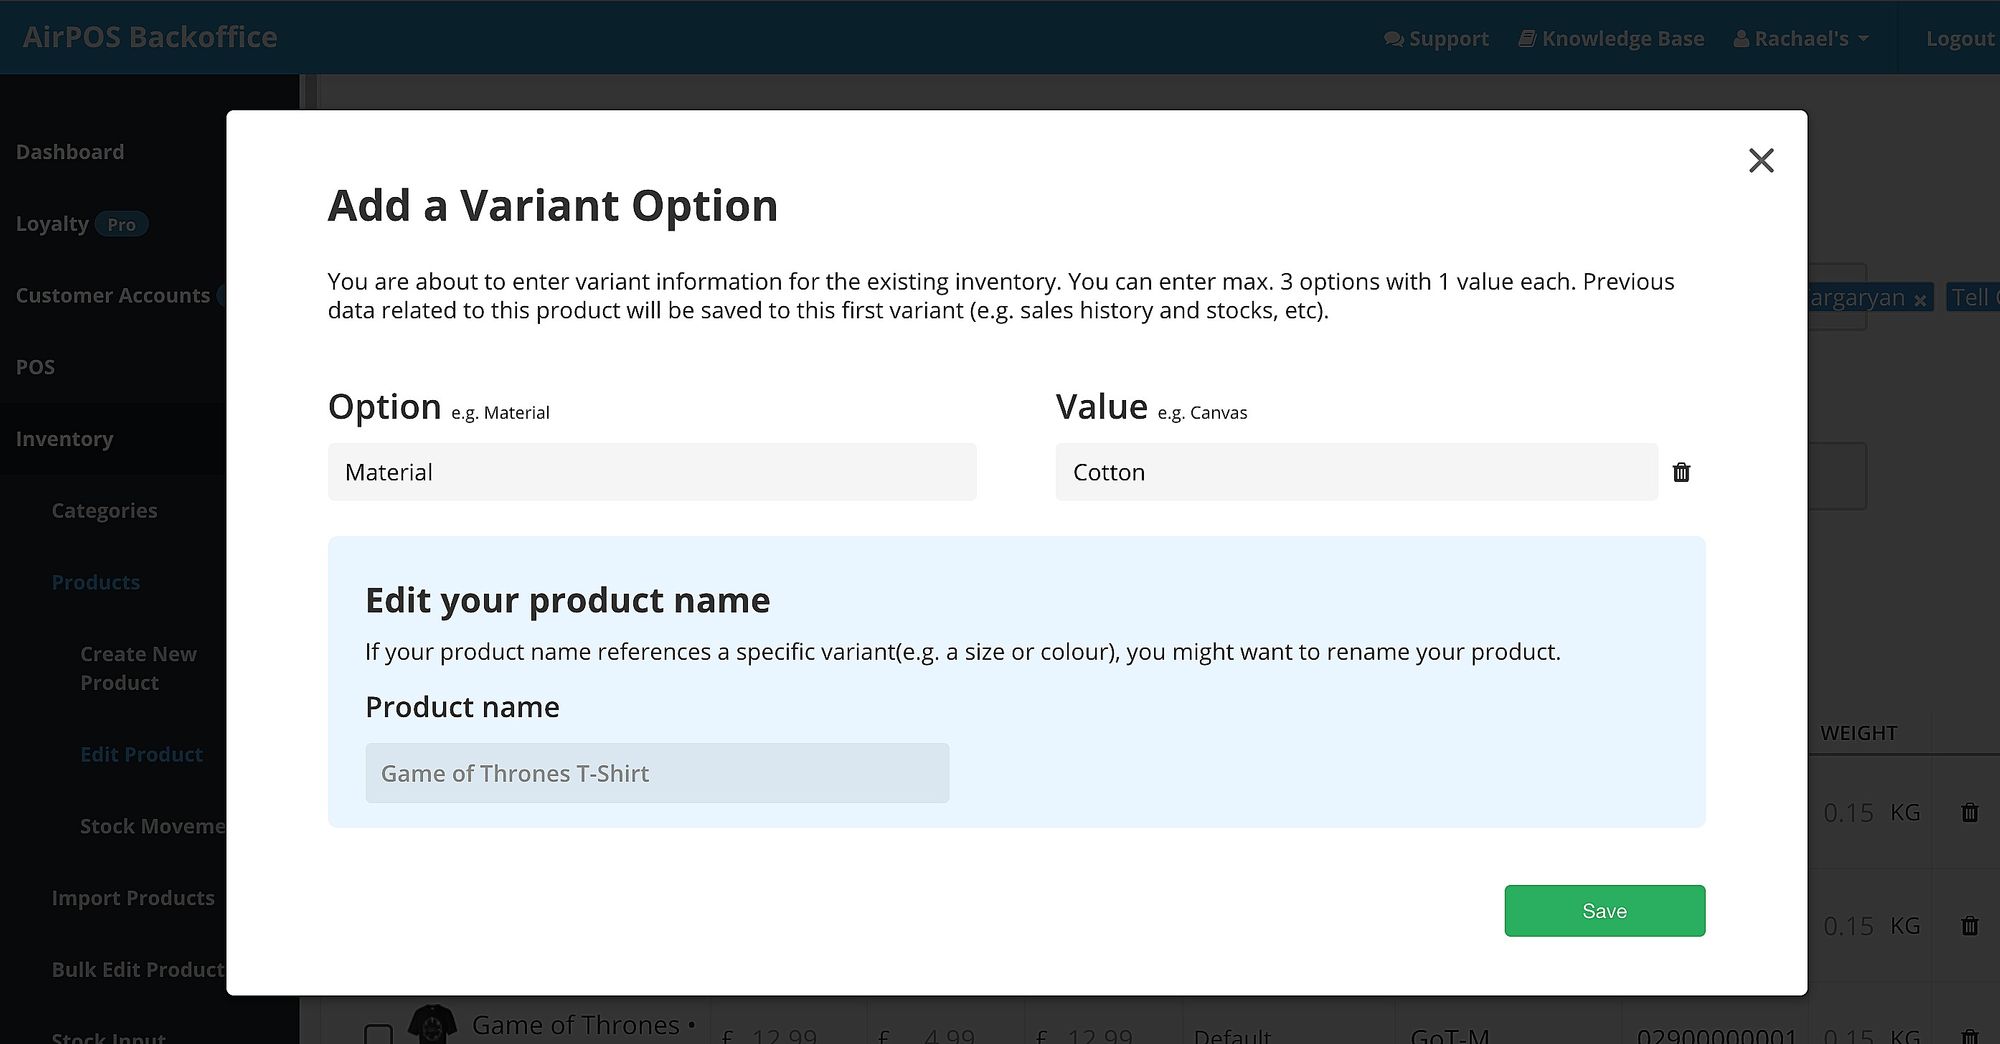
Type 'Material' as the Option and type 'Cotton' as the value. Make sure the product name is the master product name with no variant as part of it and press the green 'Save' button
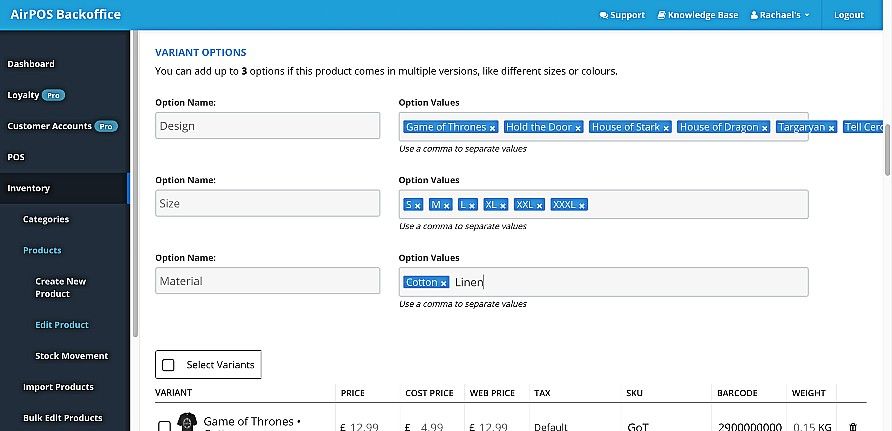
In the option value box type 'Linen' and add a comma or press return.
The choose variants popup will appear again. Select the Variant Name to select all the variants or select only a few if, for example, some sizes aren't available in linen.
When you've made your selections press the save button that appears.
Finally, click or tap update.