Connecting the Star TSP143III LAN Receipt Printer on Android
Star TSP100 Series Network Configuration on Android
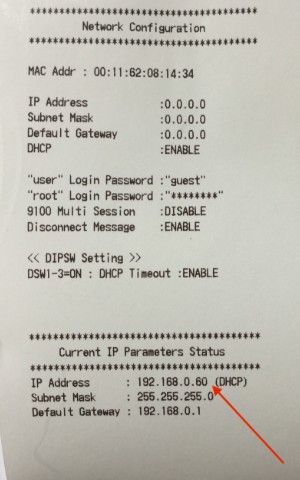
After you have connected your printer to your router with an ethernet cable the next thing to do is to obtain the IP Address for your printer. Hold down the feed button while you switch the printer on. It will churn out a list of settings and then the red light will flash a few times while the printer acquires an IP. It will then self print it’s own settings and at the bottom of that print is the IP Address.
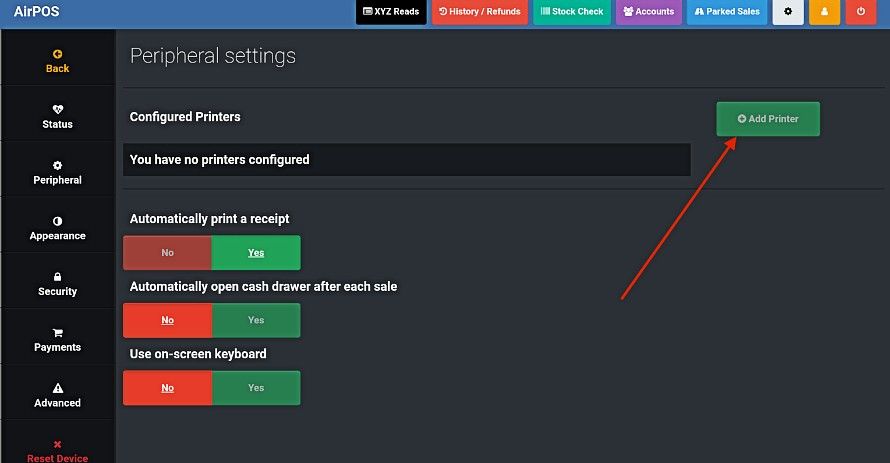
Now open the AirPOS POS and go into settings by clicking on the grey cogwheel icon at the top right of the screen. From the left navigation panel click on ‘Peripherals’ and then press the green ‘Add printer’ button.
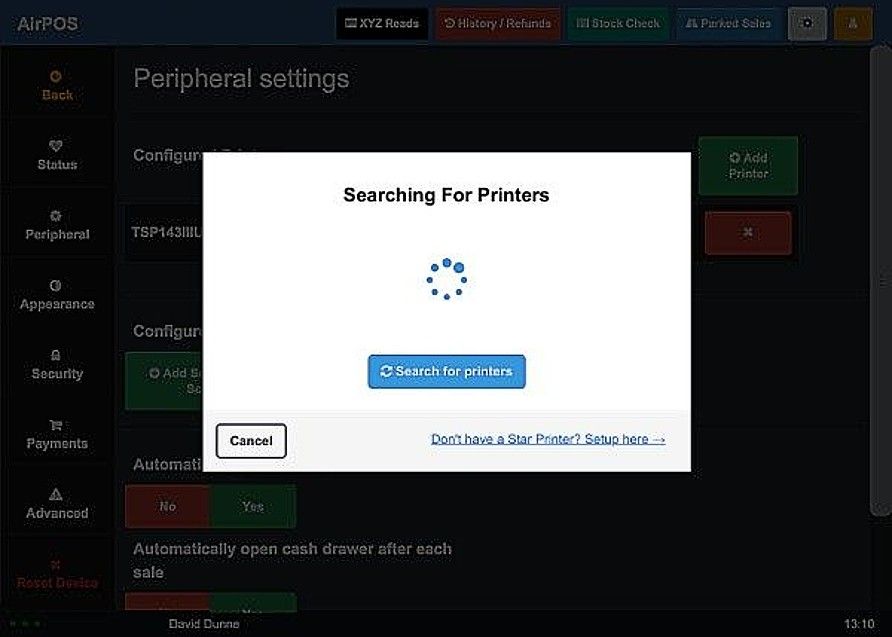
You'll see a popup to tell you that AirPOS is searching.
After a few moments you'll see your printer listed as 'TSP143 (STR_001)' with a Wi-Fi symbol to the right with the same IP Address you obtained from the self print. Tap on the green 'Test print' button.

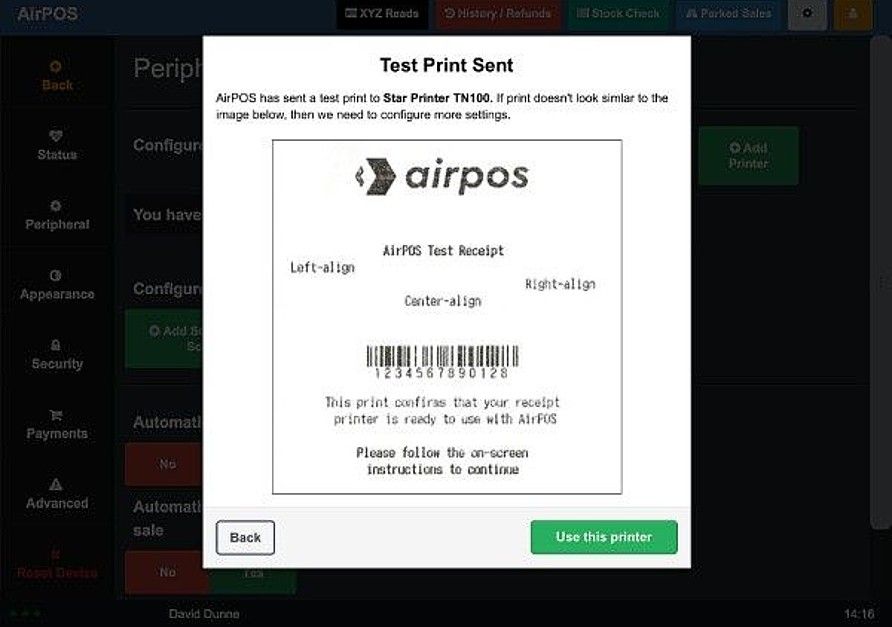
You'll see an image of the test print appear on your screen with a button to 'Use this printer'. Tap on that button to save the printer in AirPOS and that's the setup complete.