
Newland BS8060 Barcode Scanner setup
Please select from the following list the device you are trying to connect your newland scanner to:
Window Setup for the Newland BS-8060
Android Setup for the Newland BS-8060
Ipad Setup for the Newland BS8060
Windows Setup
Attention: This article pertains to the older BS-8060 model of the Newland scanner. If you've recently purchased a Newland scanner, it's likely the newer BS-8080 model. To confirm your scanner's model, check the label on the back of the device. If it says BS-8080, please refer to the attached article for connection instructions. Otherwise, if it's a BS-8060 model, proceed with reading this article.
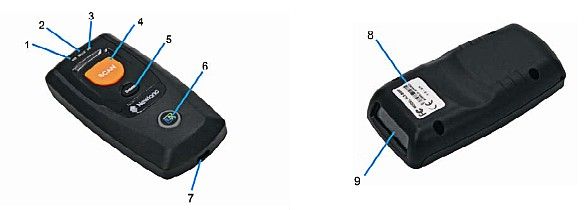
1. Charging/Battery LED
2. Good Read LED
3. Data LED
4. Scan/Power Button
5. Delete/Reset Button
6. Function Button/Function LED
7. Micro USB Port
8. Product Label
9. Scan Window (Remove protective sticker before use).
The scanner will work in Bluetooth Mode or USB Mode the default being Bluetooth. To switch between the two press the Scan/Power Button (4) and the Function Button (6) at the same time for three seconds or scan the appropriate barcode on page 9 of the quick start booklet that came with the scanner. In Bluetooth Mode, unpaired the LED of the Function Button button will blink blue and in USB Mode it will be a solid red.
Connecting the Scanner.
When the scanner has charged power it on by pressing and holding the scan button for three seconds. The function button near the bottom of the scanner will slowly blink blue indicating that the scanner is in Bluetooth mode and ready to pair.
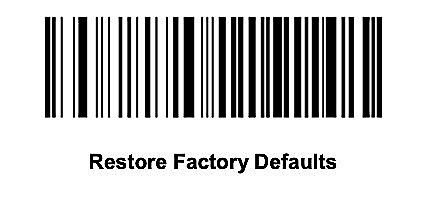
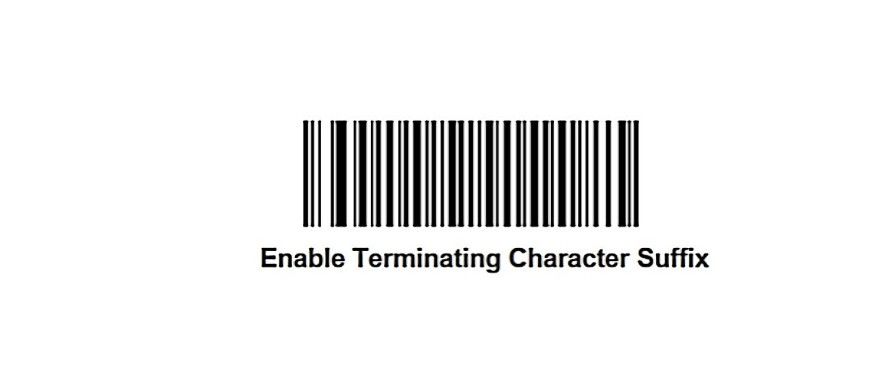
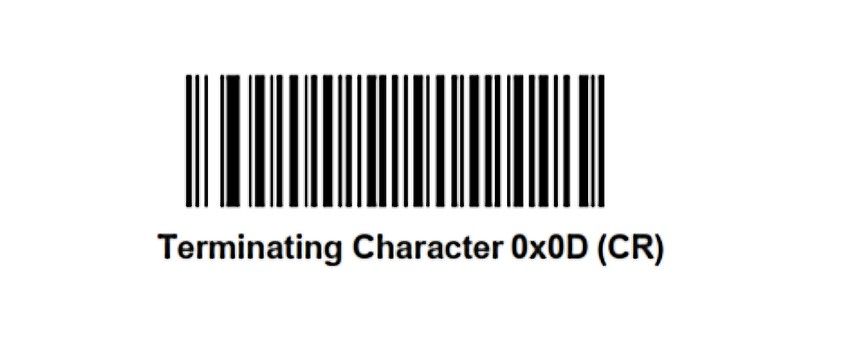
Scan the barcode below off the screen to ensure that the scanner is in it's factory settings.
The scanner will emit a series of beeps and power off. After a few moments it will power up again and beep three times.
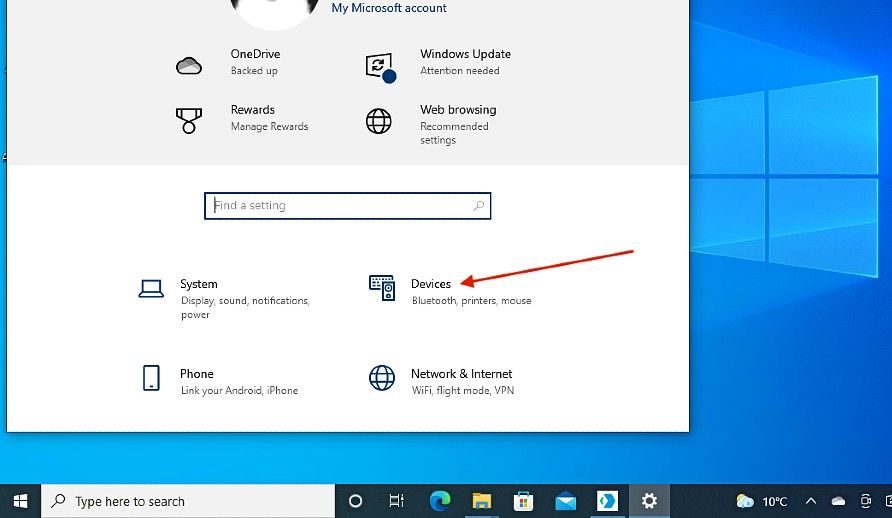
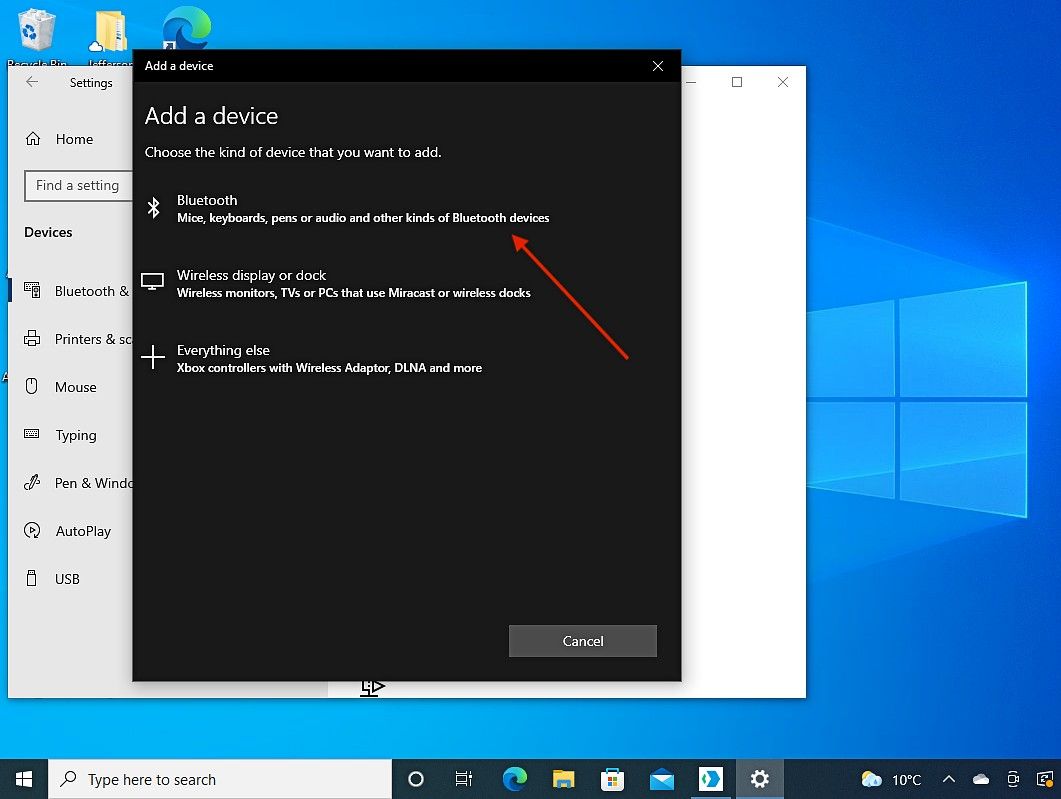
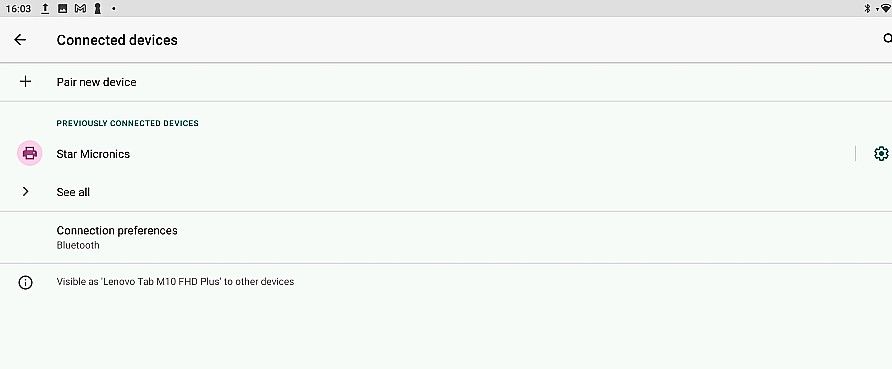
To connect by Bluetooth open the settings on your Windows machine and select 'Devices'.
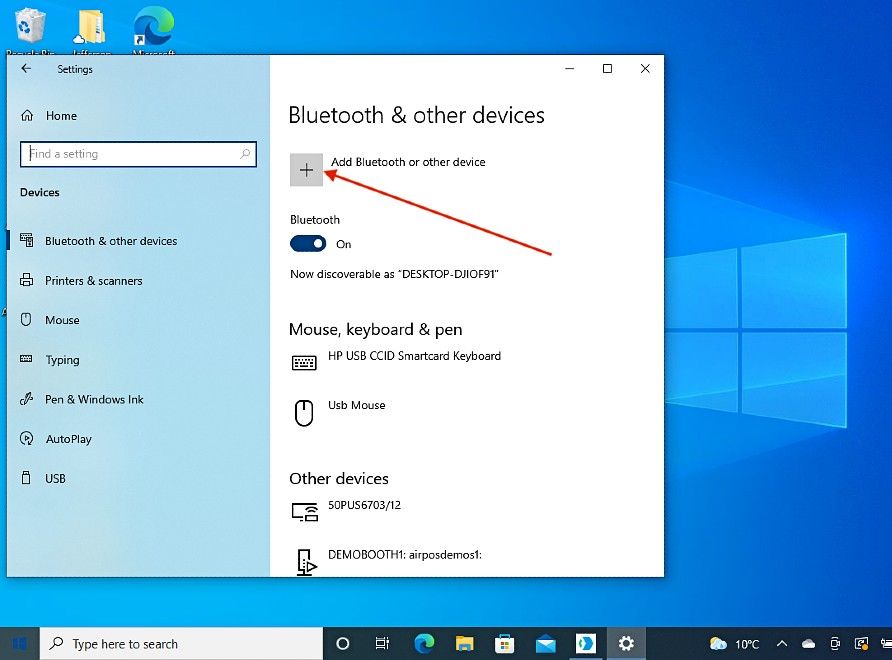
Next select 'Add Bluetooth or other devices'.
Select the 'Bluetooth' option.
After a few moments your machine will show a list of nearby Bluetooth devices. Select 'BS80+xxxx'.
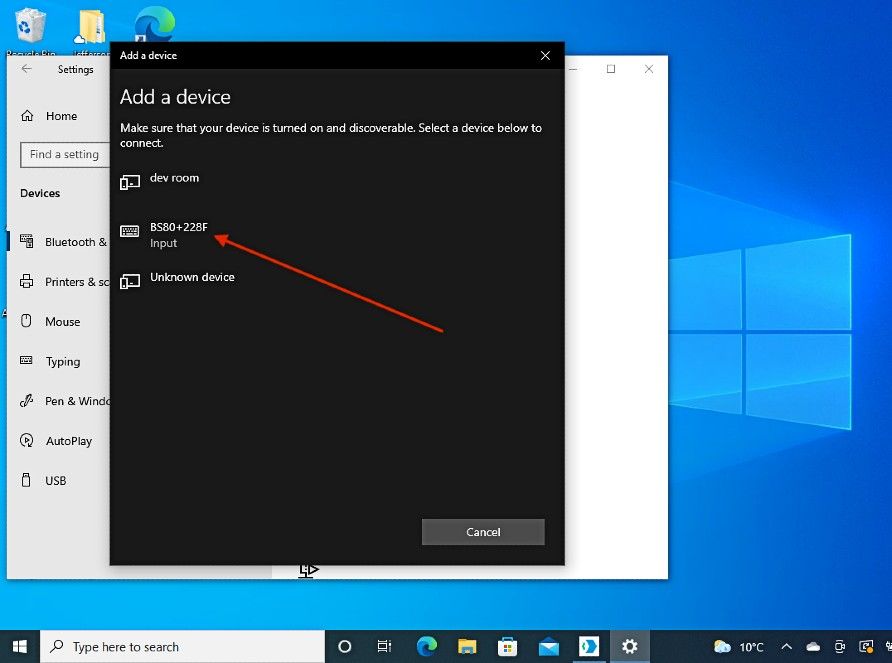
Next select 'Connect'.
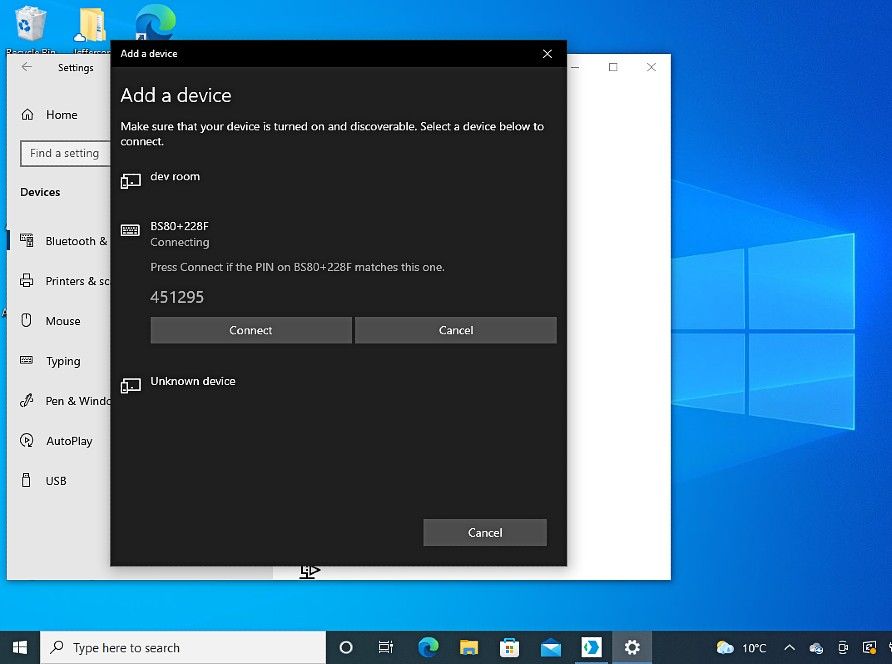
The scanner will emit a beep and the blinking blue light will become solid blue. You'll see a message to say your device is ready to go. Press done.

Next scan the two barcodes below one after the other off the screen. The scanner will emit three beeps when each barcode is successfully scanned.
For your convenience you can download these barcodes as a PDF from the link below.
Newland Scanner Firmware Barcodes
The Newland scanner is now connected to your Windows machine and ready to use.
In USB Mode simply connect the scanner into a USB port on your Windows machine and the scanner is ready to use.
Open the AirPOS app and scan a product barcode. The product will then be added to the cart.
Android Setup
How to setup and reconnect the Newland barcode scanner on Android tablets
Open the AirPOS POS app and tap on the settings icon at the top of the screen.
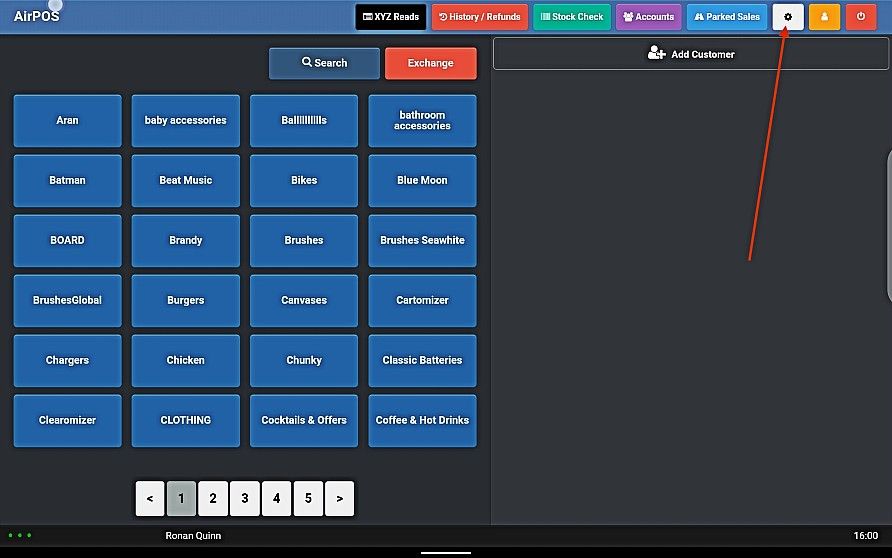
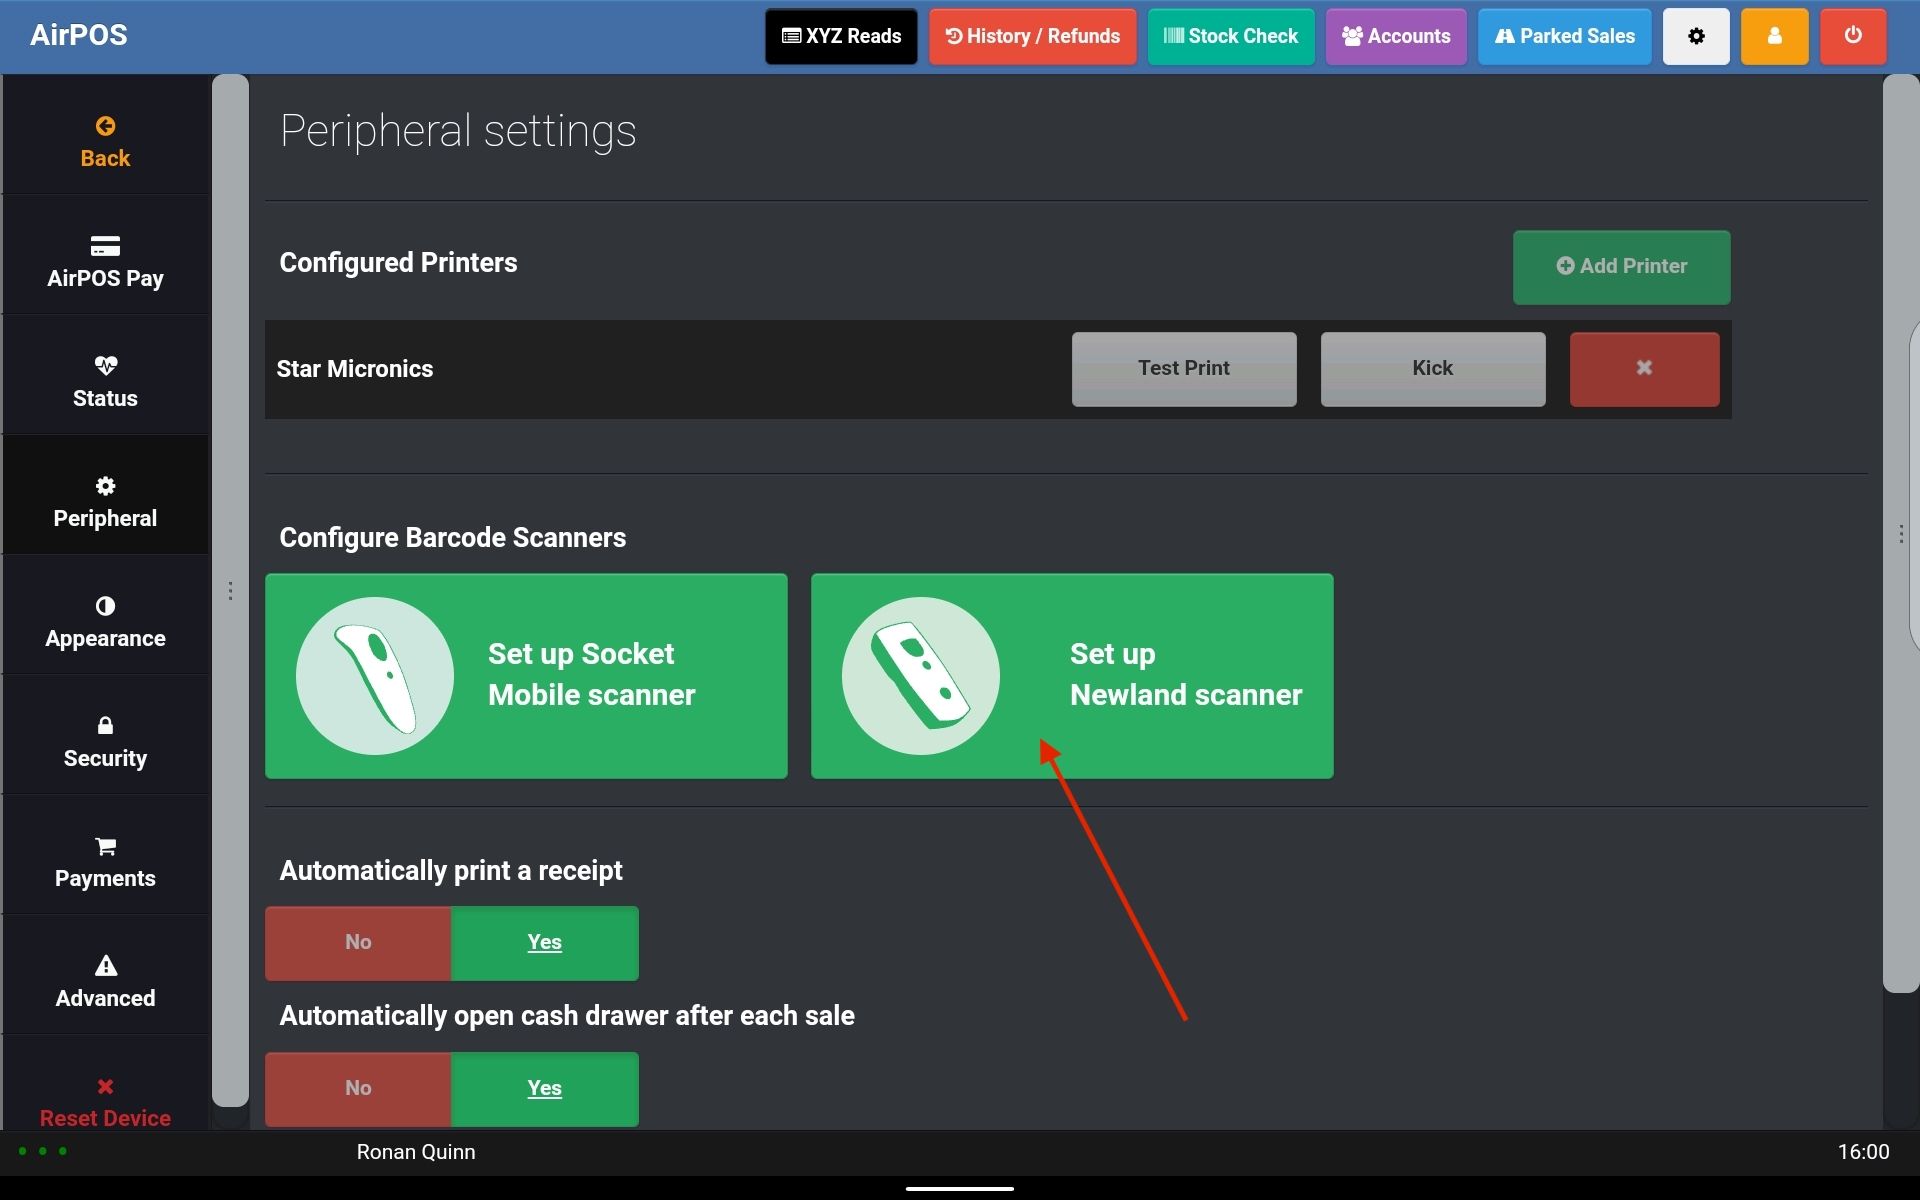
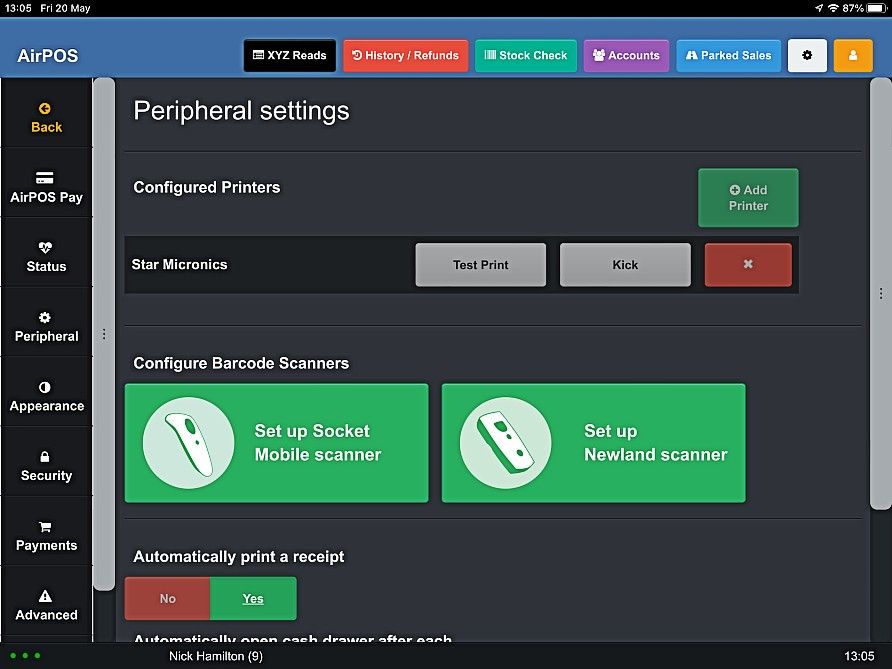
From the menu on the left select 'Peripheral' and tap on the icon to 'Set up Newland scanner'.
You'll see a popup on your screen for setting up the scanner.
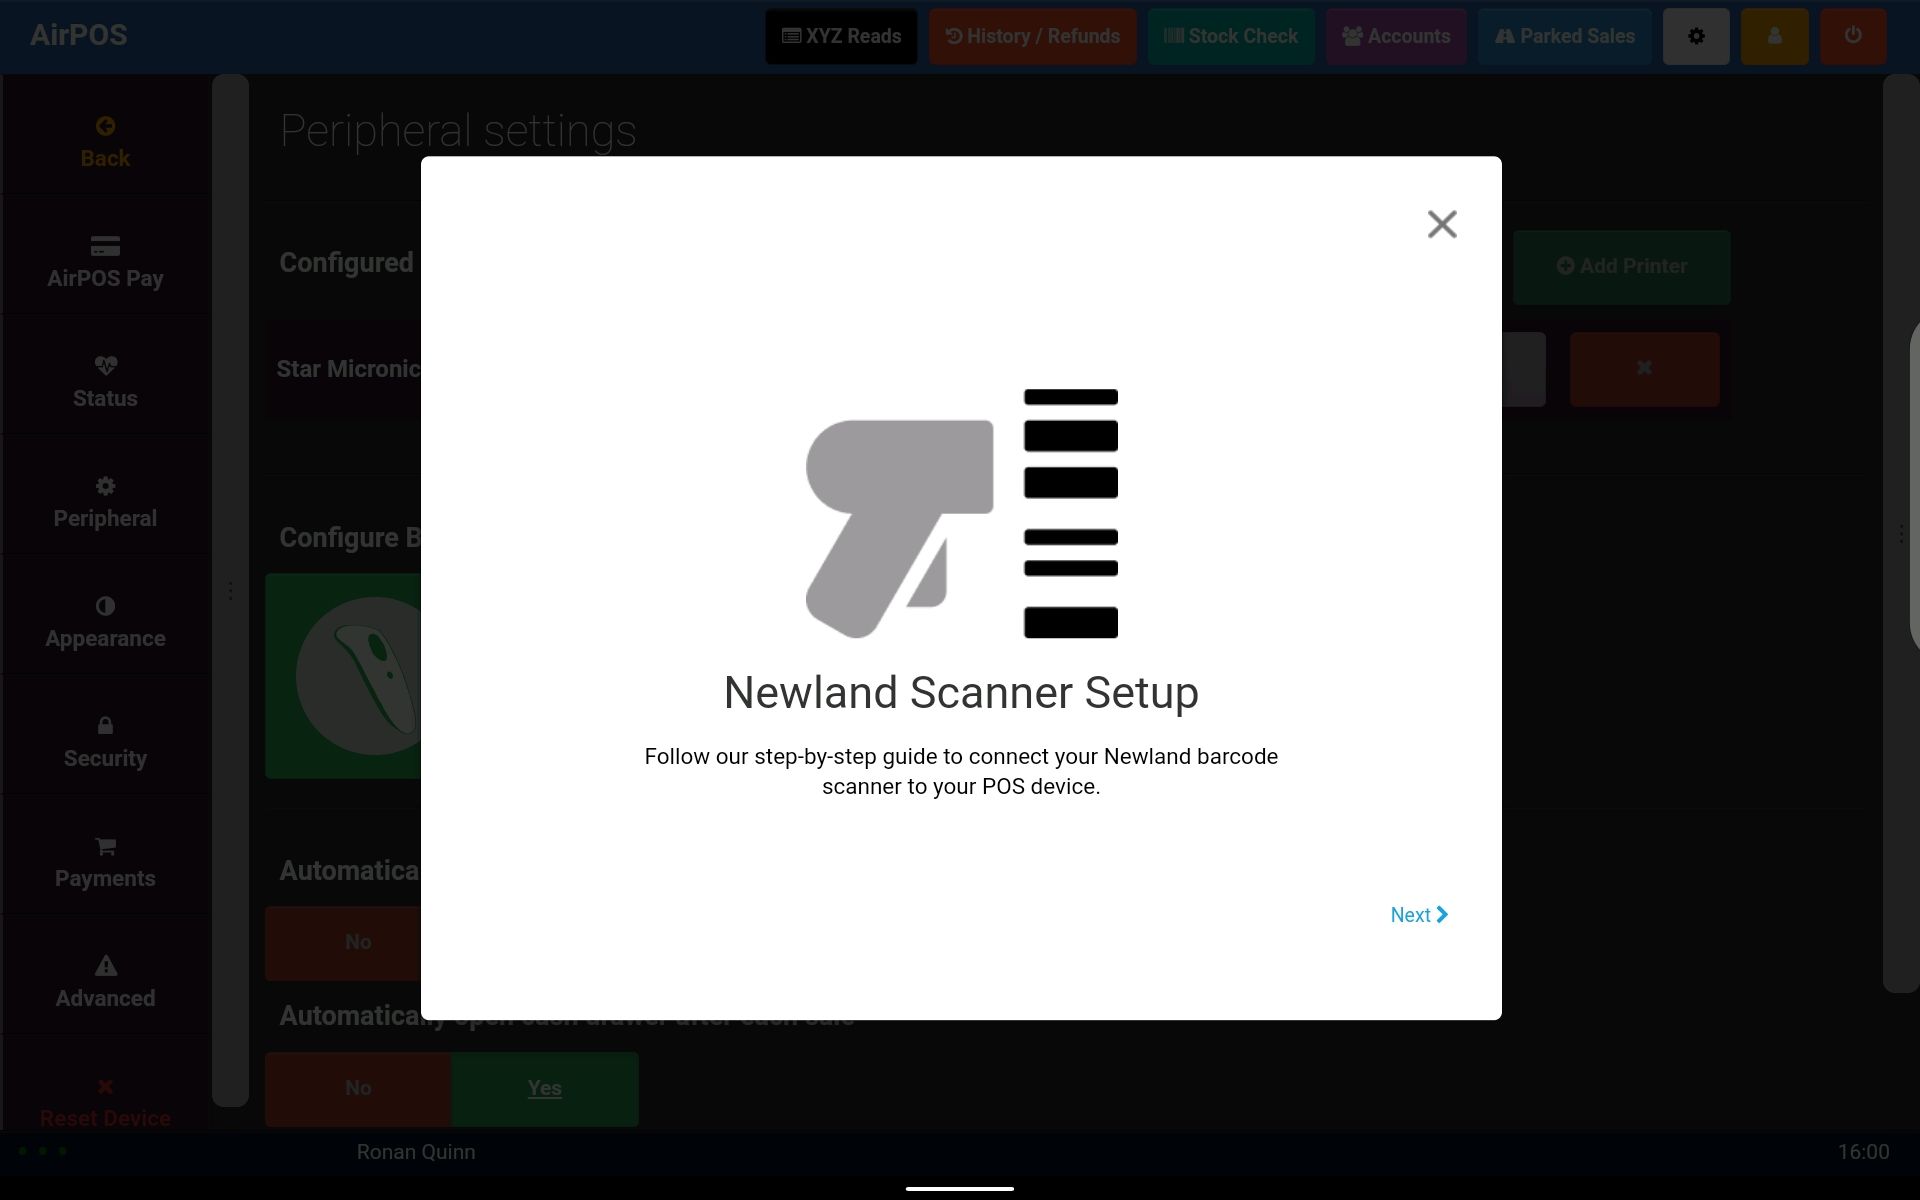
This is a step by step in app guide to connect the scanner and ensure that it's in the correct mode to work with a tablet. Tap on the 'Next' link.
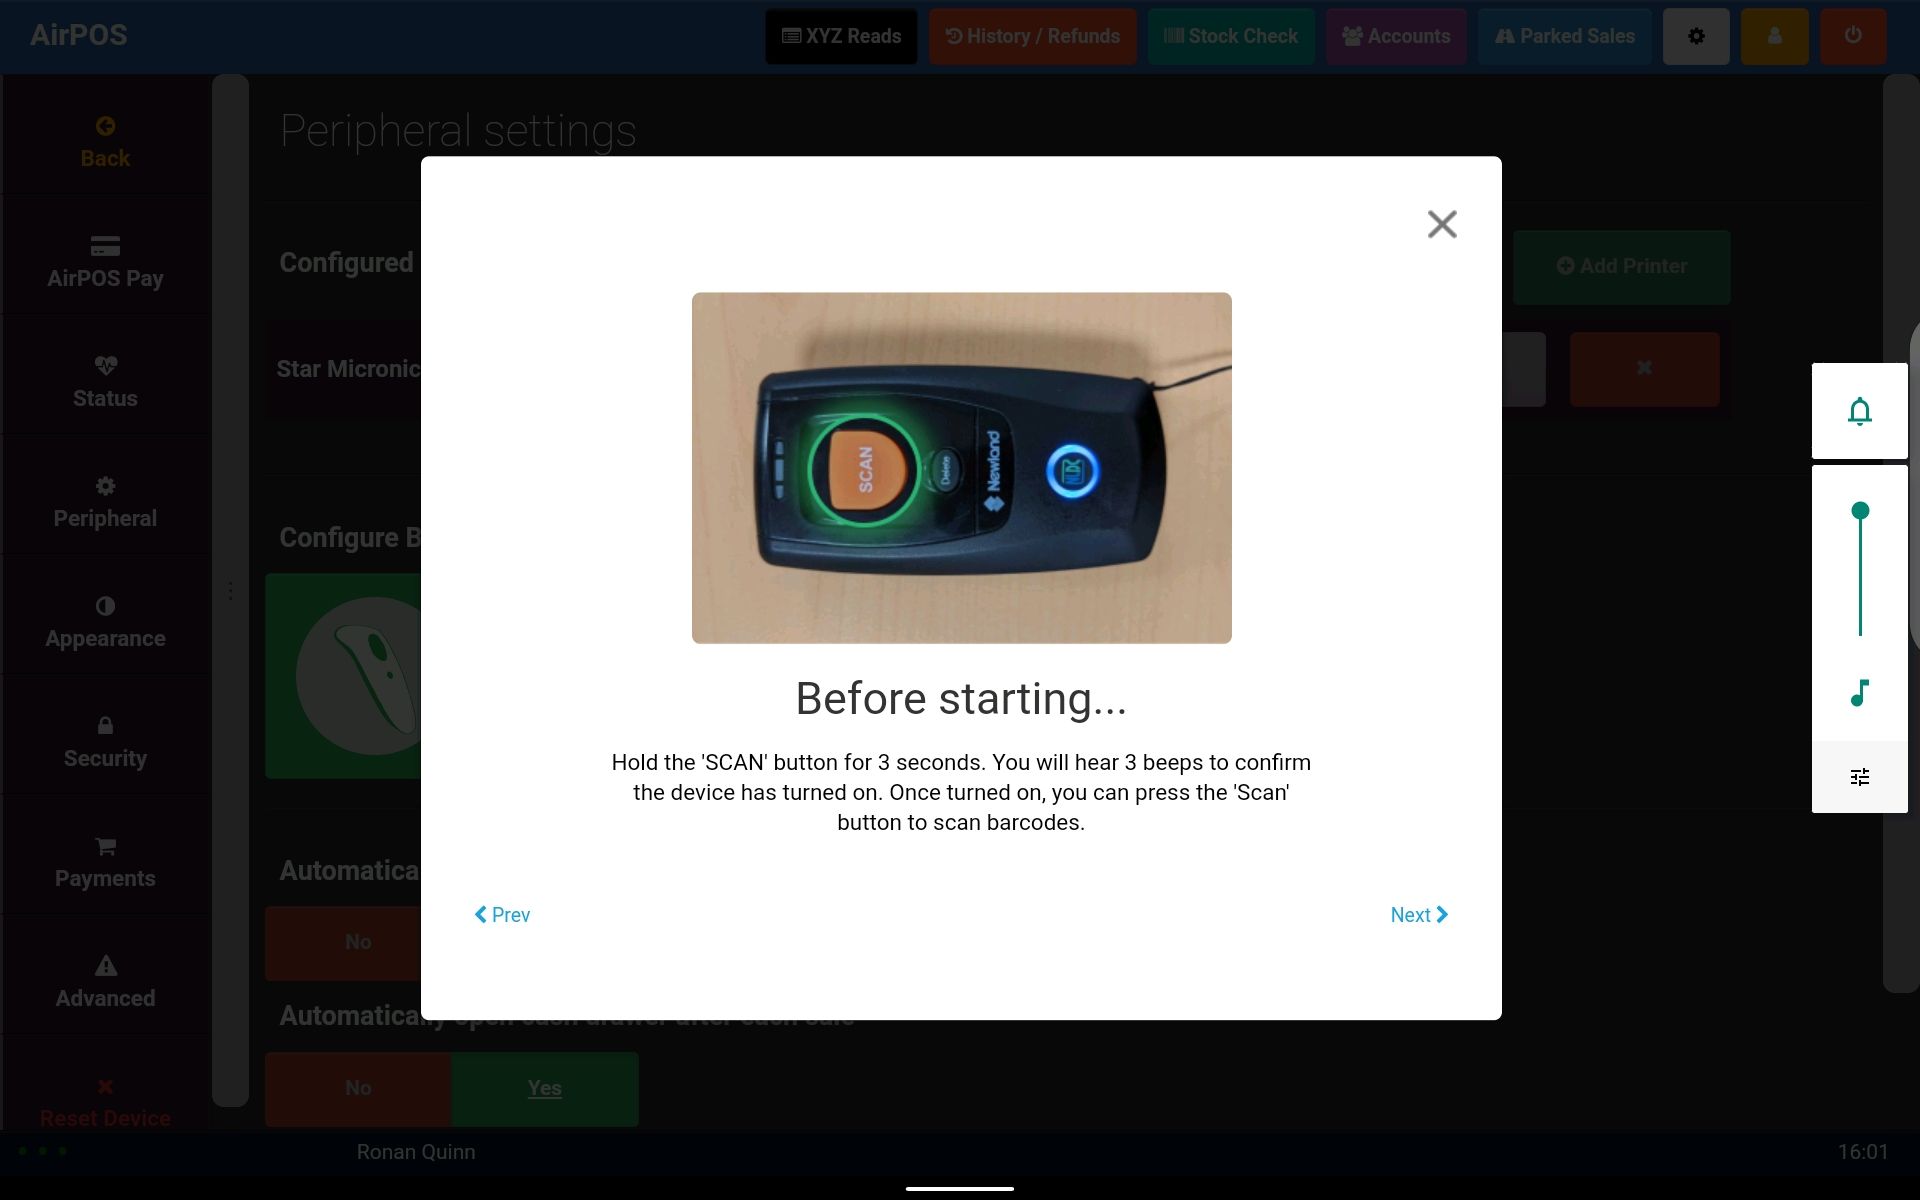
If the scanner isn't already switched on press and hold the 'SCAN' button. The scanner will emit three beeps when powered on. Tap the 'Next' link.
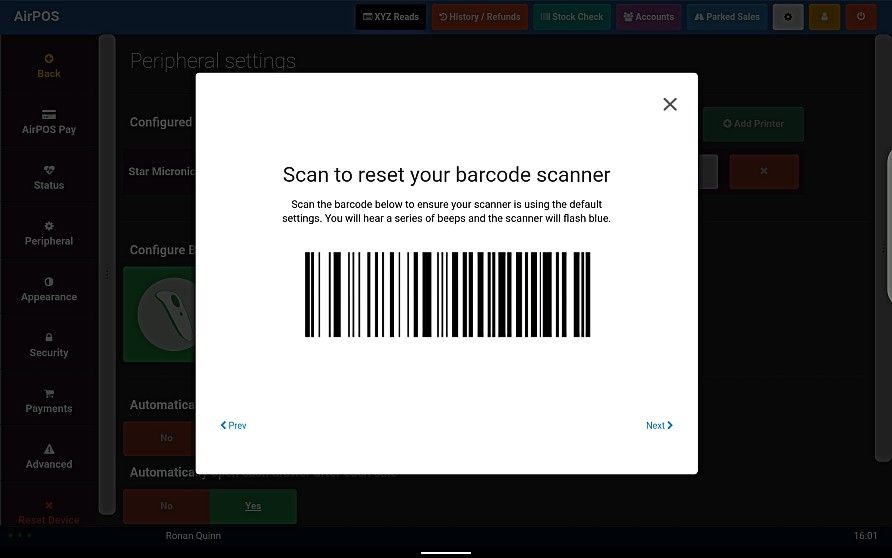
Scan the barcode off the screen. You'll hear three beeps and the scanner will power off. After a moment you'll hear another beep as it powers on again. Press 'Next'.
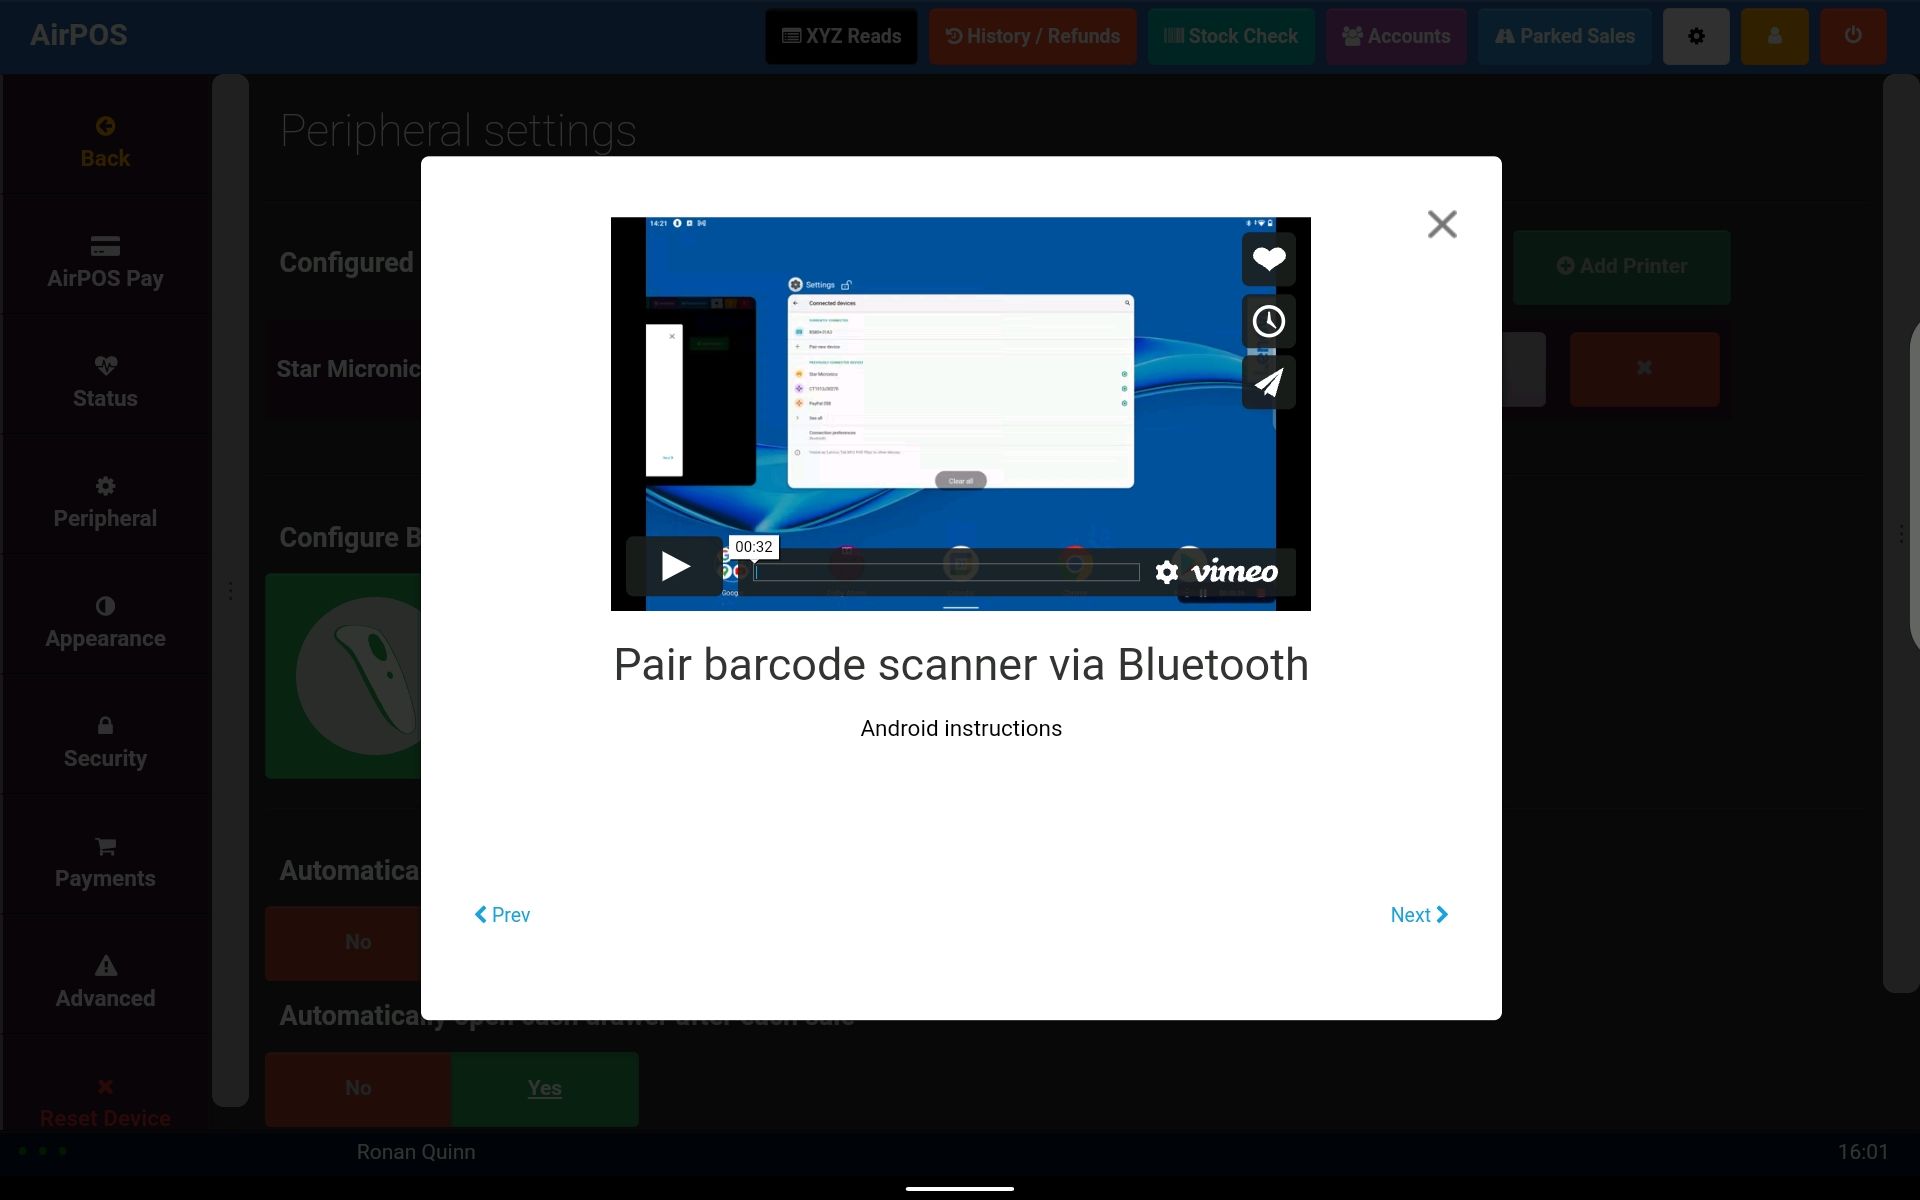
You'll be instructed to pair the scanner with the tablet before proceeding. Open the settings app on the iPad and select 'Bluetooth'.
Tap on '+ Pair new device'.
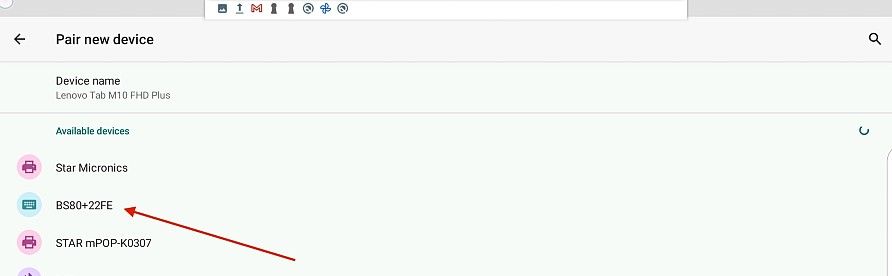
When you see 'BS80+xxxx' tap on it to pair the scanner with your tablet. You'll see a little popup asking for permissions.

Just tap 'Pair'. The scanner will emit a single beep when it pairs. Go back to the AirPOS app and press 'Next' in the 'Pair barcode scanner via Bluetooth' popup.
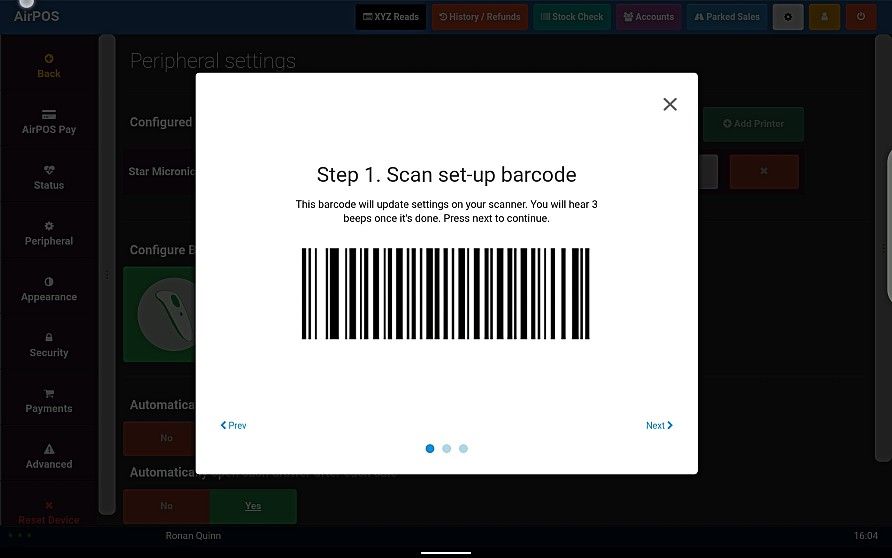
Scan the barcode off the screen. The scanner will emit three beeps after which press 'Next'.
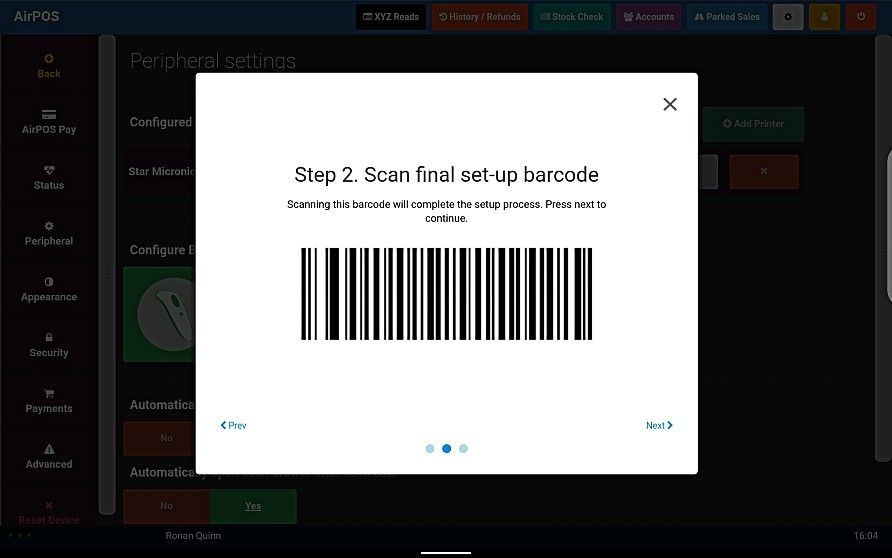
Scan the second barcode off the screen and tap on 'Next'.
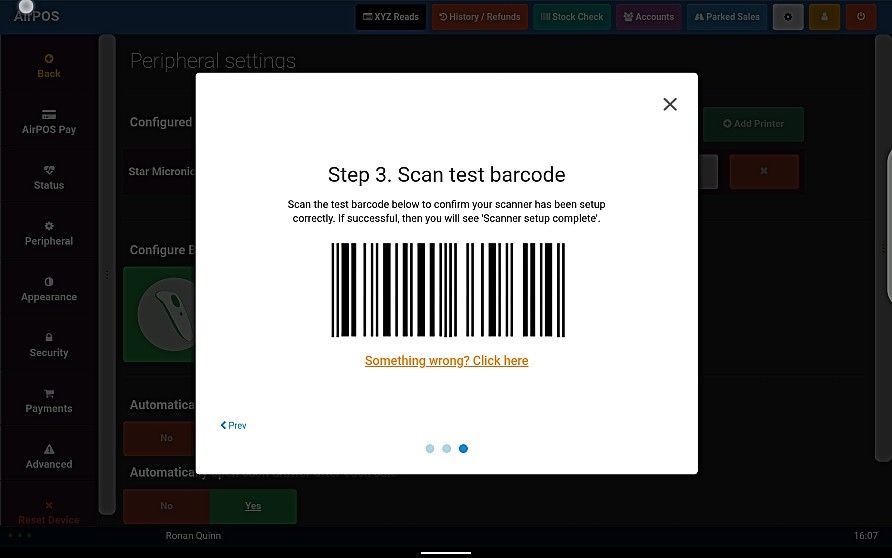
Scan the third barcode off the screen to ensure that the scanner is correctly setup. You should see a popup similar to the image below.

Tap 'Done' unless you don't see a screen similar to the image above. Tap on the 'Something wrong? Click here' link and you'll see a screen similar to the image below.
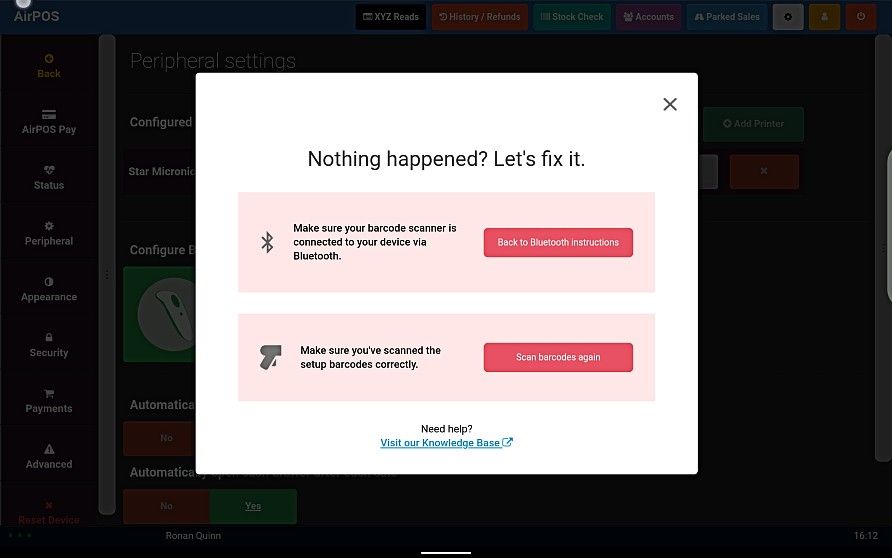
If you tap on the 'Back to Bluetooth instructions' it will take you back to the popup advising you to pair the scanner to the iPad. Open up the tablet's settings app again and check 'BS80+xxxx' is still listed among your paired devices indicating that the scanner is still connected. If it is then tap on the 'Scan barcodes again' in the image above and scan the setup barcodes again.
iPad Setup
How to setup and reconnect the Newland barcode scanner within your AirPOS POS
Open the AirPOS POS app and tap on the settings icon at the top of the screen.
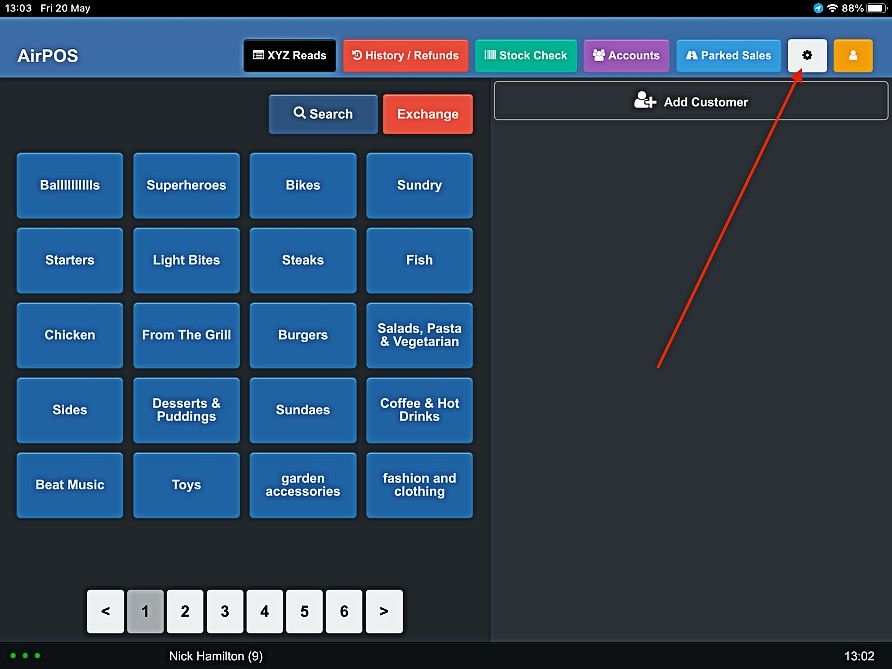
From the menu on the left select 'Peripheral' and tap on the icon to 'Set up Newland scanner'.
You'll see a popup on your screen for setting up the scanner.
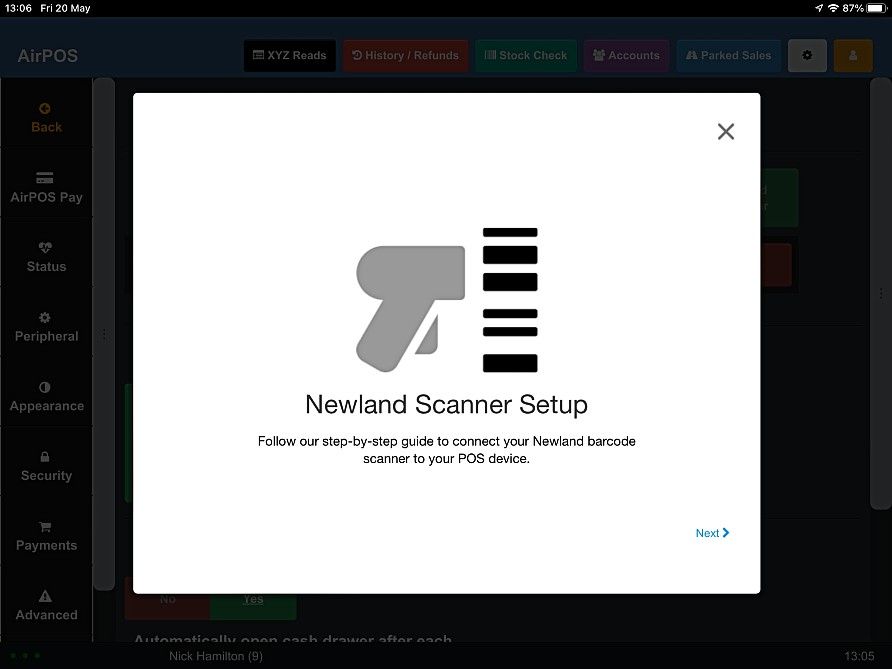
This is a step by step in app guide to connect the scanner and ensure that it's in the correct mode to work with an iPad. Tap on the 'Next' link.
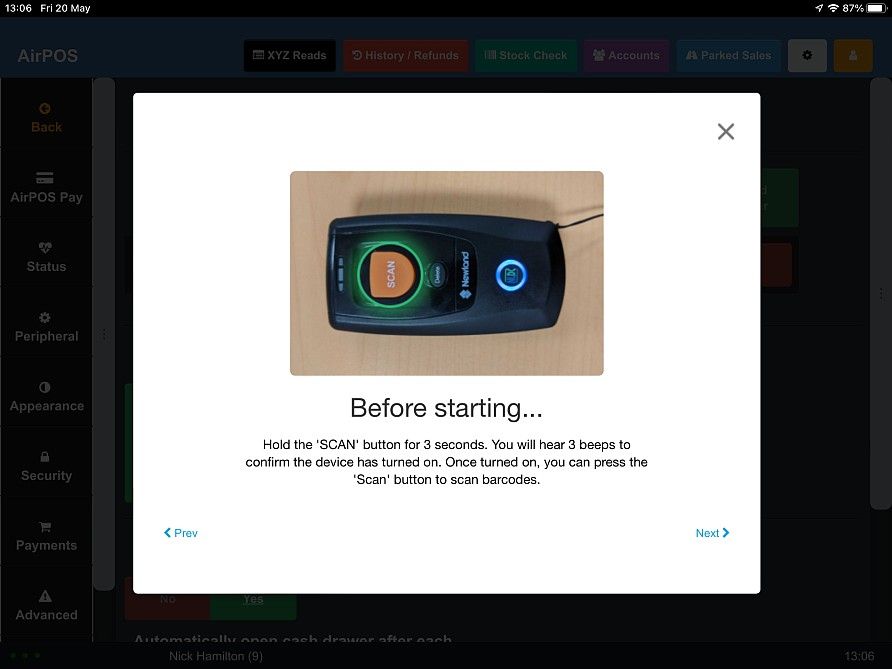
If the scanner isn't already switched on press and hold the 'SCAN' button. The scanner will emit three beeps when powered on. Tap the 'Next' link.
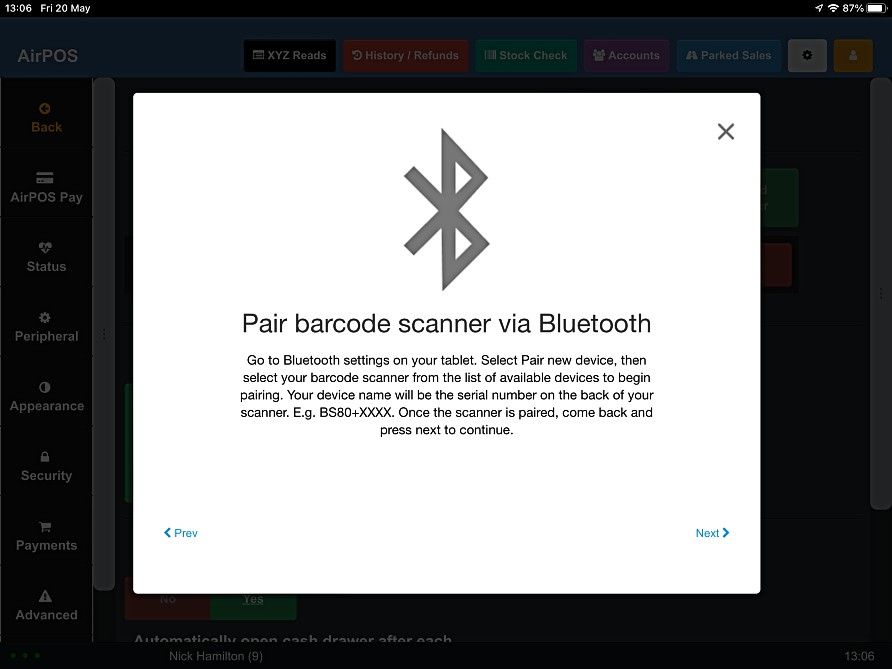
You'll be instructed to pair the scanner with the iPad before proceeding. Open the settings app on the iPad and select 'Bluetooth'.

When you see 'BS80+xxxx' under other devices tap on it to pair it.
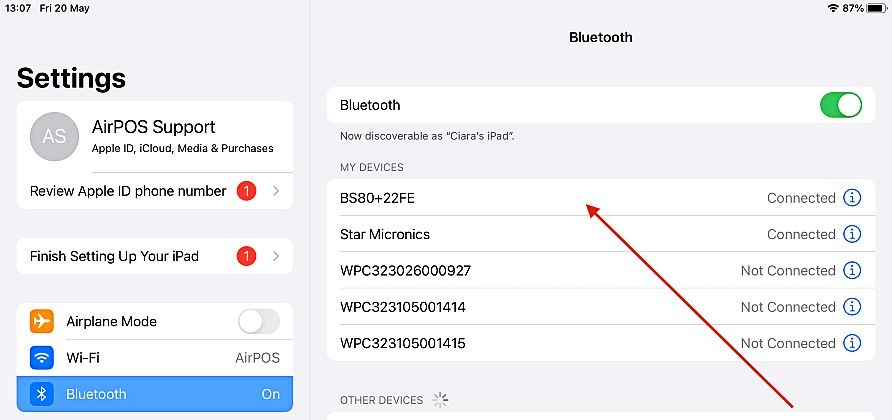
When paired the scanner will emit a single long beep and it will appear among 'MY DEVICES'. Go back into the AirPOS app and tap on the 'Next' link in the Bluetooth popup.
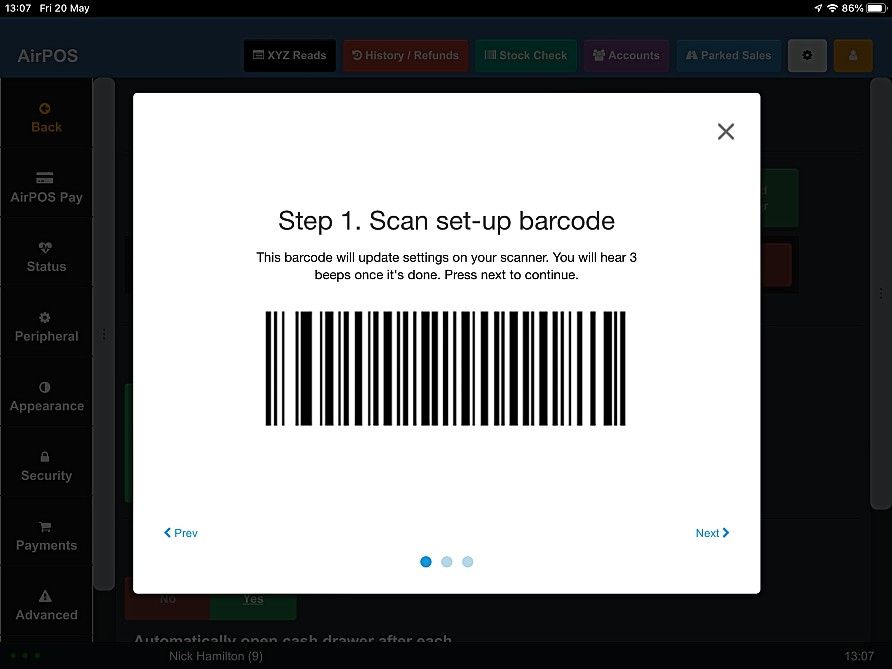
Scan the barcode from the screen and you will hear three beeps from the scanner. Press 'Next'.
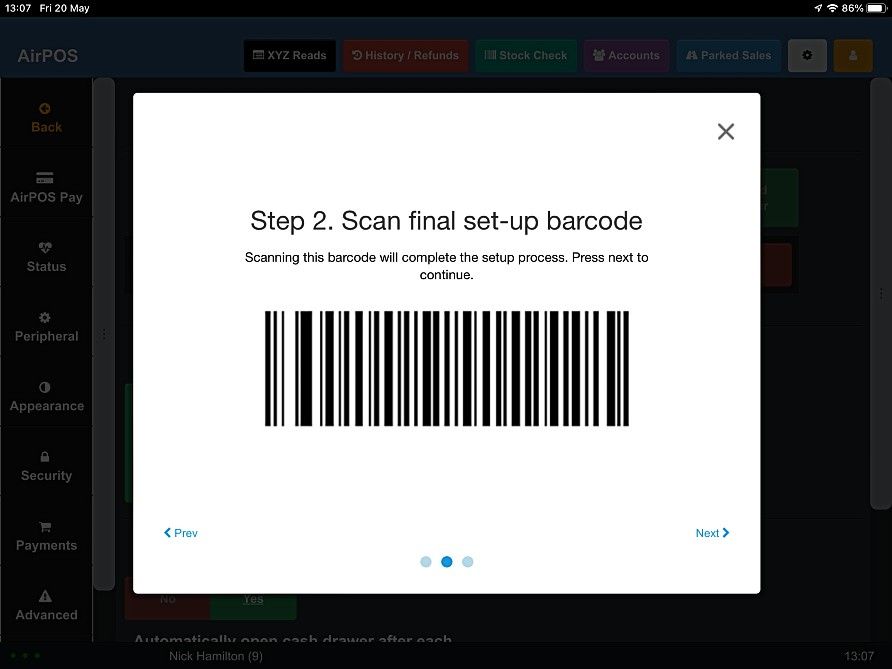
Scan the second barcode and you'll hear three beeps. Press 'Next'.
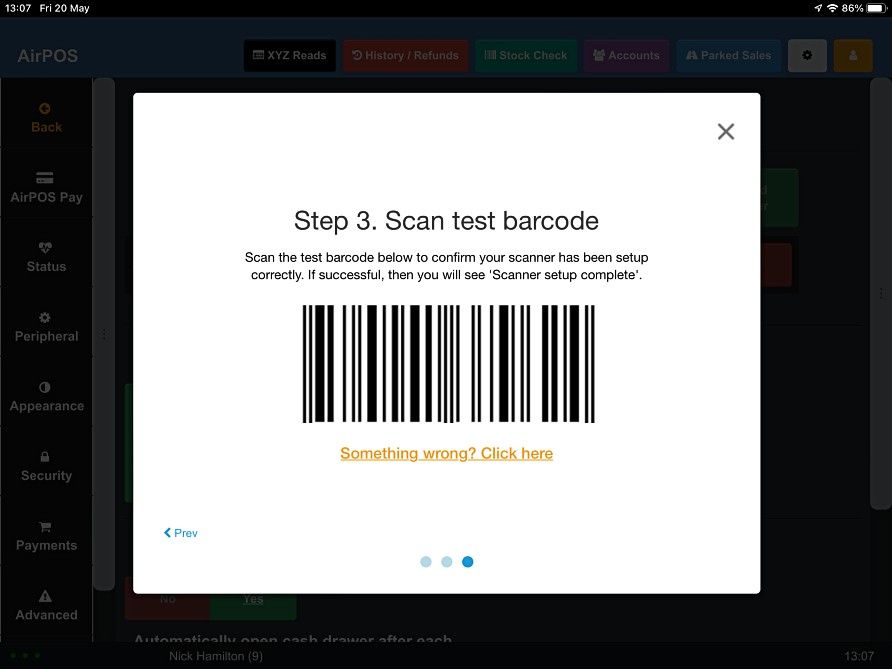
Scan the barcode off the screen. You'll hear a beep and a new popup will appear.
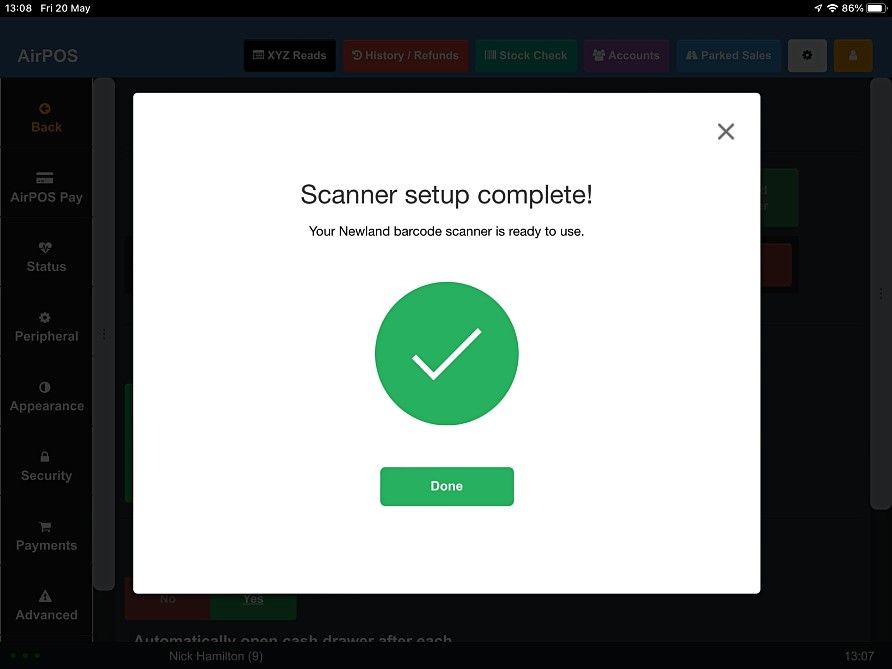
Press 'Done' and the barcode scanner is setup for use with AirPOS and paired to the iPad. If you don't see a screen similar to the image above tap on the 'Something wrong? Click here' link and you'll see a screen similar to the image below.
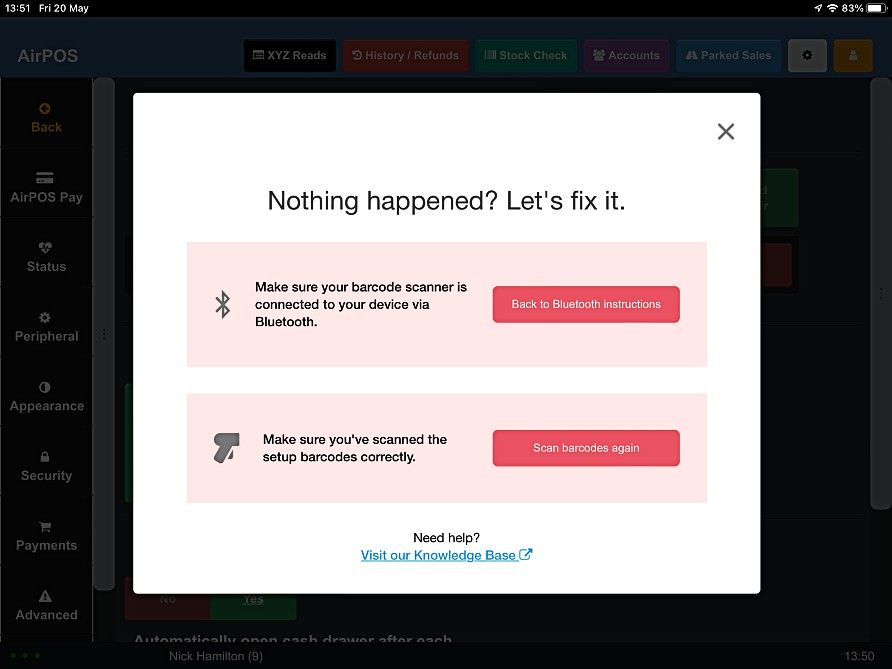
If you tap on the 'Back to Bluetooth instructions' it will take you back to the popup advising you to pair the scanner to the iPad. Open up the iPad's settings app again and check 'BS80+xxxx' is still listed among 'My Devices' indicating that the scanner is still connected. If it is then tap on the 'Scan barcodes again' in the image above and scan the setup barcodes again.