
Accessing remote sessions with Google Remote Desktop

Remote sessions are a secure and convenient way for our support team to assist you with any issues on your device. By allowing a member of our team to access your computer remotely, we can quickly diagnose and fix problems without the need for you to navigate complex technical steps. This guide will walk you through the simple process of setting up a remote session using Google Remote Desktop.
Visit the Google Remote Desktop Support Page
Go to https://remotedesktop.google.com/support/.
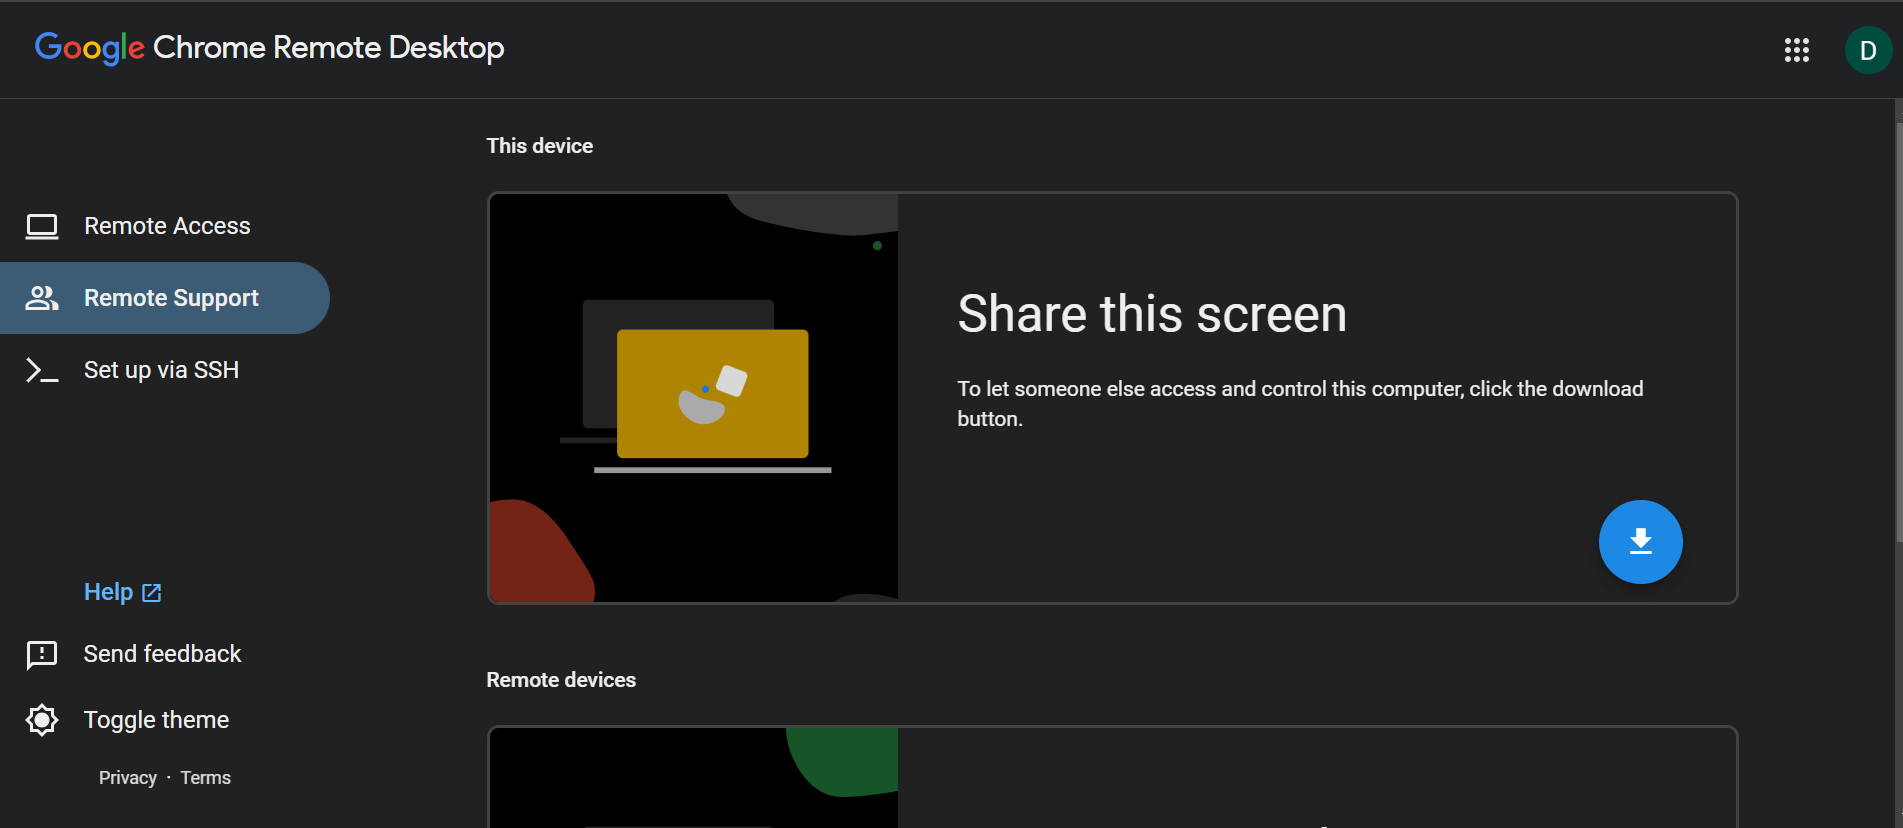
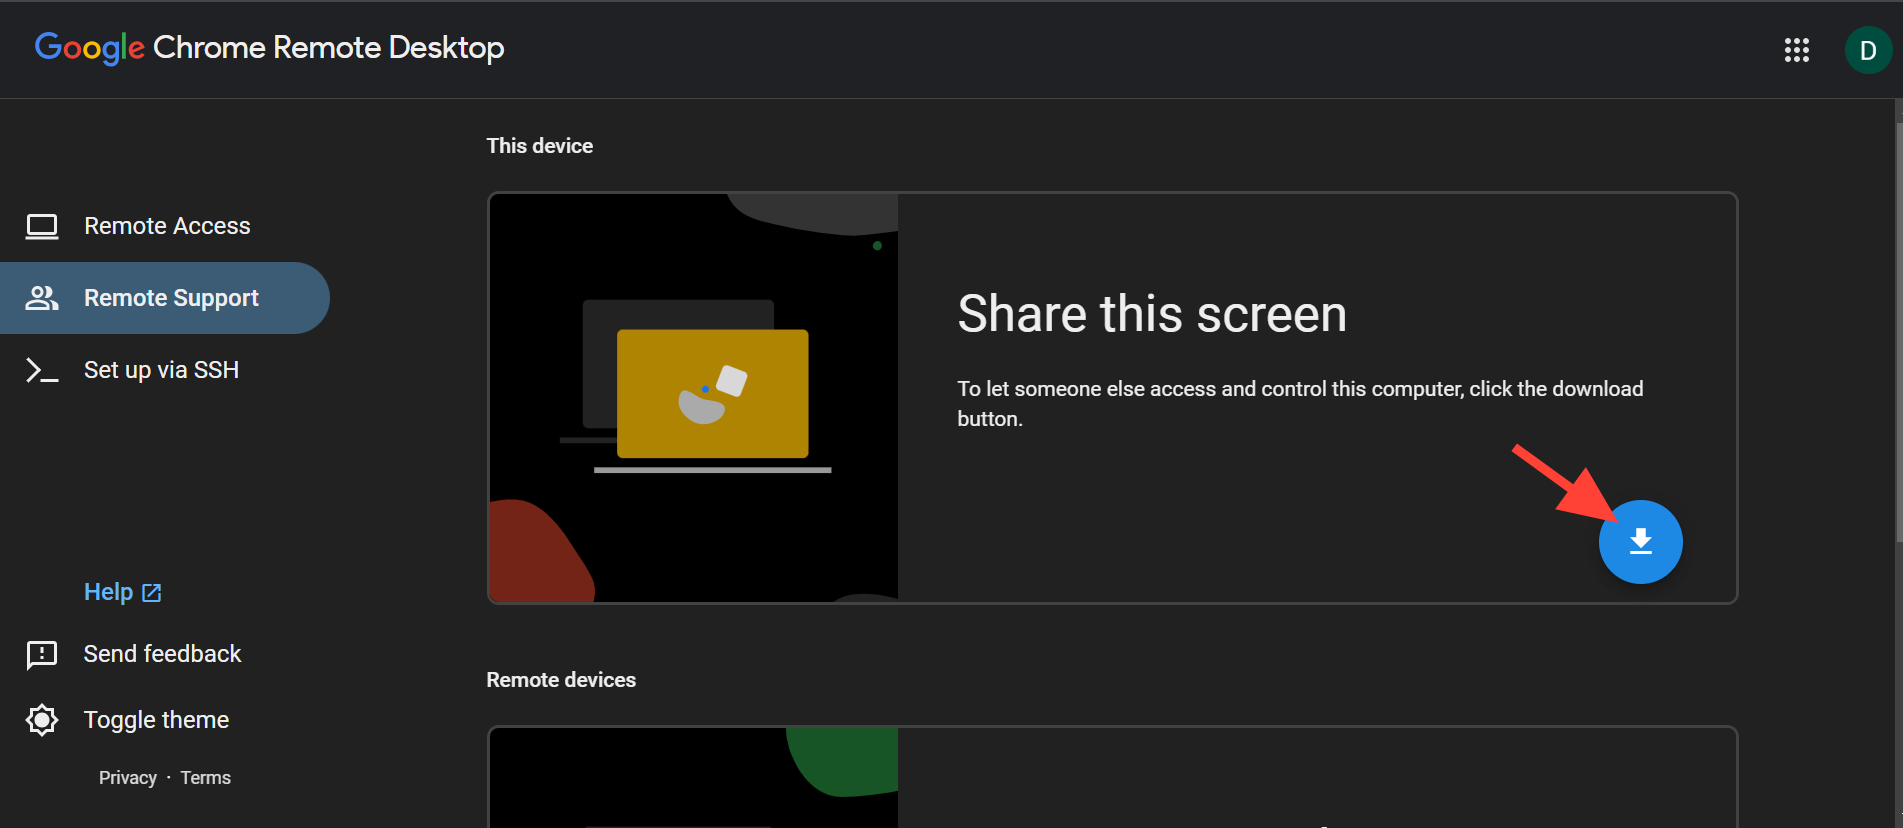
Download the Necessary Software
Click the blue icon on the page to begin downloading the software required for the remote session.
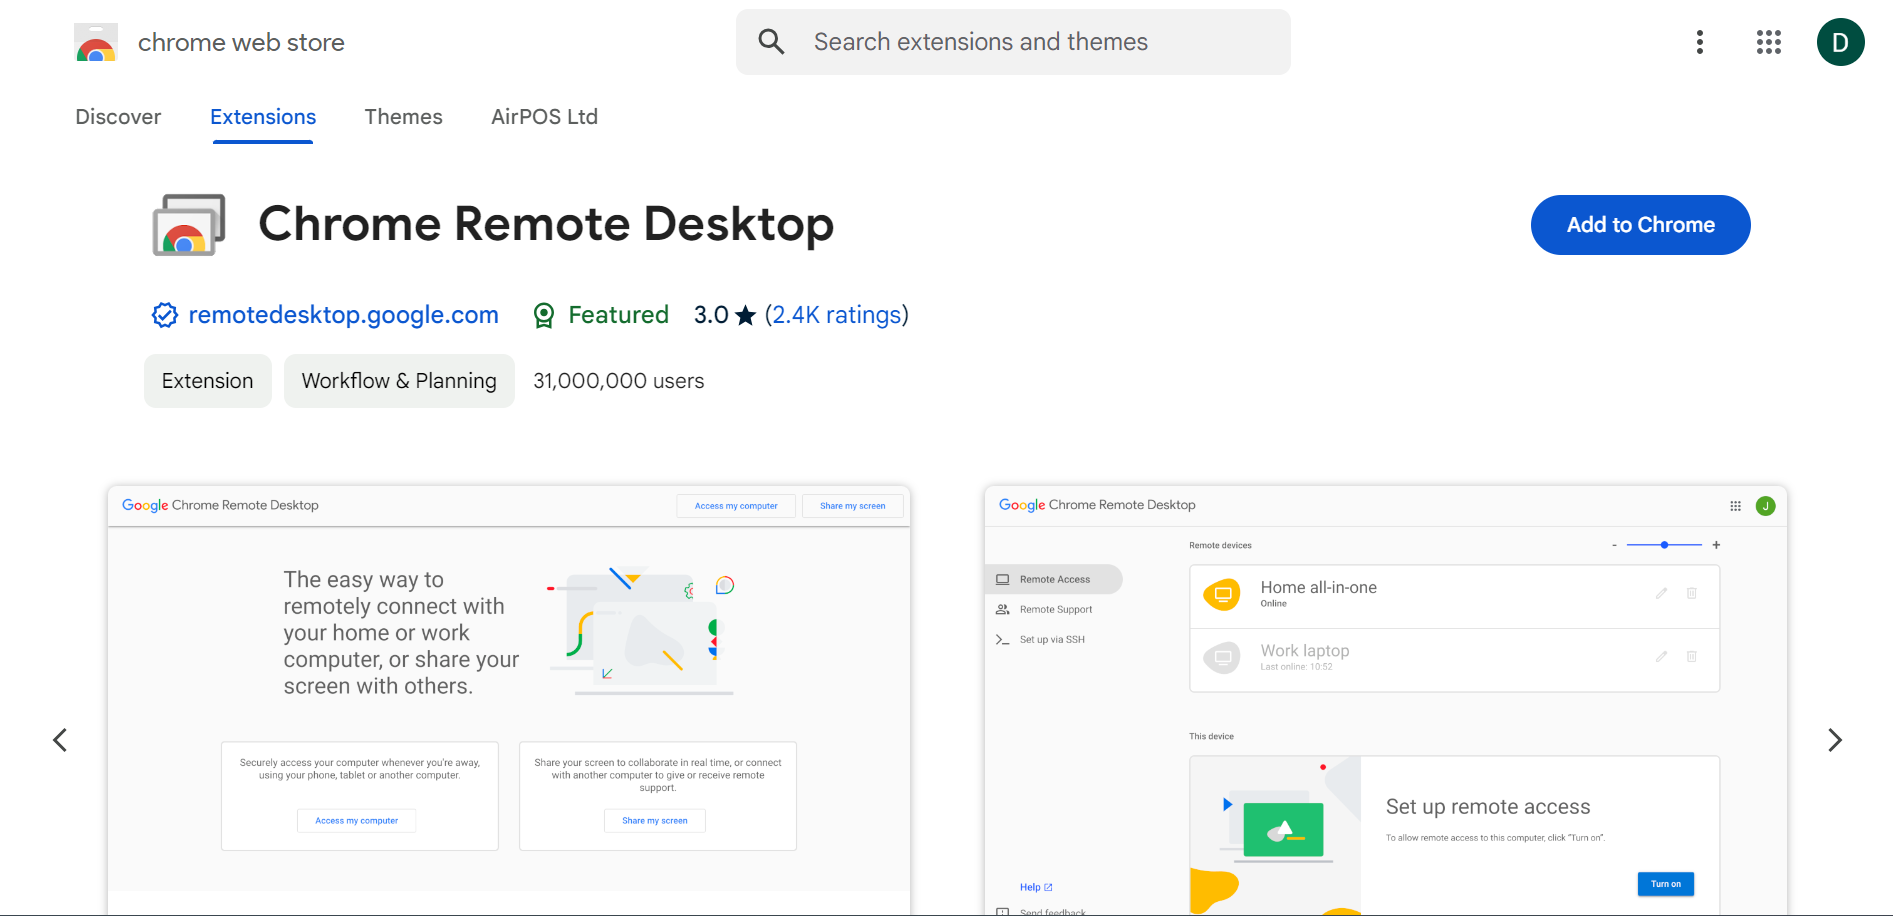
Add the Extension to Chrome
A new window will pop up asking you to add an extension to Chrome. Click on the blue "Add to Chrome" button to proceed.
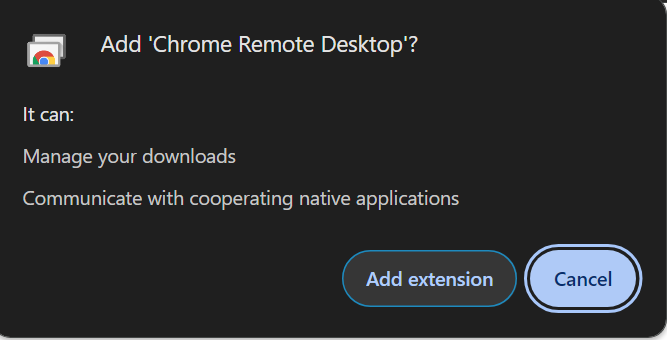
Then, select "Add extension" to confirm.
Return to the Google Remote Access Page
After adding the extension, go back to the original "Google Remote Access" page. You should now see an option to "Generate Code."

Tip: If you don't see this option, try refreshing the page.
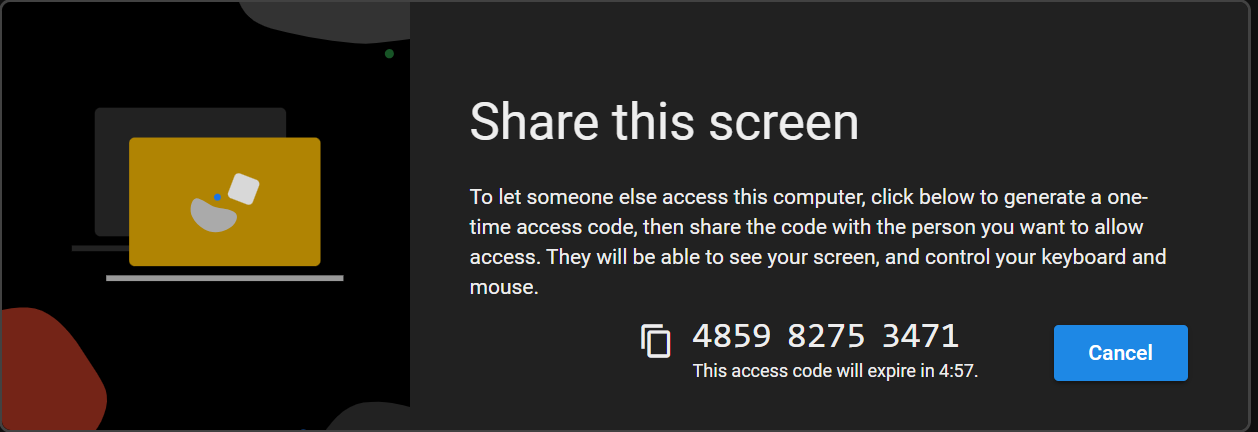
Generate and Share Your Access Code
Click on "Generate Code." Once the code is generated, copy it and send it to the AirPOS support member you’re working with. They will use this code to access your device.
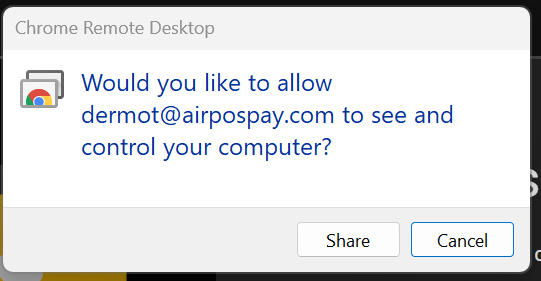
Allow Permission for Remote Access
After the support member enters the code on their side, you will receive a notification asking for permission to share your screen and allow control of your device.
Click "Share" to grant access.
Relax While We Resolve the Issue
Once you click "Share," the AirPOS support member will be able to access your computer. You can now sit back and relax while we work on resolving your issue!